Sheet-Pan Honey Mustard Chicken and Carrots Delight

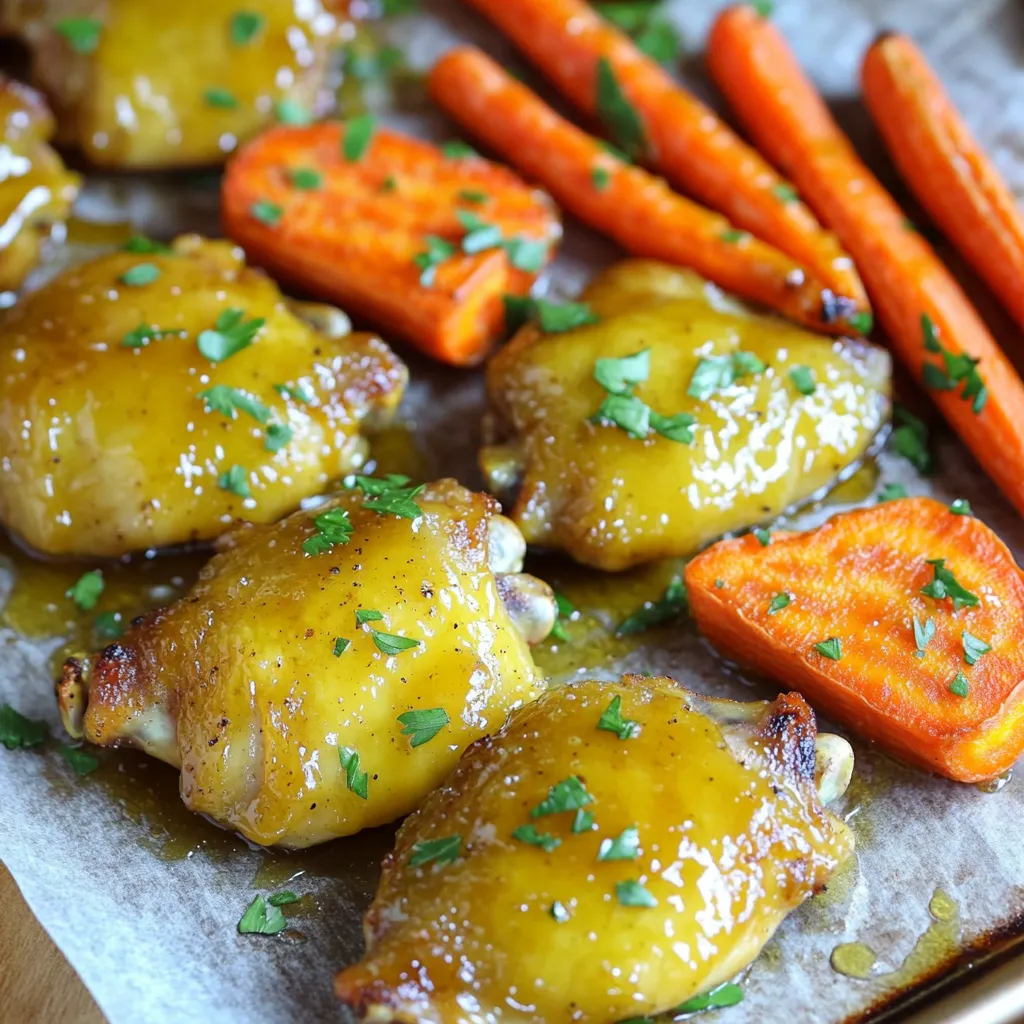
Get ready for a delicious meal with my Sheet-Pan Honey Mustard Chicken and Carrots Delight! This simple dish combines juicy, tender chicken thighs with sweet and tangy carrots. You’ll love how easy it is to prepare everything on one pan, making cleanup a breeze. With a tasty honey mustard marinade and just a few spices, this recipe is perfect for busy weeknights. Let’s dive into the ingredients and get cooking!
Ingredients
Main Ingredients
– 4 boneless, skinless chicken thighs
– 3 large carrots, peeled and cut into sticks
– 2 tablespoons Dijon mustard
– 2 tablespoons honey
– 2 tablespoons extra virgin olive oil
The main ingredients bring this dish to life. Chicken thighs stay juicy and flavorful. Carrots add a sweet crunch that pairs well with the chicken. The honey mustard marinade gives a sweet and tangy kick.
Spices and Seasonings
– 1 teaspoon garlic powder
– 1 teaspoon dried thyme
– Salt and freshly ground black pepper, to taste
Spices and seasonings make a big difference in flavor. Garlic powder adds a warm, savory note. Dried thyme gives a hint of earthiness. Salt and pepper bring out the best in all the ingredients.
Garnish
– Fresh parsley, chopped
A sprinkle of fresh parsley adds color and freshness. This simple touch makes the dish look more appealing. Plus, it adds a fresh flavor that brightens every bite.
Step-by-Step Instructions
Preparation
First, preheat your oven to 400°F (200°C). This heat makes sure everything cooks well. Next, line a large baking sheet with parchment paper. This helps with easy cleanup later.
Now, let’s make the honey mustard marinade. In a small bowl, whisk together:
– 2 tablespoons Dijon mustard
– 2 tablespoons honey
– 2 tablespoons extra virgin olive oil
– 1 teaspoon garlic powder
– 1 teaspoon dried thyme
– A pinch of salt and freshly ground black pepper
Mix it well until it blends smoothly. This marinade adds great flavor to the chicken.
Marinating the Chicken
Take the chicken thighs and put them in a large mixing bowl. Pour half of the honey mustard marinade over the chicken. Toss gently to coat each piece well. This step is key for flavor. Set aside the remaining marinade for later.
Assembling the Sheet Pan
On one side of your prepared baking sheet, place the carrot sticks. Drizzle them with a little olive oil and sprinkle with salt and pepper. Toss the carrots to coat them evenly.
On the other side of the baking sheet, arrange the marinated chicken thighs. Make sure they have enough space. This space helps them cook evenly.
Baking
Now, place the sheet pan in the preheated oven. Bake for about 25 to 30 minutes. Check that the chicken reaches an internal temperature of 165°F (74°C) and that the carrots are tender.
For the last 5 minutes, brush the chicken with the remaining honey mustard marinade. This adds a nice glaze and boosts the flavor.
After baking, carefully remove the sheet pan from the oven. Let it sit for a few moments before serving. Garnish with freshly chopped parsley for color and freshness. Enjoy your delicious meal!
Tips & Tricks
Ensuring Perfect Chicken
To check if your chicken is done, use a meat thermometer. The thickest part of the thigh should reach 165°F (74°C). If the chicken is thick, it may need more time in the oven. You can add 5-10 minutes if the pieces are larger.
Carrot Cooking Tips
For tender carrots, cut them into uniform sticks. They should cook evenly this way. You want them to be soft but not mushy. For extra flavor, toss them with a bit of honey or add a sprinkle of cinnamon before baking. This adds a nice touch.
Presentation Suggestions
When serving, use a large platter for a beautiful display. Arrange the chicken and carrots in a way that looks inviting. Drizzle any leftover glaze over the dish for shine. Finally, add a sprinkle of fresh parsley on top. This brightens the dish and gives it a fresh look.

Variations
Ingredient Substitutes
You can play with the proteins in this dish. If you want, use chicken breasts instead of thighs. Pork can also be a tasty option. It cooks well and absorbs flavors nicely.
For veggies, you have choices too. Bell peppers add crunch and color. Sweet potatoes bring a sweet touch. You can mix and match based on your taste.
Flavor Adjustments
Want a kick? Make a spicy honey mustard by adding hot sauce or cayenne pepper. This adds heat without losing the sweet taste.
Fresh herbs can lift this dish. Try adding rosemary or oregano for a new flavor twist. They pair great with the honey mustard and add freshness.
Cooking Method Alternatives
An air fryer can cook this dish faster. Set it to 375°F (190°C) and cook for about 18-20 minutes. Check the chicken to ensure it’s done.
Grilling is another fun option. You can grill the chicken and carrots over medium heat. This adds a smoky flavor that works well with the honey mustard. Just watch the cooking time to avoid burning.
Storage Info
Refrigeration
To keep the honey mustard chicken and carrots fresh, follow these tips:
– Let the dish cool: Allow it to cool for about 30 minutes.
– Use airtight containers: Store the food in glass or plastic containers with tight lids.
– Label containers: Write the date on the lid to track freshness.
Freezing Guidelines
If you want to save leftovers, freezing works well:
– Cool completely: Make sure the chicken and carrots are at room temperature.
– Use freezer bags: Place them in zip-top freezer bags. Remove as much air as possible.
– Seal tightly: Make sure the bags are sealed to prevent freezer burn.
To thaw, place the bag in the fridge overnight before reheating.
Reheating Tips
To enjoy your meal again, here are the best ways to reheat:
– Oven method: Preheat your oven to 350°F (175°C). Place on a baking sheet and heat for 15-20 minutes.
– Microwave method: Place on a microwave-safe plate. Heat in 1-minute intervals until warm.
– Skillet method: Heat a bit of oil in a skillet over medium heat. Cook until heated through.
These methods help keep the chicken juicy and the carrots tender.
FAQs
How long do you bake honey mustard chicken?
You bake honey mustard chicken for 25 to 30 minutes at 400°F (200°C). The chicken should reach an internal temperature of 165°F (74°C) to ensure it is safe to eat. Use a meat thermometer for accuracy. This cooking time also makes the carrots tender and tasty.
Can I prepare this recipe in advance?
Yes, you can prepare this recipe in advance. Marinate the chicken and cut the carrots a few hours before cooking. Store them in the fridge until you are ready to bake. This helps the flavors develop more. Just remember to cook them right before serving for the best taste.
What should I serve with sheet-pan honey mustard chicken and carrots?
You can serve this dish with rice, quinoa, or a fresh green salad. These sides add balance to the meal. You might also enjoy crusty bread to soak up any extra sauce. For a fun twist, consider adding a fruit salad for dessert.
Is it safe to eat chicken that is slightly pink?
Chicken should not be pink inside when cooked. Use a meat thermometer to check the temperature. If it reaches 165°F (74°C), it is safe to eat. Sometimes, juices may be slightly pink due to the marinade, but the chicken itself should look fully cooked.
How do I make honey mustard sauce from scratch?
To make honey mustard sauce, mix equal parts of Dijon mustard and honey in a bowl. Add olive oil for richness. You can also add garlic powder and a pinch of salt for extra flavor. Adjust the sweetness or tanginess by changing the honey or mustard amounts to fit your taste.
In this blog post, we covered how to make delicious sheet pan honey mustard chicken and carrots. We looked at the key ingredients, spices, and smart tips to ensure great taste. I shared how to marinate and bake the chicken perfectly while offering tasty variations and storage tips.
Remember, cooking is fun! Use these steps and tips to enjoy flavorful meals that everyone loves. Get ready to impress your family and friends with this easy and tasty dish!


 for more details! Start by cooking the rice noodles. Follow the package instructions. Make sure to cook them until they are al dente. This means they should have a slight bite. After cooking, drain the noodles and place them in a large bowl. Set them aside as you prepare the other ingredients. For the best texture, rinse the noodles with cold water. This helps stop the cooking process and keeps them from sticking together. In a large frying pan or wok, heat the vegetable oil over medium heat. First, add the minced garlic and sliced onion. Sauté them for about 2-3 minutes. You want the onion to become translucent and fragrant. Next, add the sliced red bell pepper and julienned carrot. Stir-fry these veggies for about 3-4 minutes. You want them to soften but still have some crunch. This adds great texture to your dish. If you want to use eggs, push the veggie mix to one side of the pan. Crack the eggs into the open space and scramble them. Cook until they are fully set. Once cooked, mix the eggs back into the veggie blend. Now, carefully add the cooked rice noodles to the pan. Gently toss everything together to combine it well. In a small bowl, mix the soy sauce, lime juice, and brown sugar. Pour this sauce over the noodle mixture and stir well. Cook for another 2-3 minutes to let the flavors meld. Finally, add fresh bean sprouts and chopped green onions. Cook for just one more minute. Your Easy Veggie Pad Thai is ready to serve hot, garnished with crushed peanuts and fresh cilantro. Enjoy it with lime wedges on the side for extra flavor! Fresh ingredients make all the difference in Easy Veggie Pad Thai. Use crisp vegetables for the best taste. Look for bright bell peppers, firm carrots, and fresh bean sprouts. The right soy sauce also boosts flavor. I prefer low-sodium soy sauce, which adds depth without too much salt. You can also try tamari for a gluten-free option. Stir-frying is key for this dish. Heat your pan well before adding oil to avoid sticking. Keep the heat high, and don’t overcrowd the pan. This helps all the veggies cook evenly and stay crunchy. Stir-fry each type of veggie separately if you want to control their doneness. Add them back together later for the best texture. How you serve your Pad Thai can make it more fun. Use a large plate or bowl to show off those colorful veggies. You can also layer your ingredients for a nice look. Pair it with spring rolls or a fresh salad to round out the meal. For drinks, a light iced tea or lemonade works great with this dish. For the full recipe, visit the Easy Veggie Pad Thai section. {{image_4}} To make this dish vegan, simply skip the eggs. You can add plant-based proteins instead. Tofu works well and adds great texture. Tempeh is another tasty choice. Both options soak up flavor and make your meal filling. If you don’t have all the ingredients, don’t worry. You can swap in what you have. For example, use zucchini instead of carrots. Snap peas can replace bell peppers. In winter, try adding Brussels sprouts or kale for a seasonal touch. Do you like heat? To make your Pad Thai spicier, add red pepper flakes or Sriracha. Start with a little, then taste as you go. If you prefer a milder dish, reduce the soy sauce. You can also add more lime juice for a zesty flavor without spice. For the full recipe, check out Easy Veggie Pad Thai. To keep your Easy Veggie Pad Thai fresh, let it cool first. Spread it out in a shallow dish. This helps the heat escape quickly. Avoid stacking it in a deep bowl. When it cools to room temperature, cover it tightly. Use plastic wrap or a lid. This keeps it from drying out. In the fridge, your Pad Thai lasts about 3-4 days. Make sure it is in an airtight container. For longer storage, you can freeze it. It stays good for about 1-2 months. To freeze, place it in freezer bags. Remove as much air as possible before sealing. When you're ready to eat, just thaw it overnight in the fridge. When reheating, I recommend using a pan or a wok. This helps keep the noodles from getting mushy. Add a splash of water or soy sauce to keep it moist. Heat on medium, stirring gently. You can also use a microwave, but do it in short bursts. Stir between heating to keep it even. This way, your Easy Veggie Pad Thai stays tasty and enjoyable! Many people make a few mistakes when making Pad Thai. First, overcooking the rice noodles is common. They should be al dente, not mushy. Second, using too much sauce can make the dish too salty. Start with a small amount and taste as you go. Lastly, don’t forget to use fresh vegetables. They add crunch and color, making your dish vibrant and healthy. Yes, you can make Easy Veggie Pad Thai ahead of time. Cook the noodles and veggies, then store them separately. You can mix them with sauce when you are ready to serve. This helps keep everything fresh and tasty. Just reheat in a pan on low heat until warm. You can serve Easy Veggie Pad Thai with many sides. Try spring rolls for a crunchy treat. A light cucumber salad adds freshness. If you want more protein, add tofu or edamame on the side. You can also serve it with a refreshing drink, like iced tea or lemonade. To make Easy Veggie Pad Thai gluten-free, use gluten-free soy sauce. Most rice noodles are gluten-free, but check the package to be sure. This way, everyone can enjoy this tasty dish without worry. Customizing Easy Veggie Pad Thai is easy. If someone doesn’t like a veggie, swap it for one they enjoy. You can also adjust the sauce to suit their taste. Start with less sauce, then add more later. If they don’t want eggs, skip them. This dish is flexible, so everyone can love it! Easy Veggie Pad Thai is a fun and tasty dish. You learned the key ingredients like rice noodles and fresh veggies. We went through the steps to make it right, from cooking noodles to sautéing vegetables. I shared tips to boost flavors and ideas for serving it up. You can even explore variations to suit your taste. In conclusion, this recipe is flexible and simple. You can enjoy it in many ways. Now, it's time to try making your own Easy Veggie Pad Thai!](https://joymealplan.com/wp-content/uploads/2025/07/b6d480dc-093e-4ee9-84ae-64c3c7fdf555-768x768.webp)
![To make a hearty Sweet Potato Black Bean Chili, you will need: - 2 medium sweet potatoes, peeled and cut into ½-inch cubes - 1 can (15 oz) black beans, thoroughly drained and rinsed - 1 large onion, finely diced - 2 cloves garlic, finely minced - 1 red bell pepper, chopped into small pieces - 1 can (14.5 oz) diced tomatoes with their juices - 2 cups vegetable broth (preferably low-sodium) - 1 tablespoon chili powder - 1 teaspoon ground cumin - 1 teaspoon smoked paprika - ½ teaspoon cayenne pepper (adjust according to your spice preference) - Sea salt and freshly cracked black pepper, to taste - 2 tablespoons olive oil Adding toppings can enhance the chili's flavor and look. Here are some tasty options: - Diced avocado for creaminess - Fresh cilantro leaves for a pop of color - Lime wedges for a zesty touch Each ingredient brings unique health benefits: - Sweet potatoes are rich in vitamins A and C. They provide fiber and antioxidants. - Black beans are a great source of protein and fiber. They help keep you full longer. - Onions contain antioxidants and may help reduce inflammation. - Garlic has immune-boosting properties and adds flavor. - Bell peppers are high in vitamin C and help with skin health. This chili is not just filling; it also packs a nutritious punch, making it a well-rounded meal for any day. For the full recipe, check out the recipe section above. Start with a large pot. Heat 2 tablespoons of olive oil over medium heat. Wait until the oil shimmers. Add 1 finely diced onion and 1 chopped red bell pepper. Sauté for about 5 minutes. Stir often until the onion is soft and clear. Next, add 2 minced garlic cloves. Sauté for 1 more minute, just enough to let the garlic smell good. Now, it’s time for the sweet potatoes. Add 2 medium sweet potatoes, cut into ½-inch cubes. Sprinkle in 1 tablespoon chili powder, 1 teaspoon ground cumin, 1 teaspoon smoked paprika, and ½ teaspoon cayenne pepper. Don’t forget salt and pepper to taste! Stir well to coat the sweet potatoes in the spices. Pour in 1 can of diced tomatoes with juices and 2 cups of vegetable broth. Mix everything together and bring it to a boil. Once boiling, lower the heat. Cover the pot and let the chili simmer for 25 to 30 minutes. The sweet potatoes should be soft but not mushy when you poke them with a fork. After the sweet potatoes cook, stir in 1 can of black beans, drained and rinsed. Heat through for another 5 minutes. This gives the beans time to warm up. Taste the chili and add more salt or pepper if you want. - Sauté onion and bell pepper: 5 minutes - Sauté garlic: 1 minute - Simmer chili: 25 to 30 minutes - Heat black beans: 5 minutes - Cut sweet potatoes into even pieces for uniform cooking. - Stir the chili occasionally to prevent sticking. - Adjust the spice levels based on your taste. - Let the chili sit for a few minutes before serving; this helps the flavors blend. For the full recipe, check out [Full Recipe]. Enjoy creating this hearty dish! Many people rush the cooking. Take your time to sauté the onion and pepper. This step builds flavor. If you skip it, your chili may taste flat. Another mistake is adding too much spice at once. Start small, then adjust to your taste. Remember to drain the black beans well. This avoids a watery chili. Use fresh herbs like cilantro or parsley for a burst of freshness. A squeeze of lime juice adds brightness. You can also try adding a splash of soy sauce for depth. If you want more heat, add diced jalapeños or a dash of hot sauce. Lastly, consider a drizzle of olive oil before serving. This adds richness and a nice finish. For this chili, you need a sturdy large pot. A good pot helps with even cooking. A sharp knife and cutting board make prep easy. You also need measuring spoons for spices and a can opener for the beans and tomatoes. A wooden spoon works best for stirring. Having these tools ready will make your cooking smooth and fun. For the full recipe, refer back to the main article. {{image_4}} You can switch up beans in this chili. Try using kidney beans or pinto beans. Both add a different flavor and texture. If you want a creamier chili, use cannellini beans. Mixing beans can make your dish more fun and unique. Feel free to add more veggies. Corn adds sweetness and crunch. Zucchini or carrots can boost nutrition and color. For a protein boost, add cooked quinoa or lentils. You can even throw in some chopped kale or spinach for added greens. These additions can change your chili into a new dish each time. Want more heat? Add extra cayenne pepper or diced jalapeños. For a milder taste, reduce the cayenne or skip it altogether. You can also add a dash of hot sauce when serving for those who like it spicy. If you love smoky flavors, try adding chipotle peppers in adobo sauce. Adjust the spices to fit your taste and make it your own. For the full recipe, check out the Sweet Potato Black Bean Chili section above. To keep your Sweet Potato Black Bean Chili fresh, let it cool first. Once cool, transfer it to an airtight container. It’s best to refrigerate the chili within two hours of cooking. When stored correctly, it lasts in the fridge for about 4 to 5 days. Be sure to label the container with the date. This helps you track how long it has been stored. If you want to keep your chili for a longer time, consider freezing it. First, let the chili cool completely. Then, pour it into freezer-safe bags or containers. Make sure to leave some space for expansion. Seal them tightly to prevent freezer burn. You can freeze the chili for up to 3 months. When you’re ready to enjoy it, just thaw it overnight in the fridge. To reheat your chili, you have a few options. The microwave is quick, but it can heat unevenly. Stir the chili halfway through heating. For the stove, pour the chili into a pot and heat it over medium heat. Stir often until it’s hot. This method helps maintain flavor and texture. If it seems thick, add a splash of vegetable broth or water. Enjoy your chili just like the first time you made it! For the full recipe, check out the details above. You can use pinto beans or kidney beans instead of black beans. They have a similar texture and flavor. If you want a different taste, try chickpeas. They add a nutty flavor and work well in this chili. Just make sure to drain and rinse them, just like you do with black beans. Yes, you can make this chili in a slow cooker! Start by sautéing the onion, garlic, and bell pepper on the stove. Then, add all ingredients to the slow cooker. Cook on low for 6 to 8 hours or on high for 3 to 4 hours. This method lets the flavors blend over time. Leftovers can stay fresh in the fridge for about 4 to 5 days. Make sure to store the chili in an airtight container. This helps keep it flavorful and safe to eat. If you want to keep it longer, you can freeze it! Yes, this chili is perfect for vegans! All ingredients are plant-based and wholesome. You can enjoy it without any worries. It’s full of flavor and nutrients, making it a great choice for everyone. You can find the full recipe [here](#). In this blog post, we explored how to make Sweet Potato Black Bean Chili. We covered the full list of ingredients, cooking steps, and essential tips to avoid common mistakes. Remember to experiment with toppings and variations to make it your own. Proper storage ensures your leftovers stay tasty. This chili is not only delicious but also packed with nutrients. Enjoy this easy recipe that fits many diets, including vegan. Cooking it can be fun and rewarding. Try it out, and discover your new favorite dish!](https://joymealplan.com/wp-content/uploads/2025/07/8ade8b74-c48b-4df7-852e-5be035604d83-768x768.webp)

