Slow Cooker Creamy Mushroom Stroganoff Simple Recipe

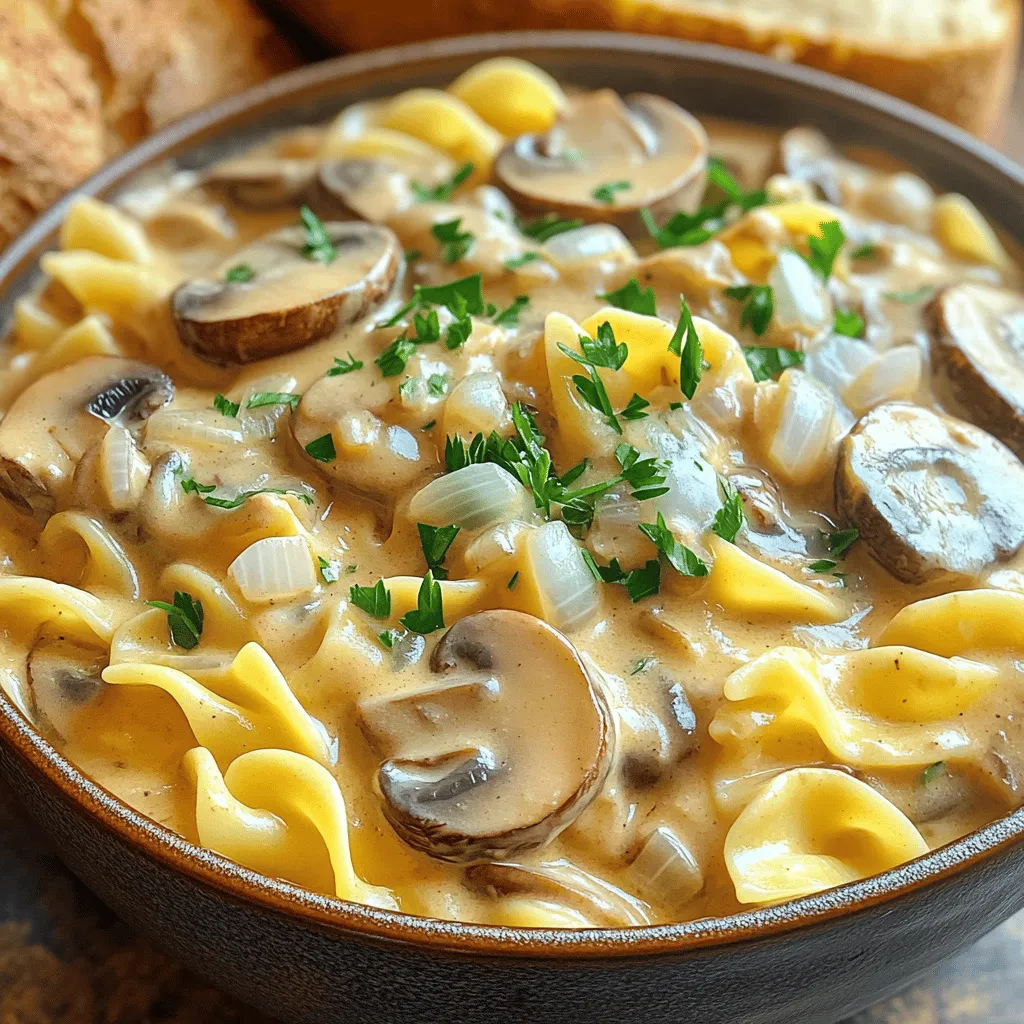
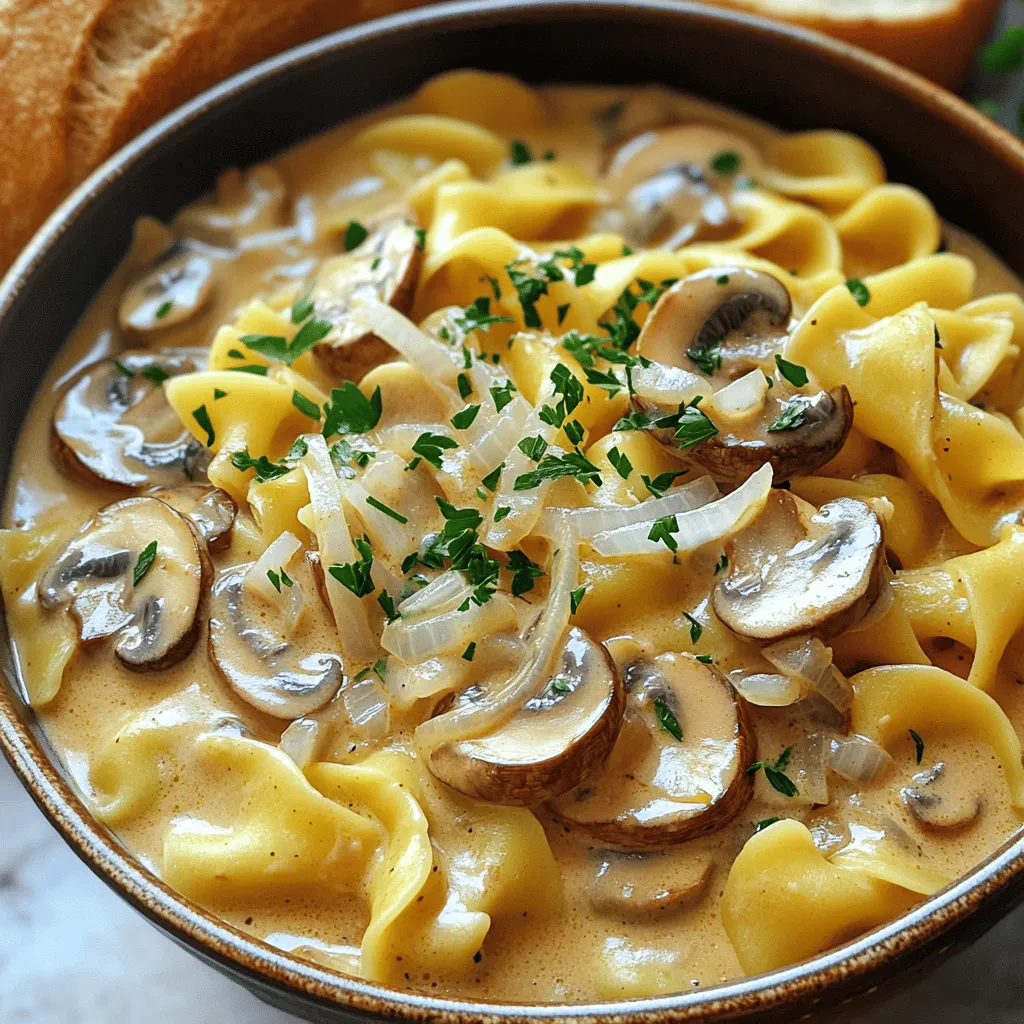
Craving a warm, creamy dish that cooks while you go about your day? This Slow Cooker Creamy Mushroom Stroganoff is simple, satisfying, and packed with flavor. You’ll love how easy it is to toss in fresh mushrooms, herbs, and spices, then let the slow cooker do its magic. Perfect for busy weeknights or cozy weekends, this recipe will impress your family and friends. Ready to get started? Let’s dive in!
Ingredients
Main Ingredients
– 1 pound (450g) of sliced mushrooms (cremini or button)
– 1 medium onion, finely chopped
– 3 garlic cloves, minced
– 2 cups of vegetable broth
– 1 tablespoon of soy sauce
– 1 tablespoon of vegetarian-friendly Worcestershire sauce
In this recipe, sliced mushrooms are the star. Cremini or button mushrooms give a rich flavor. I like using fresh, firm mushrooms for best results. Next, chopped onion and minced garlic add depth. They bring a lovely aroma to the dish. Vegetable broth serves as the base, adding moisture and flavor. Soy sauce and Worcestershire sauce enhance the taste, making it savory and satisfying.
Seasoning and Thickening
– 1 teaspoon of dried thyme
– 1 teaspoon of smoked paprika
– 1/2 teaspoon of freshly ground black pepper
– 1 cup of sour cream
– 3 tablespoons of cornstarch mixed with 3 tablespoons of cold water
Seasoning is key! Dried thyme adds earthiness, while smoked paprika gives warmth. Black pepper adds a hint of spice. Sour cream makes the dish creamy and rich. To thicken the sauce, we use a cornstarch mixture. This helps create that perfect creamy texture we all love.
Pasta Options
– 8 oz (225g) of egg noodles or gluten-free pasta of choice
For the pasta, I recommend egg noodles for their soft texture. They soak up the sauce well. If you’re gluten-free, any gluten-free pasta will work. Just cook it according to the package instructions. It will blend beautifully with the creamy mushroom sauce.
Step-by-Step Instructions
Preparing the Slow Cooker
Start by adding the sliced mushrooms, chopped onion, and minced garlic to your slow cooker. These ingredients create a rich base. Then pour in the vegetable broth, which adds moisture and flavor. Next, add the soy sauce and Worcestershire sauce for umami depth. Don’t forget the dried thyme, smoked paprika, and black pepper. Stir everything until it mixes well.
Cooking Process
Set your slow cooker to low for about 4 hours or high for 2 hours. The low setting helps the mushrooms get tender and the flavors to blend. Check your stroganoff after the time is up. The mushrooms should be soft and juicy. If they aren’t, let them cook a bit longer.
Finalizing the Dish
After cooking, stir in the sour cream until it becomes creamy. Then, add the cornstarch slurry to thicken the sauce. Mix well and cover the slow cooker again. Cook on high for another 30 minutes to achieve your desired thickness. During this time, boil your egg noodles according to the package. Drain them once they are al dente. When the sauce is ready, gently fold the noodles into the creamy mushroom mix. Adjust seasoning with salt and more pepper if needed. Let it rest for 5 minutes before serving. Enjoy your meal in deep bowls, topped with fresh parsley for a colorful touch!
Tips & Tricks
Achieving Creamy Texture
To get the best creamy texture in your stroganoff, choose the right sour cream. Regular sour cream works well, but a dairy-free version can also fit beautifully. This choice keeps the dish rich and smooth.
A cornstarch slurry is crucial here. Mix cornstarch with a bit of cold water before adding it to your dish. This thickens the sauce without clumps. Stir it in after cooking, and let it cook on high for a bit longer. This helps the sauce become velvety and thick.
Flavor Enhancements
Adding fresh herbs can really boost flavor. Try chopped parsley or thyme right before serving. They add a fresh taste that brightens the dish.
You can also swap out some ingredients for variety. For example, using a different type of mushroom can change the flavor. Consider adding spinach or peas for extra color and nutrients.
Cooking Time Adjustments
Slow cookers vary in heat, so adjust cooking times as needed. If you have a newer model, it may cook faster. Keep an eye on your dish, especially during the last hour.
To check for doneness, look for tender mushrooms and a thick sauce. When everything is soft and creamy, it’s ready to enjoy.

Variations
Dietary Modifications
You can easily make this dish fit different diets. For a vegetarian version, stick to the original recipe. To make it vegan, swap sour cream for a dairy-free alternative like cashew cream or coconut yogurt. You can also use vegetable broth as your base.
If you need gluten-free options, use gluten-free pasta instead of egg noodles. Make sure to check labels on sauces too, as some contain gluten. Look for gluten-free soy sauce and Worcestershire sauce.
Flavor Variations
Want to change the flavor? Try adding protein. Chicken or beef can give a hearty twist. Just add cooked meat toward the end to keep it tender. You can also add veggies like spinach or peas for extra nutrition and color. Toss them in during the last 30 minutes of cooking.
Texture Variations
For different textures, play with thickeners. Instead of cornstarch, you can use arrowroot or a nut-based cream for a rich feel.
Switching up noodle shapes can also change the game. Try wide noodles, shells, or even zucchini noodles for a fun twist. Each noodle shape will hold the sauce differently, giving you a new experience every time.
Storage Info
Leftover Storage
After enjoying your creamy mushroom stroganoff, let it cool down. Place it in an airtight container. This keeps the flavors fresh. You can store it in the fridge for up to three days. Make sure to label the container with the date.
Reheating Instructions
You can reheat your stroganoff in two ways: the microwave or stovetop. If using a microwave, warm it in short bursts. Stir every minute to avoid hot spots. If you prefer the stovetop, heat it gently in a pan. Add a splash of broth or water to keep it creamy. Stir often to ensure it heats evenly.
Freezing Instructions
Want to save some for later? Freezing is a great option. First, let the stroganoff cool completely. Then, portion it into freezer-safe containers. Leave a little space at the top for expansion. You can freeze it for up to three months. When ready to eat, thaw it in the fridge overnight. Reheat it as mentioned before to enjoy that creamy goodness again.
FAQs
Can I make this stroganoff dairy-free?
Yes, you can make this stroganoff dairy-free. Use a dairy-free sour cream. Brands like cashew or coconut yogurt work well. For a creamy sauce, try using coconut milk or almond cream instead. These options keep the dish rich and tasty.
How long does it take to cook on low vs. high?
Cooking on low takes about 4 hours. If you choose high, it takes about 2 hours. You can check for tenderness in the mushrooms. They should be soft but not mushy. This time helps blend all the flavors.
Can I use other types of mushrooms?
Absolutely! You can use shiitake or portobello mushrooms for a unique taste. Each type adds its own flavor note. Mixing different mushrooms can also enhance the dish’s depth. Experiment to find your favorite blend.
What do I serve with mushroom stroganoff?
I recommend serving this stroganoff with egg noodles or rice. It pairs well with crusty bread, too. You can add a side salad for freshness. Green beans or steamed broccoli also complement the dish nicely. Enjoy the mix of flavors!
In this blog post, I covered how to create a delicious mushroom stroganoff in your slow cooker. We discussed essential ingredients, step-by-step instructions, and ways to customize the dish. I shared tips for achieving the perfect creamy texture and suggested variations to suit different diets. Whether you want to stick with classic egg noodles or try gluten-free options, this recipe allows for flexibility.
Take these ideas to make a meal that suits your taste. With a little practice, you’ll master this comforting dish. Enjoy cooking!


![- 1 cup quinoa - 2 cups vegetable broth or water - 1 can (15 oz) black beans - 1 cup corn kernels - 1 red bell pepper - 1 cup cherry tomatoes - 1 ripe avocado - 1/4 cup red onion - 1/4 cup fresh cilantro - 1 teaspoon ground cumin - 1 teaspoon chili powder - Juice of 2 fresh limes - 3 tablespoons extra virgin olive oil - Salt and freshly cracked pepper To make a tasty Southwest Quinoa Salad, you need fresh ingredients. Quinoa is the star. It adds protein and fiber. You will also need vegetable broth or water to cook the quinoa. For the beans, I love using black beans. They add creaminess and texture. Corn gives a sweet crunch. You can use fresh or frozen corn. Now, let's talk about fresh produce. The red bell pepper adds color and a slight sweetness. Cherry tomatoes bring juiciness and bright flavor. A ripe avocado gives creaminess. Don't forget the red onion! It adds a nice bite. Finally, fresh cilantro adds a burst of flavor. For spices, cumin and chili powder create a warm, earthy taste. Fresh lime juice adds zest. The olive oil makes the salad rich and smooth. Add salt and pepper to taste. You can find the full recipe for this dish below. 1. Start by rinsing and draining 1 cup of quinoa. This step removes any bitter taste. 2. Next, combine the rinsed quinoa with 2 cups of vegetable broth in a medium-sized saucepan. 3. Set the heat to medium-high and bring it to a boil. 4. Once boiling, reduce the heat to low, cover the pan, and let it simmer for about 15 minutes. 5. After 15 minutes, the quinoa should be fluffy and all the liquid absorbed. Remove it from heat. 6. Let it sit covered for another 5 minutes. Finally, fluff the quinoa gently with a fork and set it aside to cool completely. 1. In a large mixing bowl, add the following ingredients: - 1 can (15 oz) black beans, well rinsed and drained - 1 cup corn kernels (fresh or frozen) - 1 red bell pepper, finely diced - 1 cup cherry tomatoes, halved - 1 ripe avocado, diced - 1/4 cup red onion, finely chopped - 1/4 cup fresh cilantro, roughly chopped 2. Gently mix these ingredients to combine. Make sure everything is evenly spread in the bowl. 1. In a small bowl, whisk together the following: - The juice of 2 fresh limes - 3 tablespoons extra virgin olive oil - 1 teaspoon ground cumin - 1 teaspoon chili powder - A sprinkle of salt and freshly cracked pepper 2. This dressing adds a zesty flavor to your salad, so make sure to mix well. 1. Now, fold the cooled quinoa into the salad mixture. 2. Gently combine all the ingredients until they are well mixed. 3. Taste and adjust seasoning with more salt and pepper if needed. 4. Once everything is mixed, cover the bowl and refrigerate for at least 30 minutes. This allows the flavors to meld together beautifully. For the complete recipe, you can refer to the [Full Recipe]. To avoid mushy quinoa, start by rinsing it well. Rinsing removes the bitter coating called saponin. This simple step makes a big difference in taste. After rinsing, use two cups of vegetable broth or water for every cup of quinoa. This ratio helps the quinoa cook evenly and stay fluffy. It's good to let the quinoa simmer gently. Boil it first, then cover and lower the heat. This method keeps the grains separate and light. Once cooked, let it sit for five minutes before fluffing it with a fork. This extra time helps the quinoa absorb any leftover moisture. For a stunning presentation, serve your salad in a colorful bowl. This makes the vibrant colors pop. Use a large bowl or individual plates for each guest. Garnish with fresh cilantro leaves for a bright touch. Adding lime wedges around the dish looks nice too. You can sprinkle crumbled feta cheese on top for richness. Tortilla strips add a nice crunch and extra flavor. These small touches can elevate your dish from good to great. If you want some heat, add diced jalapeños or a dash of hot sauce. This gives a nice kick to the salad. You can adjust the heat level to your taste. For sweetness, try adding diced mango or pineapple. These fruits pair well with the other flavors. They bring a fresh and tropical twist. Mixing sweet and spicy makes the salad more exciting. {{image_4}} You can boost the protein in this salad easily. Adding grilled chicken or shrimp makes it heartier. Both options pair well with the fresh flavors. I love to season the chicken with lime and spices before grilling. For a vegetarian twist, use tofu. Press and cube the tofu, then sauté it until golden. This adds a nice texture and flavor to your salad. Need a gluten-free option? Quinoa is naturally gluten-free! If you want to switch it up, try using millet or brown rice. Both work well and keep the dish light. For those on a vegan diet, this salad is already a great choice. Just ensure all ingredients, like the broth, are plant-based. You can swap lime juice with apple cider vinegar for a tangy twist. Herbs can really enhance your salad. Try adding parsley or dill to give it a fresh kick. These herbs add color and aroma too. If you want to change the citrus flavor, use orange or lemon instead of lime. They both add a sweet and tangy note, making your salad even more vibrant. Mixing in different flavors keeps your meals exciting. The Southwest Quinoa Salad stays fresh in the fridge for about 3 to 5 days. To keep it tasty, store it in an airtight container. This helps lock in flavors and keeps the salad crisp. I recommend using glass containers. They are great for keeping food fresh and safe. You can freeze this salad, but I suggest leaving out the avocado. The avocado does not freeze well and becomes mushy. If you want to freeze it, prepare the salad without the avocado. Store in a freezer-safe container. It’s best to eat it within 2 to 3 months for the best taste. To refresh the refrigerated salad, take it out and let it sit for a few minutes. This helps the flavors come back alive. Avoid reheating the salad in the microwave. The heat can make the veggies soggy. Instead, enjoy it cold or at room temperature for a crisp bite. To make the Southwest Quinoa Salad vegan, swap out any animal-based ingredients. For example, use olive oil instead of any honey or dairy products. Avocado is already vegan, so you can keep that. If you want creaminess, add more avocado or use a plant-based yogurt. Yes, you can prepare this salad ahead of time. I suggest making it a few hours before serving. This way, the flavors blend well. Just be sure to store it in the fridge. You can also make the quinoa the day before. This salad pairs well with grilled meats, like chicken or steak. It also makes a great side for BBQs. You can even enjoy it with tacos or burritos. It adds a fresh touch to any meal. Quinoa is a superfood packed with protein. It has all nine essential amino acids. Plus, it is high in fiber, which is good for digestion. The added veggies like tomatoes and peppers boost vitamins and minerals. To spice up the salad, add diced jalapeños or red pepper flakes. You can also add a splash of hot sauce to the dressing. For a smoky flavor, try adding chipotle powder. Adjust the heat to your taste. For the full recipe, check out the Southwest Quinoa Fiesta Salad. In this blog post, I shared a simple and tasty Southwest Quinoa Salad recipe. I covered ingredients, cooking steps, and storage tips. You learned how to make it vegan and delicious. Remember to experiment with flavors and ingredients. This salad is versatile and can fit many diets. Enjoy making it your own! Get creative and share it with friends and family for a delightful meal.](https://joymealplan.com/wp-content/uploads/2025/07/ba958c7b-7f9d-4e5f-ae24-7804e94fee3c-768x768.webp)
![- 1 block firm tofu - 1/4 cup cornstarch - 2 tablespoons vegetable oil - 1 cup cooked brown rice - 1 cup broccoli florets - 1 cup snap peas - 1 medium carrot, julienned - 1 red bell pepper, sliced into thin strips - 1/4 cup teriyaki sauce - 1 tablespoon sesame seeds - 2 green onions, sliced thinly - Optional: lime wedges for serving This recipe for crispy teriyaki tofu bowls highlights delicious flavors and fresh veggies. You start with firm tofu because it holds its shape well when cooked. Make sure to press and drain it thoroughly before cooking. This step removes extra moisture and helps achieve that perfect crunch. Next, you coat the tofu cubes in cornstarch. This coating is key for creating a crispy exterior. The cornstarch absorbs moisture and forms a crunchy crust when you sauté the tofu. For the veggies, I love using broccoli, snap peas, carrots, and red bell pepper. These not only add color but also provide a mix of textures and flavors. They pair wonderfully with the savory teriyaki sauce. Speaking of the sauce, you can use store-bought teriyaki sauce for ease or make your own at home. Either way, the sauce adds a sweet and salty kick to the dish. Adding sesame seeds and sliced green onions on top gives the bowls a nice finish. If you want a bit of zing, serve lime wedges on the side. For the full recipe, refer to the earlier section. Enjoy making these tasty crispy teriyaki tofu bowls! Start by pressing the tofu. This step removes extra moisture. Slice the tofu into bite-sized cubes. I like to use a sharp knife for clean cuts. Next, coat the tofu. Sprinkle cornstarch over the cubes in a bowl. Toss the tofu gently until each piece is coated. This coating helps achieve a crispy texture when cooking. Heat vegetable oil in a large non-stick skillet. Use medium-high heat for the perfect crisp. Once hot, add the tofu. Cook for about 8-10 minutes. Turn the cubes to cook evenly. Watch for a golden-brown color on all sides. This is how you get that crunch that everyone loves. While the tofu cooks, steam the broccoli and snap peas. Use a steamer basket over boiling water. Steam for about 3-4 minutes. You want the veggies to be bright and tender-crisp. This keeps their color and nutrients intact. For added crunch, prepare other vegetables like carrots and bell peppers as you go. Once the tofu is crispy, lower the heat. Pour teriyaki sauce over the tofu. Stir gently to coat each piece. Allow it to cook for 1-2 more minutes. This gives the sauce time to thicken and stick to the tofu. The flavor will be rich and delicious. In each serving bowl, start with a layer of brown rice. Top it with the crispy teriyaki tofu. Add the steamed broccoli, snap peas, julienned carrots, and red bell pepper slices. The colors will make your dish pop. Finally, garnish with sesame seeds and sliced green onions. This adds a nice touch and extra flavor. For an optional zest, serve lime wedges on the side. For the full recipe, check out [Full Recipe]. To make your tofu crispy, drying is key. After pressing the tofu, pat it dry well. This helps remove extra moisture. Less moisture means a better fry and a crispier texture. The oil temperature matters too. Heat your vegetable oil over medium-high heat. If the oil is too cool, the tofu will soak up oil instead of becoming crispy. A good test is to drop a small piece of tofu in the oil. If it sizzles, you're ready to fry. To make your teriyaki tofu even tastier, consider adding spices or marinades. You can sprinkle garlic powder or ginger for extra flavor. Marinating the tofu for at least 15 minutes can also deepen its taste. Choosing the right teriyaki sauce is crucial. You can buy sauce or make your own for a fresher taste. A sauce with a balance of sweet and salty works best. Look for options with natural ingredients for a healthier dish. When serving your teriyaki tofu, pair it with sides that complement the dish. Steamed rice works great, but you can also try quinoa for a nutty flavor. Adding a side salad can enhance the meal's freshness. You can customize your bowl to fit your tastes. Try swapping out vegetables based on what you like. Add more crunch with sliced radishes or extra color with yellow bell peppers. Enjoy the freedom to make it your own! For the full recipe, refer to the section above. {{image_4}} If you want to switch up the protein, tofu isn’t your only choice. You can use chicken or tempeh instead. Both options add great flavor and texture. For chicken, choose boneless, skinless thighs for juiciness. Cut them into bite-sized pieces and cook them like the tofu. Tempeh, made from fermented soybeans, offers a nutty taste. Simply slice it and coat it in cornstarch, just like the tofu. You can make your bowls even better with seasonal veggies. In spring, try asparagus or green beans. In summer, add zucchini or bell peppers. Fall offers butternut squash or Brussels sprouts. You can also mix in leafy greens like spinach or kale. They add nutrients and a vibrant color. Mushrooms are another great choice. They bring umami and a meaty bite. While store-bought teriyaki sauce is tasty, making your own is fun and easy. Combine soy sauce, honey, garlic, and ginger for a fresh taste. Simmer it until it thickens. Other sauces can work too. Try a spicy chili sauce for heat or a peanut sauce for creaminess. Each option brings its own unique flavor to your crispy tofu bowls. For the full recipe, check out the Crispy Teriyaki Tofu Bowls. To store your leftover crispy teriyaki tofu bowls, place them in an airtight container. Make sure the bowl cools down to room temperature before sealing it. This helps keep the tofu crispy and the veggies fresh. You can store these bowls in the fridge for up to three days. If you plan to enjoy them later, it's best to keep the sauce separate until you're ready to eat. For the best texture when reheating, use an oven or a skillet. Preheat your oven to 350°F (175°C) and place the tofu bowls on a baking sheet. Heat for about 10 to 15 minutes until warmed through. If using a skillet, add a splash of water to prevent sticking and cover it. This method helps retain the crispiness of the tofu and keeps the veggies tender. You can freeze these tofu bowls for later use. To do this, let the bowls cool completely. Place the tofu and veggies in a freezer-safe container. Avoid freezing the rice, as it can become mushy. These bowls can last up to three months in the freezer. When you're ready to enjoy them, thaw in the fridge overnight and reheat using the methods above. To make tofu crispy, follow these key steps: - Press the tofu: Remove as much water as you can. - Cube the tofu: Cut it into even, bite-sized pieces. - Dry the tofu: Pat each piece with a paper towel. - Coat with cornstarch: Sprinkle cornstarch evenly over the tofu. - Heat the oil: Use a hot skillet with vegetable oil. - Cook until golden: Sauté the tofu for about 8-10 minutes, turning it often. These steps help create a crispy texture that you will love. Yes, you can easily make this dish vegan. Here are some simple swaps: - Use plant-based teriyaki sauce: Check labels for non-vegan ingredients. - Add more vegetables: Use any fresh veggies you enjoy. - Try different grains: Substitute brown rice with quinoa or farro. These changes keep the dish tasty and vegan-friendly. Store your leftover teriyaki tofu bowls with these tips: - Use airtight containers: Keep air out to maintain freshness. - Refrigerate: Store in the fridge for up to 3 days. - Separate the sauce: Keep the sauce separate to avoid sogginess. These steps help retain taste and texture. Serve your teriyaki bowls in an eye-catching way. Here are some ideas: - Layer the ingredients: Start with a base of rice, then tofu, and veggies on top. - Garnish well: Add sesame seeds and green onions for flair. - Use lime wedges: Serve with lime on the side for a zesty kick. These tips make your dish look appealing and delicious. You can find the full recipe [here](#). This guide covered making teriyaki tofu bowls from start to finish. You learned about key ingredients and how to prepare everything for a tasty meal. We shared tips for crispy tofu and ideas for variations. Remember, adjust the dish to fit your taste and enjoy it fresh or stored for later. This meal is healthy, fun, and easy to customize. Dive in and have fun cooking!](https://joymealplan.com/wp-content/uploads/2025/06/6f569fa0-62f8-4b7a-b8f1-a73cdf9881a3-768x768.webp)

