Slow Cooker Keto Butter Chicken Flavorful and Easy Meal

Looking for a delicious, low-carb meal that practically cooks itself? You’ll love this Slow Cooker Keto Butter Chicken recipe! Packed with rich flavors and simple ingredients, it’s perfect for busy nights. In this guide, I’ll walk you through each step, from prepping to serving. Whether you’re sticking to a keto diet or just want a tasty dinner, this dish is easy to make and full of flavor. Let’s dive in!
Why I Love This Recipe
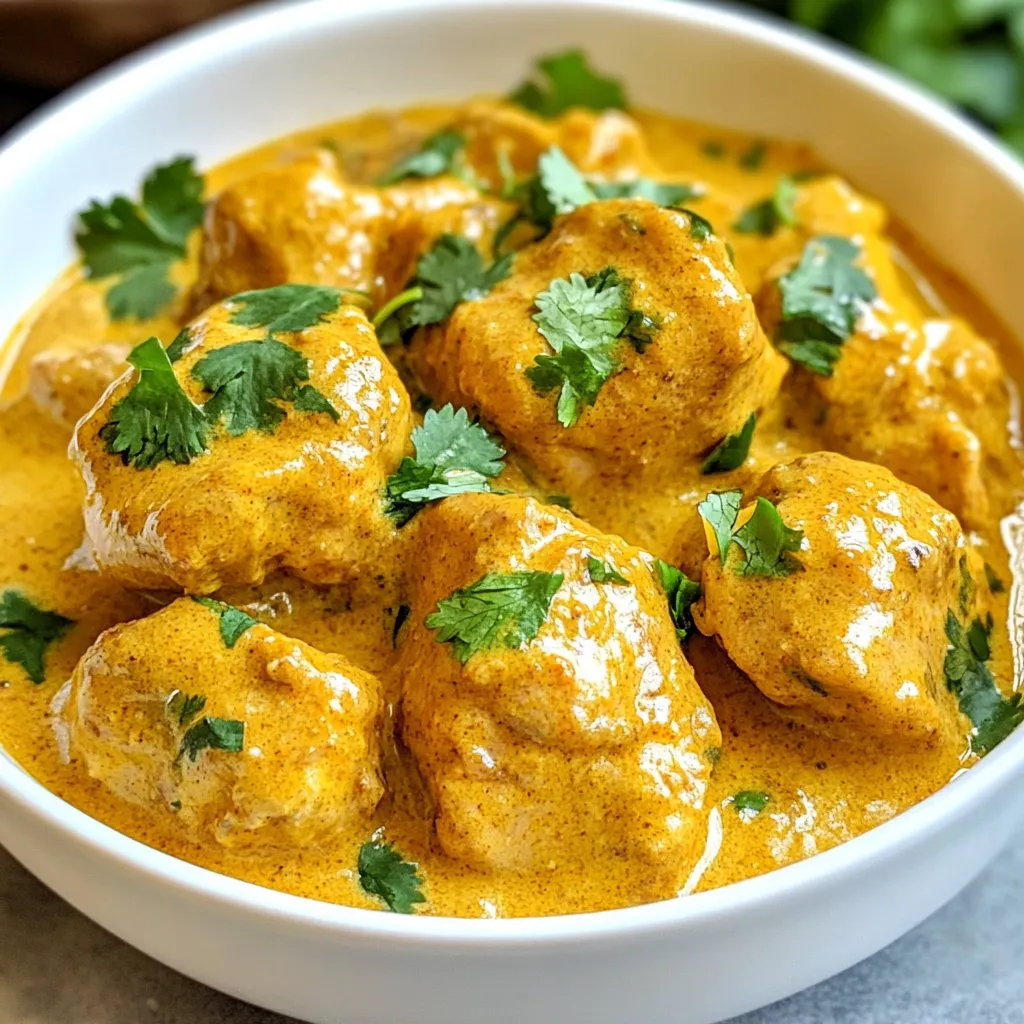
- Rich and Creamy Flavor: This butter chicken is incredibly rich and creamy, thanks to the generous use of butter and coconut cream, making each bite a delightful experience.
- Easy to Prepare: With the slow cooker doing most of the work, this recipe requires minimal hands-on time, allowing you to set it and forget it until dinner.
- Keto-Friendly: This recipe is perfect for those following a ketogenic diet, as it is low in carbs but high in healthy fats, ensuring you stay on track with your meal plan.
- Customizable Spice Level: You can easily adjust the chili powder and spices to suit your taste, making this dish perfect for anyone who loves to experiment with flavors.
Ingredients
Detailed list of required ingredients
To make Slow Cooker Keto Butter Chicken, you need:
– 2 lbs boneless, skinless chicken thighs, cut into bite-sized pieces
– 1 cup unsalted butter, divided into two 1/2 cup portions
– 1 medium onion, finely chopped
– 4 cloves garlic, minced
– 1 tablespoon fresh ginger, grated
– 2 teaspoons garam masala
– 2 teaspoons ground cumin
– 1 teaspoon ground coriander
– 1 teaspoon turmeric powder
– 1 teaspoon chili powder
– 1 cup coconut cream
– Salt and pepper, to taste
– Fresh cilantro, chopped, for garnish
– 1 teaspoon lemon juice
Ingredient substitutions for dietary preferences
You can easily swap some ingredients for your needs. For a dairy-free option, use olive oil instead of butter. Coconut cream works great for a creamy texture without dairy. If you’re allergic to coconut, try heavy cream or cashew cream. For a lower-fat dish, use chicken breast instead of thighs. You can also replace the spices with a pre-mixed curry blend if you like.
Importance of using fresh herbs and spices
Using fresh herbs and spices makes a huge difference in flavor. Fresh garlic and ginger add rich taste that dried versions can’t match. Ground spices should be fresh for the best aroma and flavor. Old spices lose potency, making your dish flat. Fresh cilantro not only adds flavor but also brightens up the plate. Always choose fresh when you can to elevate your cooking.

Step-by-Step Instructions
Prepping the slow cooker and ingredients
Start by gathering all your ingredients. You will need chicken, butter, onion, garlic, and spices. Cut the chicken thighs into bite-sized pieces. Make sure they are even for cooking. Next, finely chop the onion and mince the garlic. Grate the ginger for a fresh taste. Measure out your spices, coconut cream, and any herbs. This prep makes cooking smoother and faster.
Cooking process for the perfect butter chicken
Melt half a cup of butter in a large skillet over medium heat. Once it bubbles, add the chopped onion. Cook for about five minutes until the onion becomes soft and clear. Next, stir in the minced garlic and grated ginger. Cook for one more minute until fragrant. Add the garam masala, cumin, coriander, turmeric, and chili powder. Stir well to coat the onion mix with the spices. Let this cook for two minutes.
Now, transfer this spiced mix to the slow cooker. Add the chicken pieces and toss them gently. Make sure every piece is coated with the spice mix. Pour in the coconut cream and the rest of the melted butter. Season with salt and pepper. You can adjust the seasoning later. Cover the slow cooker. Cook on low for six to eight hours or on high for four hours.
Tips for checking doneness and seasoning adjustments
Check the chicken for doneness after the cooking time. It should be tender and cooked through. If you have a meat thermometer, the internal temperature should be 165°F. If you want more flavor, taste the sauce before serving. You can add more salt, pepper, or lemon juice if needed. This final touch brightens the dish. Garnish with fresh cilantro before serving. Enjoy your meal!
Tips & Tricks
How to achieve the best flavor and texture
To get the best flavor in your butter chicken, use fresh spices. Fresh spices give the dish a rich taste. Sauté the onion until it’s soft and sweet. This step adds depth to the sauce. Don’t rush when cooking the spices; let them bloom in the butter. This will enhance their flavor. Coconut cream adds a creamy texture. If you want it thicker, cook it longer. Finally, finish with lemon juice for brightness.
Common mistakes to avoid when making butter chicken
One mistake is not browning the onions enough. If they are not soft, the flavor will be bland. Another mistake is using low-quality spices. They can make the dish taste flat. Avoid overcooking the chicken; it should be tender, not dry. Lastly, don’t skip the garnish. Fresh cilantro adds color and flavor.
Serving suggestions to enhance the dish
Serve your butter chicken with cauliflower rice for a low-carb option. You can also pair it with a fresh green salad. For a crunch, add some toasted nuts on top. If you like heat, serve with extra chili flakes. This dish goes well with a cool yogurt sauce on the side. Each of these options enhances the meal and brings out the flavors.
Pro Tips
- Choose the Right Chicken: Using boneless, skinless chicken thighs ensures a tender and juicy texture, as they hold up better during the slow cooking process.
- Adjust Spice Levels: If you prefer a milder dish, reduce the amount of chili powder or omit it altogether. For extra heat, consider adding a pinch of cayenne pepper.
- Coconut Cream Substitution: If coconut cream is not available, you can use full-fat coconut milk as a substitute, but the sauce may be slightly less rich.
- Garnishing Tips: Fresh cilantro adds a burst of flavor and color, but you can also serve with lime wedges for an extra zesty kick.

Variations
Dairy-free alternative options
If you want a dairy-free version, swap the butter and coconut cream for ghee and almond milk. Ghee adds a rich flavor, while almond milk keeps it creamy. You can also use olive oil instead of butter for cooking. This change keeps the dish light and tasty.
Spicy and mild variations
To make a spicy butter chicken, add more chili powder or include fresh chopped chilies. You can also use a hot curry paste for an extra kick. If you prefer it mild, reduce the chili powder and skip the fresh chilies. Adjust the spices to fit your taste buds.
Additional protein or vegetable add-ins
You can boost the protein by adding shrimp or chickpeas. Just adjust the cooking time so everything cooks evenly. For a veggie twist, toss in some spinach or bell peppers. These add color and nutrition while keeping the meal low in carbs.
Storage Info
How to properly store leftovers
After enjoying your Slow Cooker Keto Butter Chicken, store leftovers in airtight containers. This keeps the dish fresh and tasty. Make sure to cool the chicken to room temperature before sealing it up. This helps avoid condensation, which can make the food soggy. Stored properly, it will last in the fridge for up to four days.
Reheating instructions for optimal taste
When you’re ready to enjoy leftovers, reheating is key. Place the chicken in a pot on low heat. Stir it often to help it warm evenly. You can add a splash of coconut cream or water to keep it moist. If you prefer, you can microwave it in short bursts. Heat until it’s hot throughout, but be careful not to overcook it. This keeps the chicken tender and delicious.
Freezing and thawing guidelines
To freeze your butter chicken, place it in a freezer-safe container. Leave some space at the top as the dish will expand. You can freeze it for up to three months. To thaw, move it to the fridge a day before you want to eat it. This slow thaw helps maintain its flavor and texture. After thawing, reheat it gently as mentioned for the best taste.
FAQs
What to serve with Slow Cooker Keto Butter Chicken?
You can serve this dish with many sides. Some good options include:
– Cauliflower rice
– Zucchini noodles
– Steamed green beans
– A fresh green salad
These sides add great texture and flavor to the meal. They also keep it low-carb.
Can I use other cuts of chicken?
Yes, you can use other cuts! Chicken breast works well, but it may cook faster. Bone-in chicken thighs add more flavor, but they take longer. Just adjust cooking time as needed.
How can I make this recipe spicy?
To add spice, increase the chili powder. You can also add fresh chopped chilies or red pepper flakes. If you like a fiery kick, try using a spicy garam masala blend.
Is it possible to make this dish without a slow cooker?
Absolutely! You can make it on the stovetop. Just follow the steps up to adding the chicken and coconut cream. Cook on medium heat for 30-40 minutes, stirring often. Make sure the chicken is cooked through. This will give you a quick and tasty meal.
You’ve learned how to make Slow Cooker Keto Butter Chicken with fresh ingredients and simple steps. We covered the key items needed, useful tips, and creative variations. You now know how to store leftovers and reheat them correctly. Remember, cooking should be fun and flavorful. Enjoy making this dish your own, and don’t hesitate to explore new flavors and twists. Your kitchen awaits, so dive in and create a meal you’ll lov

Slow Cooker Keto Butter Chicken
Ingredients
- 2 lbs boneless, skinless chicken thighs, cut into bite-sized pieces
- 1 cup unsalted butter, divided into two 1/2 cup portions
- 1 medium onion, finely chopped
- 4 cloves garlic, minced
- 1 tablespoon fresh ginger, grated
- 2 teaspoons garam masala
- 2 teaspoons ground cumin
- 1 teaspoon ground coriander
- 1 teaspoon turmeric powder
- 1 teaspoon chili powder
- 1 cup coconut cream
- to taste salt and pepper
- for garnish fresh cilantro, chopped
- 1 teaspoon lemon juice
Instructions
- Begin by melting 1/2 cup of butter in a large skillet over medium heat until it becomes bubbly and fragrant.
- Add the finely chopped onion to the skillet and sauté for approximately 5 minutes, or until the onion is soft and translucent.
- Stir in the minced garlic and grated ginger, cooking for an additional minute or until the mixture becomes aromatic.
- Next, add the garam masala, ground cumin, ground coriander, turmeric powder, and chili powder to the skillet. Stir well to evenly coat the onion mixture in the spices, and allow to cook for another 2 minutes to deepen the flavors.
- Carefully transfer the spiced onion-garlic mixture into the slow cooker. Add the bite-sized chicken pieces and toss gently until the chicken is thoroughly coated with the spice blend.
- Pour in the coconut cream along with the remaining 1/2 cup of melted butter. Season generously with salt and pepper to taste, adjusting based on your preference.
- Cover the slow cooker with its lid and set it to cook on low for 6-8 hours. Alternatively, you can cook it on high for 4 hours, or until the chicken is tender and cooked through.
- Once cooking time is complete, stir in the fresh lemon juice for an added layer of zest and flavor.
- Serve the butter chicken hot, garnished with a sprinkle of freshly chopped cilantro to enhance its appeal and freshness.


![To make the Pickle Ranch Pasta Bake, you need the following ingredients: - 8 ounces elbow macaroni - 1 cup dill pickles, chopped - 1 cup cooked chicken, shredded (optional for added protein) - 1 cup ranch dressing - 1 cup cheddar cheese, shredded - 1/2 cup cream cheese, softened - 1/2 teaspoon garlic powder - 1/2 teaspoon onion powder - 1/2 teaspoon black pepper - 1/2 cup breadcrumbs - Fresh dill for garnish (optional) These ingredients create a rich and fun dish. The elbow macaroni serves as the base, providing a nice bite. Dill pickles add a tangy crunch that surprises the taste buds. If you want more protein, shredded chicken works great. Ranch dressing brings a creamy flavor that ties it all together. Cream cheese makes it rich, while garlic and onion powders add depth. Shredded cheddar gives a gooey finish, and breadcrumbs add a crispy top. For garnish, fresh dill is a lovely touch. You can find the complete recipe in the Full Recipe section. - Preheat the oven to 350°F (175°C). - Cook the elbow macaroni until it is al dente. This means it should be firm but not hard. Follow the package directions for timing. After cooking, drain the pasta well and let it cool slightly. - In a mixing bowl, combine the softened cream cheese and ranch dressing. - Add garlic powder, onion powder, and black pepper. - Mix everything well until the sauce is smooth and creamy without any lumps. - In the bowl with the sauce, add the chopped dill pickles. If you want more protein, add shredded chicken too. - Gently fold in the cooked macaroni, ensuring all pieces are covered in sauce. - Grease a 9x13 inch baking dish with cooking spray or a bit of olive oil. - Pour the pasta mixture into the dish, spreading it out evenly. - Top it all with shredded cheddar cheese to create a nice, cheesy layer. - In a small bowl, mix the breadcrumbs with a tablespoon of olive oil until they are coated. - Sprinkle this breadcrumb mix over the cheese layer for a crunchy top. - Place the baking dish in your preheated oven and bake for 25-30 minutes. - Look for the cheese to be bubbly and the breadcrumbs to turn golden brown. Now you have a warm, hearty dish ready to serve. For more details, check the Full Recipe. To make your Pickle Ranch Pasta Bake shine, try different types of pickles. You can use sweet pickles for a fun twist or spicy ones for a kick. Each variety adds its unique taste. Always taste your dish as you cook. Adjust the seasoning to suit your preferences. More garlic powder? Add it! Need more zest? A touch of lemon juice can work wonders. For a creamier sauce, mix in a bit more cream cheese. This change makes the sauce rich and smooth. If you prefer a crunchy topping, add more breadcrumbs or even crushed potato chips. They will give the bake an exciting crunch that contrasts nicely with the soft pasta. Presentation matters! Serve the pasta bake right from the dish for a cozy look. For a pop of color, sprinkle fresh dill on top before serving. This not only looks good but also adds fresh flavor. Consider adding extra dill pickles on the side. They make a fun garnish and give guests a chance to customize their plates. For the full recipe, check out the [Full Recipe]. {{image_4}} You can switch out pasta types in this dish. Gluten-free pasta works well if you need it. You can also try whole wheat or penne for a twist. The dressing is flexible too. Use a ranch with herbs for more flavor. Different cheeses can change the taste. Try pepper jack or mozzarella for a new experience. This dish is fun because you can add more veggies or proteins. Bell peppers, spinach, or even corn can boost the flavor. You can add cooked bacon or sausage for extra heartiness. If you want a vegan option, use plant-based cream cheese and cheese. You can skip the chicken and still have a tasty meal. This pasta bake can fit many diets and tastes. To keep your Pickle Ranch Pasta Bake fresh, store leftovers in an airtight container. Place it in the fridge right after it cools. This helps keep it moist and tasty. Consume leftovers within three to four days for the best flavor. If you want to save some for later, freezing works great. First, let the pasta bake cool completely. Then, cut it into portions. Wrap each piece in plastic wrap, then place them in a freezer-safe bag. Label the bag with the date. It can last up to three months in the freezer. When it's time to enjoy your pasta bake again, you want it to taste just as good. The best way to reheat it is in the oven. Preheat your oven to 350°F (175°C). Place the portioned bake in a baking dish and cover it with foil. This keeps it from drying out. Heat for about 20 minutes or until it's warm throughout. If you're in a hurry, you can use a microwave. Place a piece on a microwave-safe plate. Cover it with a damp paper towel to keep moisture in. Heat on medium power for about two minutes. Check and stir if needed. Enjoy your delicious dish just like the first time! Yes, you can make this dish ahead of time. To do this, prepare the pasta and sauce as usual. Then, combine everything in the baking dish. Cover it tightly with foil or plastic wrap. You can store it in the fridge for up to 24 hours before baking. When you are ready to bake, remove the cover and heat your oven to 350°F (175°C). Bake for about 30 to 35 minutes. Check for bubbly cheese and a golden crust. This tip saves time during busy weeknights. Absolutely! The Pickle Ranch Pasta Bake is very kid-friendly. Kids often love the creamy texture and cheesy flavor. To make it even better for picky eaters, you can leave out the dill pickles. You might also want to reduce the ranch dressing. If your kids like it, you can try adding some cooked broccoli or peas. This adds color and nutrition without changing the taste too much. To add some heat, consider mixing in some diced jalapeños or crushed red pepper flakes. You can also use a spicy ranch dressing instead of the regular one. If you enjoy hot sauce, drizzle some over the top before baking. Just remember to taste as you go. This way, you can adjust the heat to your liking. Enjoy experimenting with flavors! This dish blends macaroni, ranch dressing, and pickles into a tasty bake. You can customize it with various ingredients and adjust flavors. For a creamy dish, mix the sauce well; for crunch, use more breadcrumbs. Store leftovers properly to enjoy later. You can make it ahead or cater to picky eaters with simple swaps. Overall, this recipe provides versatility and fun for your cooking adventures. Get creative and enjoy your delicious meal!](https://joymealplan.com/wp-content/uploads/2025/07/1b3a3990-0373-4e07-90bf-a46c97a9e002-768x768.webp)

. Enjoy your cooking! Start by washing your vegetables well. Fresh veggies make the dish pop! Dice the mixed peppers into small cubes. Cut the carrot into thin strips, or julienne it. Trim the sugar snap peas and separate the broccoli into small florets. The key is to keep all the pieces similar in size, so they cook evenly. For this recipe, use cooked jasmine rice. Day-old rice works best because it's less sticky. If you need to cook rice, rinse it under cold water until the water runs clear. This step helps remove excess starch. Then, cook it according to package instructions. Once done, let it cool before using. Heat two tablespoons of vegetable oil in a large pan or wok over medium-high heat. Add three minced garlic cloves and one teaspoon of grated ginger. Stir for about 30 seconds until fragrant. Next, toss in the broccoli and stir-fry for two minutes. Now, add the julienned carrots, sugar snap peas, and diced peppers. Stir-fry these for another three to four minutes until they're tender but still crisp. Push the veggies to one side of the pan. Add the cooked rice to the other side. Drizzle two tablespoons of soy sauce and one tablespoon of sesame oil over the rice. Use a spatula to break up any clumps and mix everything well. Finally, add sliced green onions and season with salt and pepper to taste. Cook for two more minutes to let the flavors blend. Serve hot, garnished with sesame seeds and fresh cilantro leaves. For the full recipe, check out the detailed instructions! To make fluffy rice, start with cold, day-old rice. Freshly cooked rice is too moist. Spread it out on a plate to cool and dry. This helps separate the grains. When cooking, use a bit less water than usual. This prevents soggy rice. For the best results, choose jasmine or basmati rice. They have a nice texture and flavor. Avoid sticky rice types for this dish. When you pick vegetables, look for bright colors and firm textures. Fresh veggies taste better and add crunch. Avoid any that look wilted or have brown spots. Store your vegetables in the fridge, but keep them dry. Use airtight bags to prevent moisture. This helps keep them fresh longer. Use them within a week for the best flavor. To get great flavor in your fried rice, use high heat. A hot pan sears the veggies and rice, adding depth. Start with garlic and ginger for aroma. Use soy sauce for a salty kick, but don’t overdo it. You can also add sesame oil for a nutty taste. Mix in the veggies at the right time. This keeps them crisp and colorful. For more ideas, try adding some chili flakes for heat or a splash of lime for brightness. For the full recipe, check out the Rainbow Veggie Fried Rice. {{image_4}} You can easily add protein to your vegetable fried rice. Tofu is a great choice for a plant-based meal. Use firm tofu for the best texture. Just cube the tofu and sauté it until it's golden. If you prefer meat, chicken is also a fantastic option. Use diced chicken breast and cook it until it’s no longer pink. Both options boost the meal’s nutrition and flavor. To keep your dish vegan, skip the chicken and use soy sauce that is gluten-free. Coconut aminos can also be a tasty substitute. For a gluten-free fried rice, make sure to check all sauce labels. You can enjoy this meal without compromising on taste or dietary needs. You can change the flavor of your fried rice easily. To make it spicy, add chili paste or red pepper flakes. For a sweeter taste, try adding a bit of pineapple or a drizzle of sweet soy sauce. Experiment with different herbs like basil or cilantro. Each variant can turn this simple dish into something new and exciting. Feel free to explore these variations to make your vegetable fried rice unique. For the full recipe, check out the Rainbow Veggie Fried Rice. Storing leftover vegetable fried rice is simple. First, let it cool. Place it in an airtight container. You can keep it in the fridge for up to three days. Make sure it’s sealed well to keep out moisture and odors. If you have a lot, divide it into smaller portions. This makes it easy to reheat later. To reheat your fried rice, use a skillet or a microwave. If you use a skillet, add a splash of water. This helps steam the rice and keeps it from drying out. Heat over medium heat for about five minutes. Stir often to warm it evenly. In the microwave, cover the rice with a damp paper towel. Heat for one to two minutes, checking every 30 seconds. You can freeze vegetable fried rice too. Place it in a freezer-safe container. Make sure to leave some space at the top. Rice expands when frozen. It can last up to three months in the freezer. To thaw, move it to the fridge overnight. You can also reheat it straight from the freezer. Just add a few extra minutes to your cooking time. This way, you’ll enjoy that great taste again! The best rice for fried rice is jasmine rice. It has a nice texture and flavor. Day-old rice works best because it dries out a bit. This helps keep the rice fluffy. You can also use long-grain rice if you prefer. Just make sure it's cooked and cooled before frying. Yes, you can use frozen vegetables. They are a quick and easy option. Just make sure to thaw and drain them first. This helps prevent excess water from making your fried rice soggy. Frozen mixes often have a nice variety, too. To make it healthier, add more veggies like spinach or peas. You can also reduce the oil used in cooking. Using low-sodium soy sauce cuts down on salt. Another option is to swap some rice for cauliflower rice. This adds fiber and lowers carbs. Vegetable fried rice has roots in China. It started as a way to use leftover rice and vegetables. Different cultures adapted the dish over time. You can find many versions worldwide, each with unique flavors and ingredients. Yes, you can prepare vegetable fried rice in advance. Cook the rice and veggies, then store them separately. You can mix them just before serving. This keeps everything fresh. It also makes it easy to reheat later. Check out the Full Recipe for more details! Vegetable fried rice offers a tasty, simple meal. We covered essential ingredients, types of rice, and optional flavors. You learned how to prepare veggies, cook rice, and mix everything for the best taste. Remember to store leftovers well and try different proteins or flavors for variety. Whether you prefer tofu, chicken, or vegan options, there’s a fried rice for you. Try these tips to elevate your dish and enjoy!](https://joymealplan.com/wp-content/uploads/2025/06/1a929e2b-4b2d-416b-b92a-3d8add5a3088-768x768.webp)

