Are you ready to impress your friends with a tasty treat? Follow my easy recipe for Spicy Honey Garlic Wings that combines sweet and heat in every bite. With just a few simple ingredients and steps, you’ll have wings that are crispy, flavorful, and perfect for any gathering. Let’s dive in and make your next meal a hit!
Ingredients
Main Ingredients for Spicy Honey Garlic Wings
– 2 lbs chicken wings
– 1/4 cup honey
– 1/4 cup soy sauce
– 4 cloves garlic, finely minced
– 2 tablespoons sriracha
– 1 teaspoon fresh ginger, grated
– 1 tablespoon rice vinegar
– 1 teaspoon sesame oil
– Salt and freshly ground black pepper to taste
These ingredients create the perfect balance of sweet and spicy. The honey gives a nice glaze. The soy sauce adds depth. Garlic and ginger give a punch of flavor. Sriracha brings the heat. You can adjust the sriracha to your spice liking.
Optional Ingredients to Enhance Flavor
– Lime juice for a tangy kick
– Fresh herbs like cilantro or parsley
– Hot sauce for extra spice
– Other spices like paprika or cayenne
Adding lime juice can brighten the wings. Fresh herbs add a burst of color and flavor. Hot sauce can amplify the heat if you like it fiery. Mixing in other spices can deepen the taste profile.
Recommended Tools and Equipment
– Large mixing bowl for marinating
– Whisk for mixing ingredients
– Baking sheet lined with aluminum foil
– Wire rack to elevate the wings
– Basting brush for the glaze
Using a whisk helps blend the marinade smoothly. The wire rack ensures even cooking and crispness. A basting brush is perfect for applying that last layer of flavor. Each tool makes the process easier and more enjoyable.
Step-by-Step Instructions
Preparation of the Marinade
To start, gather your ingredients. In a big bowl, mix the honey, soy sauce, minced garlic, sriracha, ginger, rice vinegar, and sesame oil. Add a pinch of salt and black pepper. Use a whisk to blend until smooth. This marinade gives your wings a sweet, spicy flavor.
Marinating the Chicken Wings
Next, add the chicken wings to the marinade. Make sure each wing gets coated well. Cover the bowl with plastic wrap or a lid. Place it in the fridge for at least one hour. For a better taste, marinate overnight. This step helps the wings soak up all those tasty flavors.
Baking the Wings to Perfection
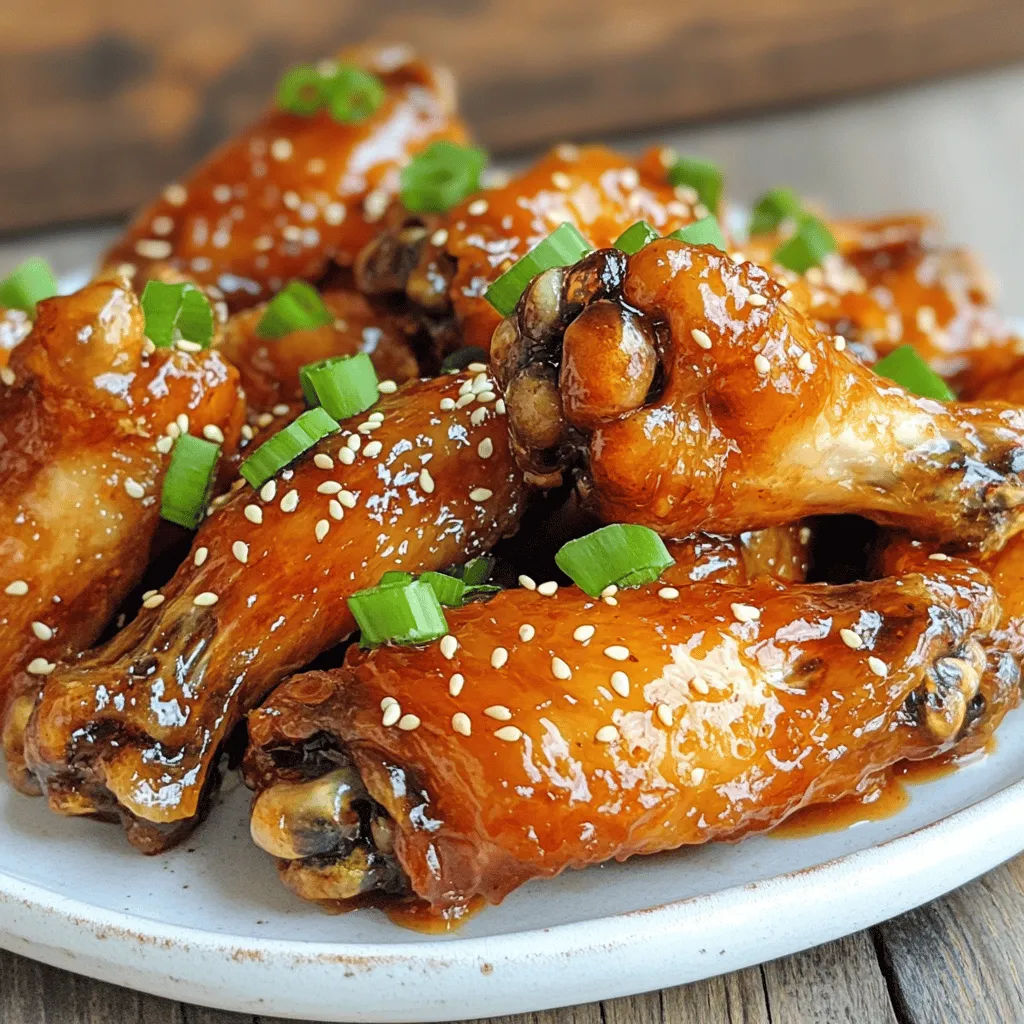
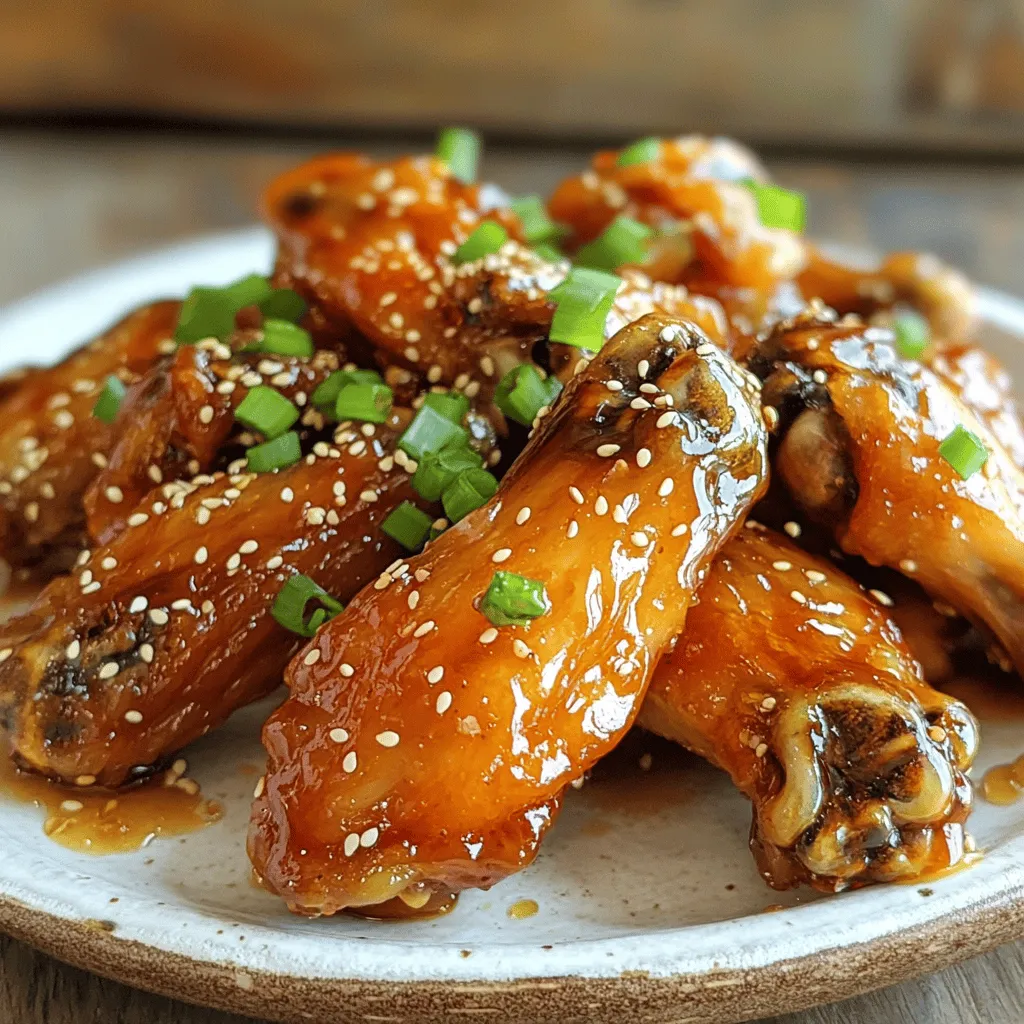
Now, preheat your oven to 400°F (200°C). Line a baking sheet with aluminum foil for easy cleanup. Put a wire rack on top. This helps the wings cook evenly. After marinating, take out the wings and let excess marinade drip off. Place them in a single layer on the rack. Bake for about 40-45 minutes, flipping halfway through. This helps them brown evenly. In the last five minutes, brush on some reserved marinade to enhance the flavor. When done, let the wings rest for a few minutes. Garnish with sesame seeds and chopped green onions for a fresh look. Enjoy these Spicy Honey Garlic Wings!
Tips & Tricks
How to Achieve Perfectly Crispy Wings
To get crispy wings, start by drying them well. Pat the chicken wings with paper towels. This step is key. Moisture leads to soggy skin. Next, use a wire rack when baking. This allows hot air to circulate around the wings. Bake them at 400°F (200°C). Flip the wings halfway through cooking. This helps them brown evenly.
Balancing Spice and Sweetness
Spice and sweetness should work together. The honey adds sweetness. Sriracha brings the heat. Start with 2 tablespoons of sriracha. Taste the marinade before marinating the wings. If you want more heat, add more sriracha. This way, you control the spice level. Remember, balance is key to great flavor.
Common Mistakes to Avoid
One common mistake is overcrowding the baking tray. Wings need space to crisp up. If you place too many on one tray, they will steam instead of bake. Another mistake is skipping the marinating step. Marinating adds depth of flavor. Don’t rush it! Lastly, avoid opening the oven too often. This lets heat escape and slows cooking. Follow these tips for the best wings ever!
Variations
Cooking Methods: Oven vs. Air Fryer
You can make spicy honey garlic wings in two main ways: the oven or the air fryer. Both methods yield tasty wings, but they differ in texture and cooking time.
– Oven: Baking wings in the oven gives them a crispy skin. It takes about 40-45 minutes at 400°F (200°C). You should flip them halfway for even cooking.
– Air Fryer: This method cooks wings faster. In about 25-30 minutes, you can have crispy wings. The air fryer circulates hot air around the wings, making them crispy without much oil.
Try both methods to see which you like best!
Flavor Variations: Adding Different Heat Levels
You can adjust the heat of your wings easily. If you want them spicier, add more sriracha to the marinade. For a milder flavor, reduce the sriracha or use sweet chili sauce. Here are some ideas:
– Mild: Cut sriracha to 1 tablespoon or use sweet chili sauce.
– Medium: Stick with the original recipe, using 2 tablespoons of sriracha.
– Spicy: Add chili flakes or use a hot sauce like habanero for a kick.
Experiment with different heat levels to find what you love!
Ingredient Substitutions for Dietary Needs
You can swap some ingredients to fit different diets. Here are some easy swaps:
– Gluten-Free: Use tamari instead of soy sauce.
– Vegan: Replace chicken wings with cauliflower florets and use maple syrup instead of honey.
– Low-Sodium: Look for low-sodium soy sauce or reduce the amount used.
These substitutions keep the flavors while catering to your dietary needs. Enjoy your cooking!
Storage Info
How to Store Leftover Wings
To store leftover wings, let them cool first. Place the wings in an airtight container. Seal it tightly to keep them fresh. Store the container in the fridge. They last for about three to four days. Make sure to label it with the date.
Reheating Tips for Best Results
For the best results when reheating, use an oven. Preheat your oven to 350°F (175°C). Place the wings on a baking sheet. Cover them with foil to keep moisture. Heat for about 10-15 minutes. This method keeps them crispy and juicy. You can also use a microwave, but they may not be as crispy.
Freezing and Thawing Guidelines
You can freeze wings if you want to save them for later. Place the cooled wings in a freezer-safe bag. Remove as much air as you can before sealing. These wings can stay frozen for up to three months. When you’re ready to eat, thaw them in the fridge overnight. Reheat as mentioned above for the best taste.
FAQs
How to Make the Sauce Spicier?
To make the sauce spicier, add more sriracha. You can also mix in crushed red pepper flakes. A dash of cayenne pepper works well too. Start with a small amount, then taste and adjust. Remember, a little goes a long way!
Can I Use Other Types of Chicken Cuts?
Yes, you can use other chicken cuts. Thighs, drumsticks, or even chicken breasts work well. Just keep in mind that cooking times may change. Thighs and drumsticks might need a bit longer. Always check for doneness with a meat thermometer.
What Sides Pair Well with Spicy Honey Garlic Wings?
Spicy honey garlic wings go great with several sides. Here are some ideas:
– Celery sticks
– Carrot sticks
– Blue cheese or ranch dressing
– French fries
– Coleslaw
– Garlic bread
These sides balance the heat and add a nice crunch.It includes all the ingredients and steps to make these tasty wings. Enjoy the cooking!
You learned how to make spicy honey garlic wings using simple steps. We covered key ingredients, tools, and how to marinate and bake the wings. Tips helped you get crispy results, balance flavors, and avoid common mistakes. You also discovered cooking methods and storage tips for leftovers.
Now, you can enjoy these tasty wings anytime. Experiment with flavors and cooking styles to suit your taste. Dive into this fun recipe, and share it with friends and family!


