Spicy Korean Beef Bowls Flavorful Quick Meal Idea

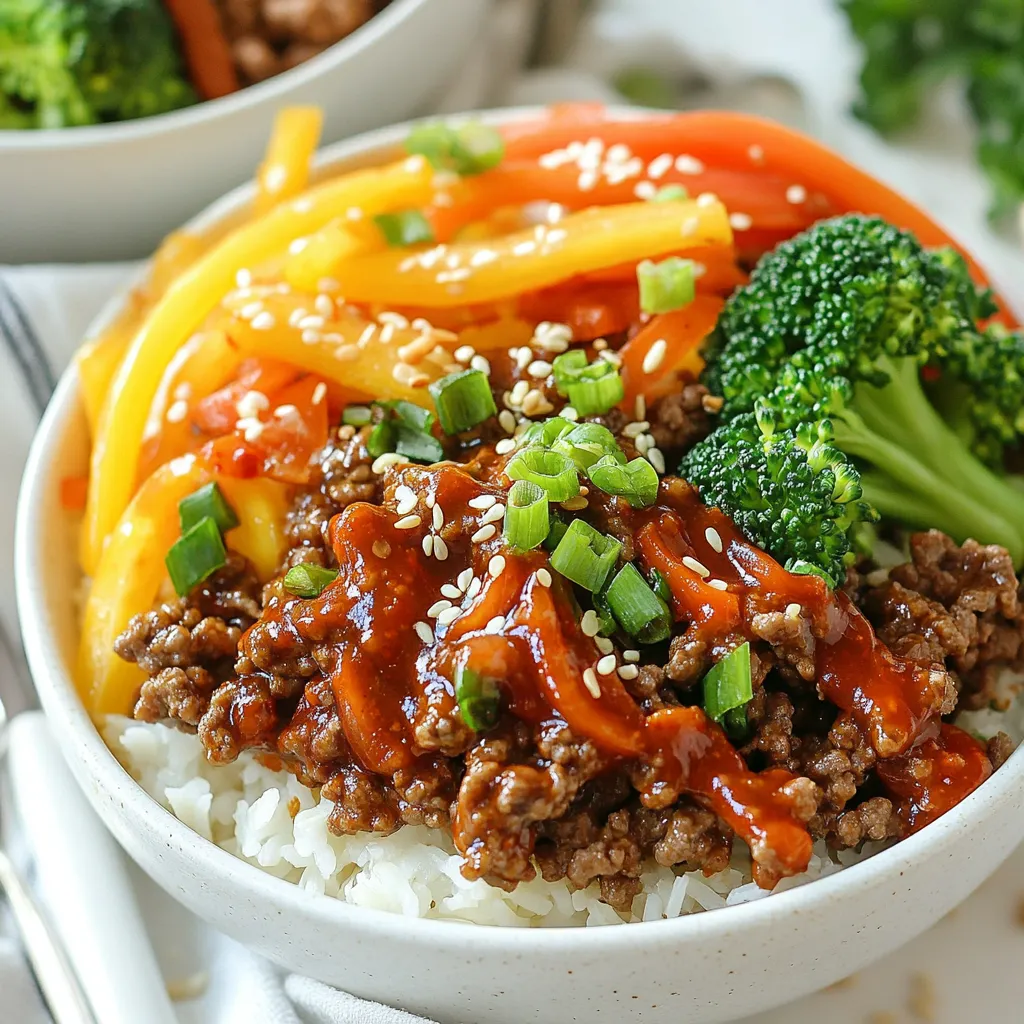
Craving a quick and tasty meal? Look no further than Spicy Korean Beef Bowls! This dish packs a punch with flavorful ground beef, fresh veggies, and a spicy sauce that will make your taste buds dance. In just a few steps, you can create a nutritious meal that impresses your family and friends. Let’s dive into the simple ingredients and easy steps to whip up this delicious bowl. You’re going to love it!
Why I Love This Recipe
- Bold Flavors: This recipe combines the rich umami of gochujang with the sweetness of brown sugar, creating a perfect balance that excites the palate.
- Quick and Easy: With just 30 minutes from prep to plate, this dish is perfect for busy weeknights without sacrificing flavor.
- Healthy Ingredients: Packed with vegetables like broccoli and bell peppers, this bowl is not only delicious but also nutritious.
- Customizable: Feel free to swap in your favorite veggies or protein to make this dish your own, ensuring it suits your taste perfectly.
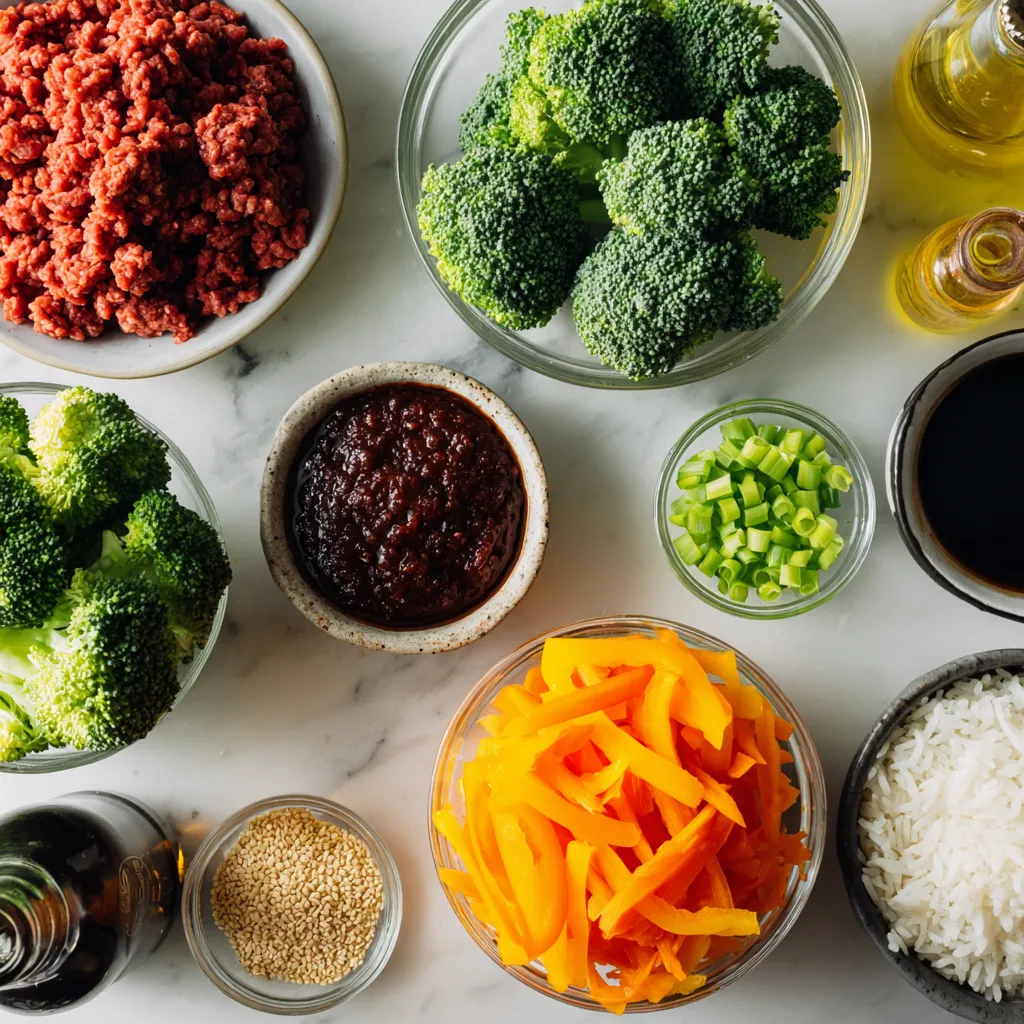
Ingredients
List of Main Ingredients
– 1 lb ground beef
– 3 tablespoons gochujang
– 2 tablespoons soy sauce
– 1 tablespoon sesame oil
– 1 tablespoon brown sugar
Fresh Produce and Garnishes
– 2 cloves garlic
– 1 teaspoon fresh ginger
– 2 cups broccoli florets
– 1 medium carrot
– 1 bell pepper
– 4 green onions
– Sesame seeds for garnish
Rice Options
– 2 cups cooked rice (white or brown)
– Alternative grains for serving
In this recipe, the combination of flavors is key. The main ingredient is ground beef, which brings rich taste and texture. Gochujang, a spicy Korean chili paste, adds heat and depth. Soy sauce gives a savory element, while sesame oil and brown sugar balance the flavors perfectly.
Fresh produce adds color and nutrition. Garlic and ginger boost flavor. Broccoli, carrots, and bell peppers provide crunch and sweetness. Green onions and sesame seeds enhance the dish with fresh notes.
For the base, use cooked rice or try alternative grains like quinoa or cauliflower rice. This choice can change the dish’s vibe entirely.

Step-by-Step Instructions
Cooking the Beef
1. Heat a large skillet over medium-high heat.
2. Add the ground beef and break it apart with a spatula.
3. Cook until the beef is fully browned, about 5-7 minutes.
4. Drain any excess fat from the skillet.
Incorporating Flavors
1. Lower the heat to medium.
2. Add gochujang, soy sauce, sesame oil, brown sugar, minced garlic, and grated ginger.
3. Stir well to coat the beef evenly.
4. Let the mixture simmer for 2-3 minutes, stirring occasionally.
Preparing Vegetables
1. In a separate pot or steamer, cook the broccoli, julienned carrots, and sliced bell pepper.
2. Steam for about 3-5 minutes until just tender.
3. Alternatively, sauté the veggies in sesame oil for more flavor.
Assembling the Bowls
1. Start with a scoop of cooked rice at the bottom of each bowl.
2. Add a hearty portion of the spicy beef mixture.
3. Top with a colorful array of the sautéed or steamed vegetables.
4. Make sure to arrange the ingredients nicely for a great look.
Garnishing
1. Garnish with chopped green onions and sesame seeds.
2. This adds a nice crunch and extra flavor.
3. Serve the bowls hot and enjoy with chopsticks for fun!
Tips & Tricks
Cooking Techniques
– Best practices for browning beef: Use a large skillet and set it on medium-high heat. This helps the beef cook evenly. Break it apart with a spatula as it cooks. This keeps it from clumping together. You want it nicely browned, which takes about 5-7 minutes. If there’s extra fat, drain it for a leaner dish.
– Flavor enhancement tips for gochujang: Gochujang is rich and spicy. To make it shine, mix it well with soy sauce, sesame oil, and brown sugar. This blend creates a sweet and spicy balance. Let the beef simmer for a few minutes to soak up all the flavors.
Pairing Suggestions
– Ideal side dishes: This dish pairs well with simple sides. Try steamed rice or a fresh salad. You can also serve it with kimchi for a traditional touch. The tangy taste of kimchi complements the spicy beef.
– Drink pairings to complement the meal: Enjoy this meal with a cold beer or sweet tea. If you prefer non-alcoholic drinks, try sparkling water with lime. These drinks balance the heat and enhance the flavors.
Presentation Tips
– Arranging ingredients for visual impact: When you serve, layer the rice, beef, and veggies in bowls. This makes each bowl colorful and inviting. Use bright vegetables like carrot and bell pepper to create a vibrant look.
– Using appropriate serving dishes: Choose bowls that contrast with your food. White bowls make the colors pop. For a fun touch, serve with chopsticks. This gives an authentic Korean experience and adds excitement to your meal.
Pro Tips
- Marinate for Extra Flavor: For an even deeper flavor, let the ground beef marinate in the sauce ingredients for 30 minutes before cooking. This allows the meat to absorb the spices and enhances the overall taste.
- Veggie Variations: Feel free to add or substitute your favorite vegetables such as snap peas, zucchini, or mushrooms. This allows you to customize the dish and utilize seasonal produce.
- Adjust the Spice Level: If you prefer a milder dish, reduce the amount of gochujang or add a bit of honey to balance the heat. You can also serve extra gochujang on the side for those who want more spice.
- Rice Cooking Tips: For fluffier rice, rinse it under cold water before cooking to remove excess starch. This will result in a lighter texture that pairs beautifully with the spicy beef.

Variations
Protein Options
You can mix up the protein in your Spicy Korean Beef Bowls. If you want a lighter option, try using ground chicken or turkey instead of beef. These meats soak up the flavors well and keep the dish tasty.
For those who prefer vegetarian meals, you can use tofu or tempeh. Crumble them up to mimic the texture of ground meat. They also absorb the sauces nicely, making every bite flavorful.
Spice Levels
Adjust the heat based on your taste. If you love spice, add more gochujang to your beef. For a milder dish, reduce the amount. Start with one tablespoon, then add more if you want more kick.
You can also explore different spicy sauces. Sriracha or chili garlic sauce can give your meal a unique twist. Don’t be afraid to experiment with flavors!
Vegetable Swaps
Seasonal vegetables work great in these bowls. Try using bell peppers, zucchini, or snap peas. These add color and nutrition to your dish.
For quick meals, frozen vegetables are a smart choice. They save time and still provide good flavor. Just steam or sauté them, and you’re ready to go!
Storage Info
Refrigeration
To store leftovers, let the spicy Korean beef bowls cool down. Once they’re cool, put the beef and veggies in a container. Make sure it has a tight lid to keep the food fresh. I like using glass containers because they help keep flavors intact.
Freezing Guidelines
You can freeze cooked beef and vegetables for later use. Just place them in freezer-safe bags or containers. Be sure to remove as much air as possible to prevent freezer burn. To thaw, move the container to the fridge overnight. When it’s time to eat, reheat in a pan over medium heat until hot.
Shelf Life
You can keep spicy Korean beef bowls in the fridge for about 3 to 4 days. If frozen, they can last up to 3 months. Just remember to label your containers with dates. This way, you know when they were made. Enjoy your meal prep!
FAQs
Common Questions
What is gochujang and where can I find it?
Gochujang is a thick, red chili paste from Korea. It has a sweet and spicy flavor. You can find it in Asian grocery stores or the international aisle of many supermarkets. Look for it in jars or squeeze bottles.
Can I make this dish gluten-free?
Yes, you can make Spicy Korean Beef Bowls gluten-free. Just use gluten-free soy sauce instead of regular soy sauce. This simple swap keeps the dish tasty and safe for those avoiding gluten.
Cooking Time and Servings
Can I double the recipe for a larger group?
Absolutely! You can double the recipe easily. Just make sure your skillet is large enough to hold all the beef and veggies. This way, you can serve more people without losing flavor.
How long does the dish take to cook?
The total cooking time is about 20 minutes. You’ll spend 10 minutes prepping and 10 minutes cooking. It’s a quick meal that’s perfect for busy nights!
Alternative Ingredients
What can I use instead of sesame oil?
If you don’t have sesame oil, try using olive oil or vegetable oil. While it may change the flavor slightly, it will still work well in this recipe.
Can I use instant rice with this recipe?
Yes, you can use instant rice! It cooks quickly, making it a great option for busy cooks. Just follow the package instructions to prepare it before assembling your bowls.
In this blog post, I covered how to make spicy Korean beef bowls. We discussed ingredients, cooking steps, and fun variations to try. You learned how to cook beef, prepare fresh veggies, and assemble your bowl perfectly. Presentation tips enhance your dish’s look. Keep storage and reheating tips in mind for leftovers. Experiment with spices and proteins for personal flair. Enjoy this tasty dish and impress your friends with your cooking skill

Spicy Korean Beef Bowls
Ingredients
- 1 lb ground beef
- 3 tablespoons gochujang (Korean red chili paste)
- 2 tablespoons soy sauce
- 1 tablespoon sesame oil
- 1 tablespoon brown sugar
- 2 cloves garlic, minced
- 1 teaspoon fresh ginger, grated
- 2 cups broccoli florets
- 1 medium carrot, julienned
- 1 bell pepper sliced into thin strips
- 4 green onions chopped (including green and white parts)
- 2 cups cooked rice (white or brown)
- to taste sesame seeds for garnish
Instructions
- In a large skillet, heat over medium-high heat. Add the ground beef and cook, breaking it apart with a spatula, until fully browned and cooked through, about 5-7 minutes. Once cooked, drain any excess fat from the skillet if needed.
- Reduce the heat to medium and incorporate the gochujang, soy sauce, sesame oil, brown sugar, minced garlic, and grated ginger. Stir well to coat the beef evenly with the sauce. Allow the mixture to simmer for an additional 2-3 minutes, stirring occasionally, so the flavors meld beautifully.
- In a separate pot or steamer, cook the broccoli, julienned carrots, and sliced bell pepper together until they are just tender, about 3-5 minutes. Alternatively, you can sauté the vegetables in a splash of sesame oil for an enhanced flavor and aroma.
- To assemble your bowls, start by placing a generous scoop of cooked rice at the bottom of each serving bowl. Next, top with a hearty portion of the spicy beef mixture, followed by a colorful array of sautéed vegetables.
- Finish the dish by garnishing with chopped green onions and a sprinkle of sesame seeds to add a delightful crunch and texture.


![- 1 pound boneless, skinless chicken breasts - Marinade: 1 cup buttermilk - Breading elements: 1 cup panko breadcrumbs, 1/2 cup all-purpose flour - Seasonings: 1 teaspoon garlic powder, 1 teaspoon onion powder, 1 teaspoon smoked paprika, 1/2 teaspoon salt, 1/2 teaspoon black pepper, 1/4 teaspoon cayenne pepper (optional) - Cooking oil: 2 tablespoons extra virgin olive oil - Garnish: Fresh parsley, finely chopped I love using fresh, simple ingredients for my crispy baked chicken tenders. The chicken breasts are the star here. I always choose boneless and skinless for easy handling. This keeps them juicy and tender. For the marinade, I use buttermilk. It helps to make the chicken soft and adds great flavor. Soak the chicken for at least 30 minutes. You can go up to two hours for the best taste. Next comes the breading. I prefer panko breadcrumbs because they give the best crunch. The all-purpose flour helps the breadcrumbs stick. Mixing garlic powder, onion powder, smoked paprika, salt, and pepper adds a nice depth of flavor. I add cayenne pepper for those who like a bit of heat. It’s optional, but it gives a great kick. Finally, a drizzle of extra virgin olive oil helps the tenders bake to a golden brown. You can finish with fresh parsley for a pop of color. Want the full recipe? Check out the [Full Recipe]. It’s a delicious way to enjoy chicken! First, set your oven to 425°F (220°C). While it heats up, grab a baking sheet. Line it with parchment paper. This will help the chicken not stick. It also makes cleanup easy. Take a big bowl and pour in the buttermilk. Add the chicken strips. Make sure they are all covered. Cover the bowl with plastic wrap. Let it sit for at least 30 minutes. For even more flavor, you can marinate it for up to 2 hours in the fridge. In another shallow dish, mix the flour, garlic powder, onion powder, smoked paprika, salt, black pepper, and cayenne pepper. Whisk it well. In a separate bowl, place the panko breadcrumbs. This is what will give your chicken that crunchy outside. After marinating, take the chicken out of the buttermilk. Let the excess drip off. Next, coat each piece in the flour mixture. Make sure each strip is covered. Gently shake off the extra flour. For extra crunch, dip the chicken back into the buttermilk. Then, roll it in the panko breadcrumbs. Press down a bit to help the crumbs stick. Arrange the coated chicken on the lined baking sheet. Drizzle a little olive oil on top. This helps it get golden brown. Bake the chicken for 20-25 minutes. Check with a meat thermometer. It should reach 165°F (75°C). Once the chicken is baked, take it out of the oven. Let it rest for about 5 minutes. This helps keep the juices in. Finally, garnish with fresh parsley. It adds a nice touch. Serve hot with your favorite sauces. Don't forget to check the Full Recipe for all the details! For the crispiest chicken tenders, use panko breadcrumbs. Panko adds a light and airy crunch that regular breadcrumbs can't match. Their larger flakes create a wonderful texture. To take it up a notch, use the double-dipping technique. First, coat the chicken in flour, then dip it back into the buttermilk before rolling it in panko. This extra layer of breading will give you an amazing crunch. To make your chicken tenders more flavorful, add spices to the breading mix. Garlic powder, onion powder, and smoked paprika all work great. Feel free to adjust the amounts to fit your taste. You can also try different marinades. A simple mix of lemon juice and herbs can change the flavor profile entirely. Experiment with your favorites to find the perfect taste. If you want a healthier option, consider using an air fryer. It cooks the chicken tenders with less oil while still keeping them crispy. Adjust the cooking time to about 12-15 minutes at 400°F (200°C). Another great tip is to place the chicken tenders on a wire rack. This allows hot air to circulate around the tenders, leading to even cooking and a crispier finish. {{image_4}} You can easily change the flavor of your chicken tenders. Here are two fun ideas: - Lemon pepper chicken tenders: Add lemon zest and black pepper to the flour mix. This gives a bright and zesty taste that wakes up your meal. - BBQ chicken tenders: Brush the tenders with your favorite BBQ sauce before baking. This adds a sweet and tangy flavor that kids love. If you have dietary needs, you can still enjoy these tenders: - Gluten-free options: Use gluten-free breadcrumbs instead of regular. This way, everyone can enjoy the meal without any worry. - Low-carb alternatives: Swap regular flour with almond flour or coconut flour. Both options give you a nice crunch while keeping carbs low. Pair your chicken tenders with tasty sides and dips: - Suggested dipping sauces: Try ranch dressing, honey mustard, or spicy sriracha. Each adds a unique kick to your tenders. - Side dish pairings: Serve them with a fresh salad, crispy fries, or steamed veggies. These sides complete your meal and add more nutrition. For more ideas, check out the Full Recipe to explore different flavors and tips! To keep your chicken tenders fresh, store them right. First, let the cooked tenders cool. Then, place them in an airtight container. You can store them in the fridge for up to three days. If you want to keep them longer, freezing is a great option. Use containers that seal tightly. Glass or plastic containers work well. If you use plastic wrap, make sure it hugs the tenders closely. This way, they won’t dry out. When you want to enjoy your leftovers, reheating is key. The best way to keep them crispy is to use the oven. Preheat your oven to 375°F (190°C) and bake for about 10 to 15 minutes. This method makes the chicken hot and crispy again. You can also use an air fryer. Set it to 375°F (190°C) and heat for about 5 to 7 minutes. This method is quick and gives great results. You can freeze both uncooked and cooked chicken tenders. For uncooked tenders, place them on a baking sheet to freeze individually first. Once they are frozen, transfer them to a freezer bag. This keeps them from sticking together. For cooked tenders, let them cool, then store them in an airtight container. They can last up to three months in the freezer. When you are ready to eat, just reheat them as mentioned earlier. For more detailed cooking methods, check the Full Recipe. Bake chicken tenders for 20 to 25 minutes at 425°F. This time gives them a golden color and keeps them juicy. Always check their internal temperature; it should reach 165°F for safety. Yes, you can make these chicken tenders ahead of time. Prepare them fully and store them in the fridge for up to 24 hours. When you're ready to eat, just pop them in the oven to reheat. This way, you save time while still enjoying a tasty meal. If you don't have buttermilk, use regular milk with a splash of vinegar or lemon juice. Let it sit for about five minutes. This method mimics buttermilk's acidity and helps tenderize the chicken just as well. Check chicken tenders with a meat thermometer. They are done when they hit 165°F inside. If you don’t have a thermometer, cut one open. The meat should be white, not pink, and the juices should run clear. Yes, chicken thighs work well in this recipe. They are more flavorful and juicy than breasts. Just cut them into strips like you would with the chicken breasts. The cooking time may be similar, so keep an eye on them. Crispy baked chicken tenders are easy and tasty. You start with simple ingredients, like chicken, buttermilk, and spices. The steps are clear, from marinating to baking. I shared tips for extra crunch and tasty flavors. Finally, you can personalize these tenders with countless variations and sides. Whether it's for a family dinner or meal prep, these tenders will impress. Enjoy making them and exploring your options!](https://joymealplan.com/wp-content/uploads/2025/06/4bfc5954-182f-42e7-9a90-e67bfbd9568b-768x768.webp)

![- 1 lb boneless, skinless chicken breasts - 2 bell peppers (red and green) - 1 medium yellow onion - Olive oil and spices The main ingredients are simple yet flavorful. I use boneless, skinless chicken breasts because they cook evenly. Bell peppers add color and sweetness, while the onion provides a tasty base. Olive oil helps the spices stick and adds richness. - Chili powder - Ground cumin - Garlic powder - Smoked paprika - Onion powder The seasoning blend makes this dish special. Chili powder gives a nice kick. Ground cumin adds warmth, while garlic and onion powders boost the flavor. Smoked paprika brings depth with its smoky taste. - Flour tortillas - Fresh cilantro - Lime wedges for serving To enjoy the fajitas, I use small flour tortillas that hold the filling well. Fresh cilantro adds a bright touch, and lime wedges bring a zesty finish. These extras make the meal even better. For the full recipe, check out the [Full Recipe]. - Set the oven to 425°F (220°C). - Line a sheet pan with parchment paper. - In a bowl, whisk together olive oil and spices. - Coat the chicken with the marinade well. - Add the sliced bell peppers and onion to the chicken. - Spread the mixture evenly across the sheet pan. - Bake for 20-25 minutes, stirring halfway through. This recipe makes it easy to prepare a tasty meal. You can enjoy it with warm tortillas. For the full recipe, check out the details provided earlier. To make the best sheet pan chicken fajitas, marinate the chicken longer if you can. Letting it soak in flavors for more time makes a big difference. A meat thermometer is also very handy. It helps you check if your chicken is fully cooked. Aim for 165°F (74°C) for safety. A fajita bar is a fun way to serve these. Lay out all the toppings for everyone to enjoy. Think about adding sour cream, salsa, or guacamole. To warm the tortillas, heat them in a dry skillet for about 30 seconds on each side. You can also wrap them in foil and place them in the oven for the last five minutes of cooking. Make your presentation pop with colorful toppings. Fresh avocado, diced tomatoes, and shredded cheese can make your dish look great. Don't forget to garnish with lime wedges and cilantro. These small touches bring out the flavors and make the dish more inviting. Enjoy the full recipe for more details on how to create this tasty meal! {{image_4}} You can switch the chicken for shrimp or tofu. Shrimp cooks fast and adds a nice flavor. Tofu is great for a plant-based option. If you want to use chicken, try different cuts like thighs. Thighs are juicy and full of flavor. If you want a meatless meal, replace chicken with mixed vegetables. Bell peppers, zucchini, and corn work well. Add beans for protein. Black beans or pinto beans add creaminess and taste. This keeps your meal hearty and filling. Want to spice things up? Add jalapeños for heat. They bring a nice kick that many love. You can also mix in different herbs and spices. Try oregano, cilantro, or smoked paprika for variety. Each adds unique flavors to your dish. Explore these options to find your favorite twist on this recipe! For the full recipe, check the link. After you enjoy your sheet pan chicken fajitas, store any leftovers in an airtight container. This keeps the flavors fresh. You can refrigerate them for up to 3 days. Make sure to let them cool before sealing to avoid steam buildup. To freeze the fajita mix, place it in a freezer-safe bag or container. Remove as much air as possible to prevent freezer burn. You can keep it frozen for up to 3 months. For thawing, move it to the fridge overnight. If you're in a hurry, use the microwave's defrost setting. To reheat without drying out your fajitas, use the oven. Preheat it to 350°F (175°C) and warm the fajitas in a covered dish for about 10-15 minutes. You can also use a skillet over low heat, adding a splash of water to create steam. This keeps everything juicy. Get creative with leftovers! Use them in tacos, wraps, or salads for a quick meal. You can even mix them into scrambled eggs for a tasty breakfast. For the full recipe, check it out above. Yes, you can use frozen chicken for this recipe. Just follow these guidelines: - Thawing: Always thaw the chicken before marinating. You can do this overnight in the fridge or use the microwave's defrost setting. - Cooking Time: If you skip thawing and bake from frozen, increase the cooking time by 5-10 minutes. - Check Doneness: Use a meat thermometer to ensure the chicken reaches 165°F (74°C). There are many tasty sides to pair with your fajitas. Here are some great options: - Rice: Cilantro lime rice adds a fresh touch. - Beans: Black beans or refried beans are both hearty and flavorful. - Salad: A simple green salad with lime vinaigrette complements the fajitas well. - Chips and Salsa: Serve with tortilla chips and your favorite salsa for a crunchy side. Want extra heat? Here are some tips to spice up your fajitas: - Add Jalapeños: Sliced fresh jalapeños can give a nice kick. - Use Hot Sauce: Drizzle your favorite hot sauce over the fajitas before serving. - Increase Spice Mix: Add more chili powder or a pinch of cayenne pepper to the marinade for more heat. For the complete recipe, check the Full Recipe section. In this blog post, we covered a tasty sheet pan chicken fajitas recipe. You learned about the key ingredients and how to prepare them. I shared tips to make your fajitas perfect, including variations for different diets. Storing leftovers and reheating them properly helps reduce waste. Remember, these fajitas are easy to customize and fun to serve. Enjoy making them with family or friends, and let your creativity shine. Your next meal can be delicious and simple!](https://joymealplan.com/wp-content/uploads/2025/06/bce38261-6b1a-4600-b2d8-c9c563997242-768x768.webp)