Spicy Mango Salsa Fresh Flavor for Any Dish

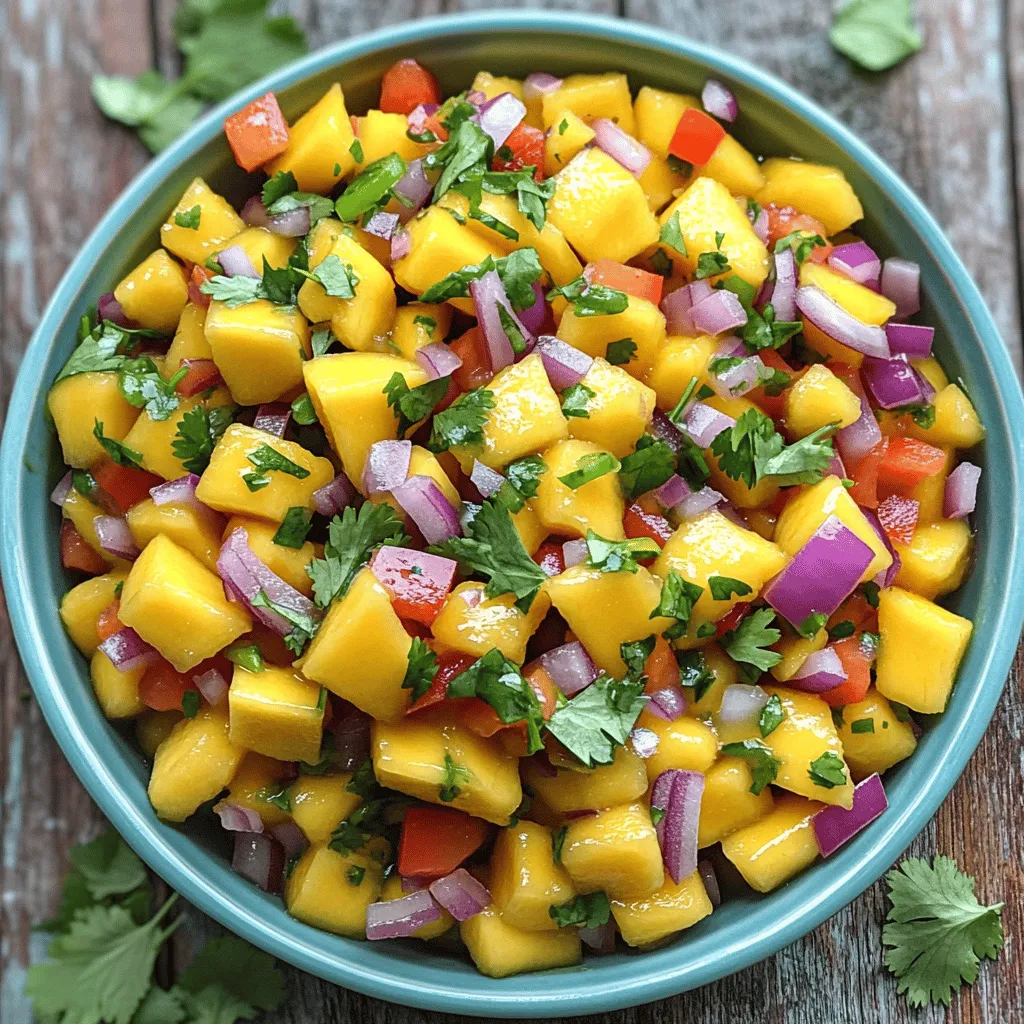
Are you ready to add a burst of flavor to your meals? Spicy Mango Salsa is your answer! This zesty blend of juicy mangos, fresh herbs, and spicy peppers can elevate any dish. Whether you’re looking to jazz up grilled chicken or enjoy it with tortilla chips, this salsa is both easy to make and deliciously satisfying. Let’s dive into the fresh ingredients and steps to create this tasty treat!
Ingredients
List of Ingredients
– 2 ripe mangos, peeled and diced
– 1 small red onion, finely chopped
– 1 red bell pepper, diced
– 1 jalapeño pepper, seeded and minced
– 2 tablespoons freshly squeezed lime juice
– 1 tablespoon honey or agave syrup
– 1/4 cup fresh cilantro, finely chopped
– Salt and freshly cracked black pepper to taste
Nutritional Information
A serving of spicy mango salsa has about:
– Calories: 70
– Fat: 0.5g
– Protein: 1g
– Carbohydrates: 18g
– Fiber: 2g
Health Benefits
Mangos are rich in vitamins A and C. They support skin health and boost your immune system. Red bell peppers add vitamin C and antioxidants. Jalapeños provide capsaicin, which can help with metabolism. Fresh cilantro is good for digestion and adds flavor without calories. Together, these ingredients make your salsa not just tasty, but also healthy!
Step-by-Step Instructions
Preparation Steps
To make your spicy mango salsa, start by gathering your ingredients. In a medium bowl, combine the diced mangos, red onion, and bell pepper. Use a spatula to mix gently. This helps keep the salsa fresh and colorful.
Next, add the minced jalapeño pepper. If you want less heat, start with a small amount. You can always add more later. Drizzle the lime juice over the mixture. Then, add honey or agave syrup. Mix lightly to coat everything without mashing the mangos.
Now, fold in the chopped cilantro. Season your salsa with salt and freshly cracked black pepper. Be sure not to overmix; you want that nice salsa texture!
Let the salsa rest at room temperature for about 15 minutes. This step helps all the flavors blend well. You can serve the salsa chilled or at room temperature. It goes great with tortilla chips or as a topping for grilled fish or chicken.
Tips for Perfect Salsa
You can adjust the spice level by adding more or less jalapeño. Start small if you’re unsure. The resting time is also key. Letting the salsa sit allows the flavors to mix. This extra time makes a big difference in taste!
Video Demonstrations
For a better idea of the process, I recommend watching a video demonstration. Seeing the steps can help you feel more confident in making your salsa. You can find useful videos online that show the exact mixing and serving techniques.
Tips & Tricks
Serving Suggestions
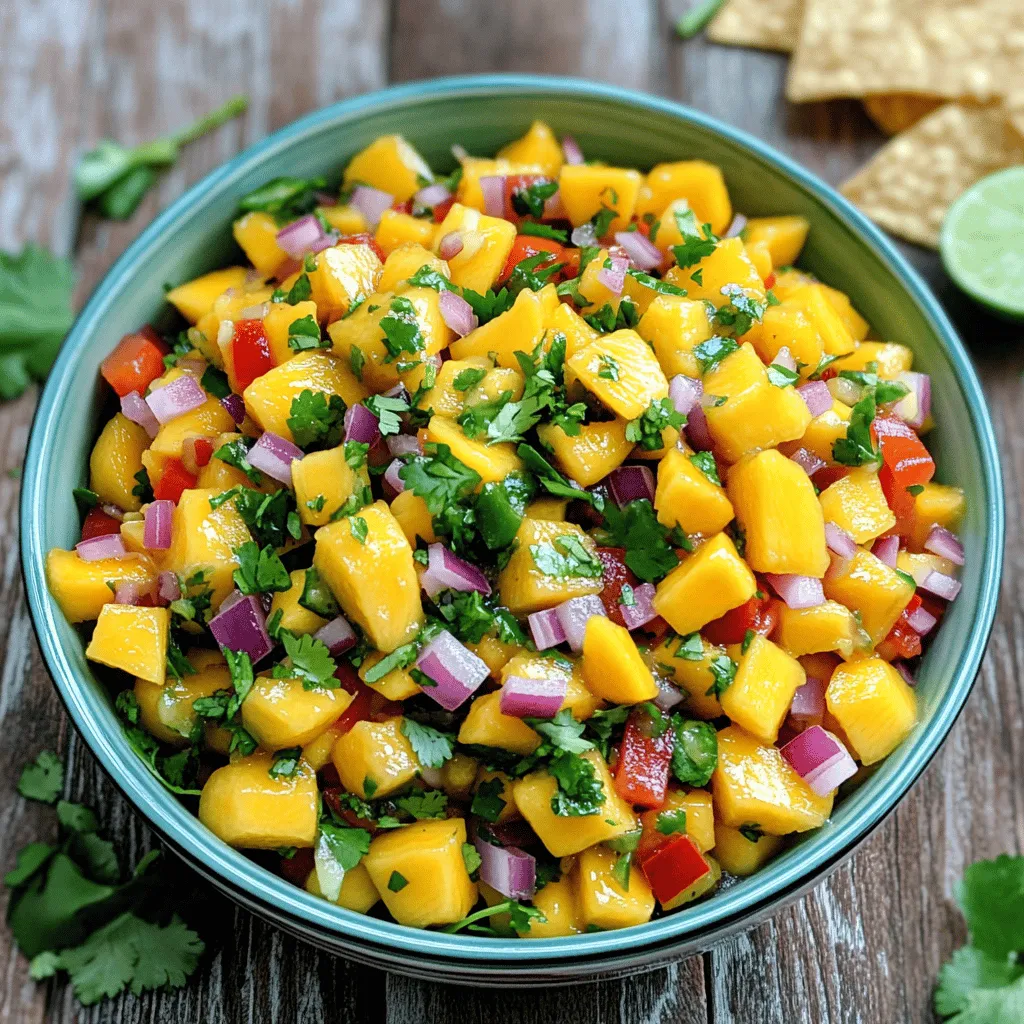
Spicy mango salsa shines with many dishes. It pairs well with crispy tortilla chips. The crunch complements the fresh salsa nicely. You can also serve it with grilled fish or chicken. The salsa adds a sweet and spicy kick to these proteins. For a great presentation, use a colorful bowl. Garnish with lime wedges and extra cilantro leaves. This makes the dish look fresh and inviting.
Substitutions and Adjustments
If you have dietary needs, you can swap some ingredients. Use green onions instead of red onion for a milder taste. If you’re avoiding sugar, skip the honey or agave syrup. For a sweeter salsa, add more mango or a touch of pineapple. To spice it up, include more jalapeño or add a dash of hot sauce. Adjusting the salsa to your taste makes it perfect for you.
Maximizing Flavor
Choosing ripe mangos is key to great flavor. Look for mangos that feel slightly soft when you squeeze them. Their skin should have a rich color, usually yellow or red. To enhance the flavor, let the salsa rest at room temperature. This allows the ingredients to meld together. A little lime juice brightens the taste and balances the sweetness. Enjoy this fresh and zesty salsa with your favorite meals!

Variations
Tropical Fruit Variations
You can easily change your spicy mango salsa by adding other fruits. Pineapple adds a nice tartness. Kiwi gives it a sweet twist. Both fruits blend well with mango. You can also add avocado for creaminess. The smooth texture balances the salsa’s heat.
Herb and Spice Variations
Try using different herbs in your salsa. Mint brings a fresh taste. Basil offers a sweet hint. Both herbs can change the flavor profile. You can also play with different chilies. Mild poblanos work for less heat, while serranos add more kick. Adjust the spice to fit your taste!
Seasonal Adaptations
Seasons can inspire new salsa ideas. In the fall, try adding pumpkin and warming spices like cinnamon. This gives your salsa a cozy vibe. Winter is perfect for citrus fruits like oranges or grapefruits. They add a bright flavor that warms up any dish. Each season brings a new twist to your salsa!
Storage Info
Storage Recommendations
To keep your spicy mango salsa fresh, store it in an airtight container. Glass or plastic containers work well. Make sure to seal it tight to avoid air exposure. Place the container in the fridge right after serving. This helps maintain its vibrant taste and texture.
Shelf Life
Your spicy mango salsa will last about 3 to 5 days in the fridge. Keep an eye out for signs of spoilage. If the colors fade or it develops a sour smell, it’s time to toss it. Mold is another clear sign that it’s no longer safe to eat.
Freezing Tips
Yes, you can freeze mango salsa! Just use a freezer-safe container or a resealable bag. Leave some space for expansion as it freezes. When you’re ready to enjoy it again, thaw it in the fridge overnight. To serve, mix it well; the flavors will still be bright and delicious!
FAQs
How do I adjust the spice level in spicy mango salsa?
To adjust the spice, start with less jalapeño. You can always add more later. If you want it milder, remove the seeds and membranes. For more heat, add diced jalapeño or even a serrano pepper. You can also mix in a pinch of cayenne pepper for a kick. Remember to taste as you go!
Can I make spicy mango salsa ahead of time?
Yes, you can make spicy mango salsa ahead of time! Prepare it up to 24 hours in advance. Store it in an airtight container in the fridge. This helps the flavors meld together. Just give it a quick stir before serving. Freshness is key, so try to eat it within a couple of days.
What dishes pair well with spicy mango salsa?
Spicy mango salsa fits many dishes. Here are some great pairings:
– Grilled chicken or fish
– Tacos or burritos
– Rice bowls
– Crispy tortilla chips
– Quesadillas
This salsa adds a fresh burst of flavor to any meal.
Is spicy mango salsa healthy?
Yes, spicy mango salsa is healthy! It is low in calories and full of nutrients. Mangos are rich in vitamins A and C. They also provide fiber. Peppers add antioxidants and boost your metabolism. This salsa is a great way to enjoy fresh ingredients while keeping your meals light and tasty.
This spicy mango salsa is fresh, easy to make, and full of flavor. You learned about the key ingredients, their health benefits, and how to prepare the salsa step-by-step. Remember to adjust spice levels and pair it with your favorite dishes for the best taste. You can also get creative with variations or try out different storage methods to keep it fresh. Enjoy making your salsa, and have fun exploring all the tasty options!


![- 2 large chicken breasts, diced into bite-sized pieces - 1 tablespoon olive oil - 1 teaspoon taco seasoning - 1 teaspoon smoked paprika - 1 jalapeño, finely chopped - 1 cup corn kernels - 1 cup black beans - 1 cup shredded cheddar cheese - 1 cup shredded Monterey Jack cheese - 4 large flour tortillas - Salt and pepper, to taste - 1/4 cup fresh cilantro, chopped - Sour cream and salsa, for serving When I cook spicy chicken quesadillas, I focus on fresh and simple ingredients. The chicken breasts are the star here. I like to cut them into small pieces for quick cooking. This way, they soak up all the flavors from spices like taco seasoning and smoked paprika. Next, I add a jalapeño for heat, but you can remove the seeds for less spice. Corn and black beans add sweetness and texture. Together, they create a colorful filling. Cheese is crucial for that melty goodness. I mix cheddar and Monterey Jack for a creamy blend. Don’t forget the large flour tortillas; they wrap everything up nicely. Finally, I season with salt and pepper. Fresh cilantro is my go-to garnish. It brightens the dish. I serve these quesadillas with sour cream and salsa. These additions bring out the best flavors. For the full recipe, check the details above. - Heat olive oil in a large skillet. - Add diced chicken and season with taco seasoning and smoked paprika. - Cook until chicken is thoroughly cooked, about 7-10 minutes. In this step, make sure the skillet is hot enough. You want the chicken to sizzle when it hits the pan. The taco seasoning adds a great flavor. Smoked paprika gives a nice smoky touch. Stir the chicken often. This helps it cook evenly. You’ll know it’s ready when there’s no pink left. - Stir in chopped jalapeño, corn, and black beans. - Cook for an additional 2-3 minutes. Now, it’s time to boost the flavor. Adding jalapeños brings some heat. If you want it milder, remove the seeds. The corn adds sweetness, while black beans give protein. Mix everything well. Let them cook together for a few minutes. This melds the flavors nicely. - Place flour tortilla in a skillet and sprinkle with cheese. - Add chicken and vegetable mixture and fold. - Cook until golden brown on both sides. Grab a large skillet again. Place one tortilla in it and sprinkle half the cheese on top. Next, scoop some of the chicken and vegetable mix onto one half. Fold the tortilla over. This creates a pocket of goodness! Cook until the bottom is golden brown. Flip it carefully. Both sides should be crispy and brown. - Slice quesadillas into wedges. - Garnish with cilantro and serve with sour cream and salsa. Once cooked, take the quesadilla out. Let it cool for a minute. Then, slice it into wedges. This makes dipping easy. Sprinkle fresh cilantro on top for a burst of flavor. Serve with sour cream and salsa on the side. These add a creamy and tangy element to your dish. For the full recipe, check out the details above! - Ensure chicken is thoroughly cooked to avoid any raw texture. - Use a non-stick skillet for easier flipping. When cooking chicken, make sure it reaches an internal temperature of 165°F. This keeps it safe and tasty. I often check by cutting a piece in half to see if it's no longer pink. A non-stick skillet helps prevent the quesadillas from sticking. This way, flipping them becomes a breeze. - Experiment with different cheeses for added flavor. - Adjust jalapeño amount based on spice preference. Trying different cheeses can change the whole dish. You might love a mix of pepper jack and cheddar for a spicy kick! If you like it mild, reduce the jalapeño. On the other hand, if you crave heat, toss in more. Every bite should be just right for you. - Pair with Mexican rice or a fresh salad. - Serve with lime wedges for a citrusy twist. I love serving these quesadillas with Mexican rice. It adds a nice touch and makes the meal more filling. A fresh salad with crunchy veggies offers a great contrast. Don’t forget lime wedges! A squeeze of lime adds a bright flavor that complements the spices perfectly. For the full recipe, check out the section above. {{image_4}} You can make spicy chicken quesadillas vegetarian by swapping chicken for grilled vegetables or tofu. Try using bell peppers, zucchini, or mushrooms. These veggies will soak up the spices and add great taste. Tofu gives a nice texture and protein. Just make sure to season them well with taco seasoning. If you prefer other meats, use beef or shrimp instead of chicken. Both will bring their own unique flavors. For beef, consider using ground beef or steak strips. For shrimp, use peeled and deveined shrimp. Explore different marinades for varied flavors. A spicy marinade can add excitement to your filling! Cheese is key in quesadillas. You can try pepper jack cheese for some extra heat. Its creamy texture matches well with the spicy filling. Goat cheese is another option for a creamy twist. It melts nicely and adds a tangy flavor. Mixing different cheeses can create a rich, delicious taste! For the full recipe, check out the [Full Recipe]. Store any leftover quesadillas in an airtight container. They will last in the fridge for up to 3 days. This way, you can enjoy them again and save time on cooking. You can freeze uncooked quesadillas for later use. Just prepare them as you normally would, but do not cook them. Wrap each quesadilla tightly in plastic wrap. Cooked quesadillas can also be frozen for up to one month. This is a great way to have a quick meal ready. To reheat, use a skillet for the best texture. Heat the skillet over medium heat and add the quesadilla. Cook until heated through and crispy. If you need a quick option, a microwave works too. Just place the quesadilla on a plate, cover it with a paper towel, and heat for about 30 seconds to 1 minute. Enjoy your tasty meal! You can use beans or grilled vegetables as a filling. Black beans work well. They add protein and fiber. Grilled peppers or zucchini also give a great taste. This option is tasty and healthy. Common sides include guacamole, rice, or a fresh salsa. Guacamole adds creaminess. Rice provides a nice base. Fresh salsa gives a tangy kick. These sides make your meal complete and fun. Yes, corn tortillas can be used, but they may require more care while cooking. They can break easily, so handle them gently. Warm them first to soften. This will help with folding and cooking. Add sliced jalapeños or chopped habaneros to the filling. These peppers boost the heat level. You can also use spicy cheese like pepper jack. This adds flavor and spice all at once. For the full recipe, check out the details above. This blog post discussed how to make delicious spicy chicken quesadillas. We started with the main and additional ingredients, like chicken, jalapeños, corn, and beans. Next, I detailed a step-by-step cooking guide, from preparing the chicken to serving the filled quesadillas. I also shared helpful tips, variations, and storage methods to enhance your experience. Make these quesadillas your own by trying new ingredients. Enjoy the process and share them with friends!](https://joymealplan.com/wp-content/uploads/2025/06/eac4fc54-0f3b-4254-8def-89065c9b0855-768x768.webp)
![To make this tasty roasted red pepper hummus, you need a few key items. Here’s what you’ll need: - 1 can (15 oz) chickpeas, thoroughly rinsed and well-drained - 2 large roasted red peppers, peeled and coarsely chopped - 3 tablespoons creamy tahini - 2 tablespoons extra virgin olive oil, plus more for drizzling - 2 cloves of garlic, finely minced - 1 tablespoon freshly squeezed lemon juice - 1 teaspoon ground cumin for warmth - Salt and freshly cracked black pepper, to taste - Cold water, as required for desired creaminess - Smoked paprika and freshly chopped parsley for an elegant finish Want to kick your hummus up a notch? Consider these fun add-ins: - A pinch of cayenne pepper for heat - Roasted garlic for a sweeter taste - A tablespoon of fresh herbs like basil or cilantro - A splash of balsamic vinegar for tanginess - A bit of feta cheese for creaminess Feel free to mix and match these options. Each one can add a unique twist to your hummus. The ingredients in this hummus are not just tasty; they pack a nutritious punch: - Chickpeas: High in protein and fiber, they help keep you full. - Tahini: Made from sesame seeds, it adds healthy fats and calcium. - Olive Oil: Rich in monounsaturated fats, it supports heart health. - Garlic: Offers immune-boosting properties and can help lower blood pressure. - Red Peppers: Full of vitamins A and C, they promote healthy skin and eyes. Each ingredient works together to create a dish that's not only delicious but also good for you. For the full recipe, check out the detailed cooking guide. Making roasted red pepper hummus is easy and quick. You need a food processor. Gather all your ingredients first. This helps keep things organized. Start by blending everything together until smooth. You can add water for creaminess. 1. Place the rinsed chickpeas, chopped roasted red peppers, tahini, olive oil, minced garlic, lemon juice, and ground cumin into your food processor. 2. Secure the lid tightly. Blend the mix on high speed. Stop to scrape the bowl down. This ensures everything mixes well. 3. If the hummus is too thick, add cold water. Do this one tablespoon at a time. Blend after each addition until you reach the right creaminess. 4. Taste your hummus. Add salt and freshly cracked black pepper to make it better. 5. Transfer the smooth hummus to a serving bowl. Drizzle olive oil on top for extra flavor. 6. Sprinkle smoked paprika and chopped parsley on top for color and flair. To get your hummus just right, focus on the blending time. Blend longer for a smoother texture. If it’s still thick, keep adding cold water slowly. Make sure to taste as you go. Adjust the seasoning to your liking. A little tweak can make a big difference. One big mistake is using dry chickpeas. Always use canned chickpeas for smoothness. Another pitfall is not rinsing the chickpeas. Rinsing helps reduce the canned taste. Avoid over-blending; you want a creamy texture, not a soup. Lastly, be careful with salt. Start with a little and taste as you go. To boost flavor, try adding lemon zest. It adds brightness and fresh taste. You can also mix in roasted garlic for a sweet, rich flavor. For extra heat, toss in a pinch of cayenne pepper. Experiment with herbs like cilantro or basil for unique twists. Each of these can make your hummus stand out. Presentation matters! Serve the hummus in a colorful bowl to catch the eye. Drizzle olive oil on top for a glossy finish. Sprinkle smoked paprika or fresh herbs for color. Pair it with warm pita bread and crunchy veggies. Arrange these on a large platter for a beautiful spread. Explore the [Full Recipe] for more ideas on serving this dish. {{image_4}} Want some heat? Add a kick to your hummus! Use sliced jalapeños or red pepper flakes. Blend them in with your other ingredients for a spicy twist. This adds depth and flavor. You can also drizzle with hot sauce before serving. It’s a perfect match for those who love bold flavors. Herbs can give your hummus a fresh taste. Try adding fresh basil, cilantro, or parsley. You can also mix in other roasted veggies. Think zucchini or eggplant for extra flavor. These additions make your hummus unique and vibrant. They bring in new textures and tastes, making it fun to try different combinations. This hummus is already vegan and gluten-free! You can enjoy it with confidence. It uses chickpeas, tahini, and olive oil, which fit both diets perfectly. If you want to make it even more exciting, serve it with gluten-free crackers or veggie sticks. This way, everyone can enjoy it at any gathering. For the full recipe, check the details mentioned earlier. To keep your hummus fresh, place it in an airtight container. This helps prevent air from drying it out. Make sure to seal the lid tightly. You can also drizzle a thin layer of olive oil on top. This adds flavor and keeps it moist. Store the container in the fridge. It will stay good for about 4 to 5 days. If you want to save hummus for later, freezing is a great option. Start by placing the hummus in a freezer-safe container. Leave some space at the top, as it may expand when frozen. You can also use ice cube trays for small portions. Once frozen, transfer the cubes to a zip-top bag. This method makes it easy to thaw just what you need. Homemade hummus can last up to 3 months in the freezer. Choose containers made of glass or BPA-free plastic. Glass containers are great for keeping flavors intact. They are also easy to clean. If you use plastic, make sure it is strong and safe for freezing. Avoid containers that are too large for small amounts. This helps keep your hummus fresh. For extra care, label your containers with the date. This way, you’ll know when to use them. For the full recipe, check out the Roasted Red Pepper Hummus Delight. Homemade roasted red pepper hummus can last about 5 to 7 days in the fridge. Make sure to store it in an airtight container. This keeps it fresh and tasty. If you notice any changes in smell or color, it's best to toss it out. Yes, you can use jarred roasted red peppers. They save time and add great flavor. Just drain them well before adding to your hummus. This helps keep the hummus from getting too watery. Roasted red pepper hummus pairs well with many foods. Here are some ideas: - Warm pita bread - Fresh vegetable sticks like carrots, cucumbers, and bell peppers - Crackers or tortilla chips - A colorful mezze platter with olives and herbs You can find the full recipe above. Enjoy your tasty hummus! In this post, we explored the key ingredients and step-by-step instructions for roasted red pepper hummus. We covered tips for flavor, common mistakes, and variations. You learned how to store hummus properly and answered your main questions. Remember, this dish is simple yet versatile. Enjoy making your own hummus using fresh ingredients. Try different flavors to find your favorite mix. Happy cooking!](https://joymealplan.com/wp-content/uploads/2025/06/a7fe634f-a62f-44e2-9912-8eb9edd9a507-768x768.webp)


