Strawberry Shortcake Icebox Cake Dreamy Summer Delight

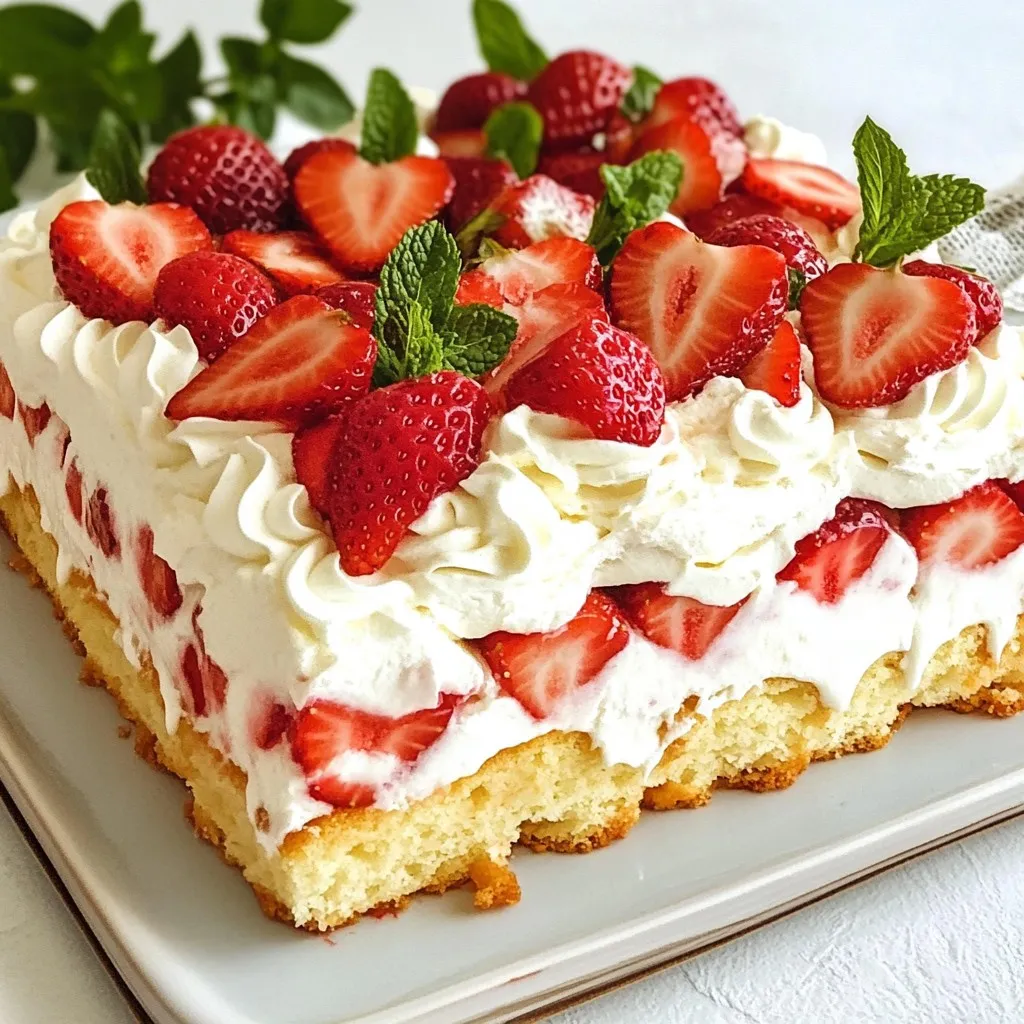
Get ready for a taste of summer with my Strawberry Shortcake Icebox Cake! This dreamy dessert is cool, creamy, and made with fresh strawberries. Whether you’re hosting a BBQ or just need a sweet treat, this cake is easy to whip up. You’ll love the simple layers of sponge cake and whipped cream. Let’s dive into the ingredients and steps to create this refreshing delight!
Why I Love This Recipe
- Refreshing Flavor: The combination of fresh strawberries and whipped cream creates a light and refreshing dessert perfect for warm weather.
- Easy Preparation: This icebox cake requires minimal effort, making it perfect for both novice and experienced bakers.
- Make-Ahead Convenience: With its chilling time, you can prepare this dessert in advance, allowing you to enjoy your gathering without last-minute stress.
- Beautiful Presentation: Layers of strawberries and cream, topped with mint, make this cake not only delicious but also stunning to serve.
Ingredients
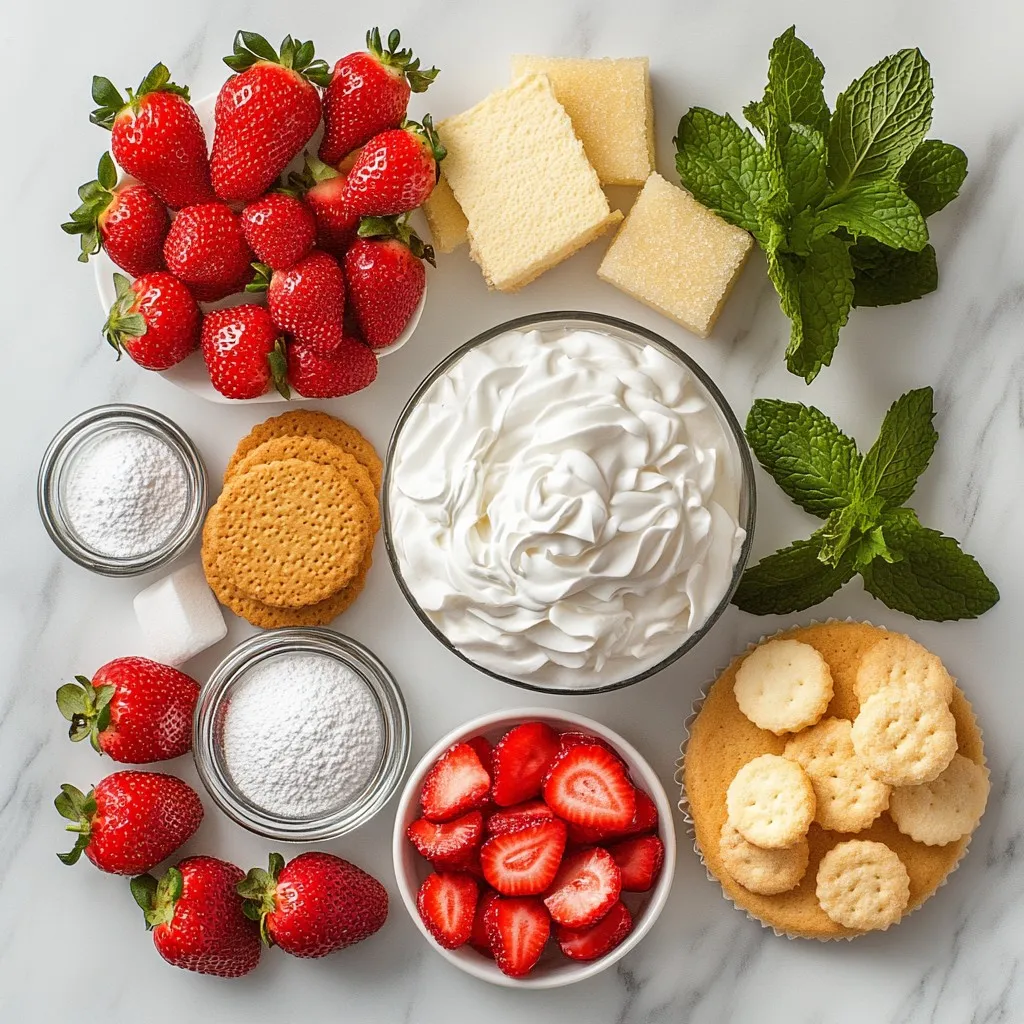
For the Strawberry Shortcake Icebox Cake, you will need some simple ingredients. Here is a complete list:
– Fresh strawberries
– Granulated sugar
– Heavy whipping cream
– Powdered sugar
– Vanilla extract
– Sponge cake or ladyfinger cookies
– Fresh mint leaves
Each ingredient plays a key role in making this cake delightful. Fresh strawberries bring sweetness and color. Granulated sugar helps draw out the juice from the strawberries, creating a tasty syrup. Heavy whipping cream forms the fluffy whipped topping, while powdered sugar adds just the right sweetness.
Vanilla extract enhances the flavor of the cream, making it rich and inviting. You can use round sponge cake or ladyfinger cookies as the base. They soak up the strawberry juices, adding to the cake’s flavor. Finally, fresh mint leaves add a pop of color and a refreshing touch when you serve it.
Gather these ingredients, and you are ready to create a summer treat that everyone will love!

Step-by-Step Instructions
Preparation of Strawberries
1. Start with 2 cups of fresh strawberries. Hull and slice them.
2. Put the sliced strawberries in a medium bowl.
3. Add 1/4 cup of granulated sugar.
4. Gently toss the strawberries until they are well coated.
5. Let the mixture sit for 10-15 minutes at room temperature.
6. This resting time helps form a sweet syrup from the strawberries.
Whipping the Cream
1. In another bowl, pour in 1 cup of heavy whipping cream.
2. Use an electric mixer on medium speed to beat the cream.
3. As it thickens, slowly add 1/2 cup of powdered sugar.
4. Also add 1 teaspoon of vanilla extract for flavor.
5. Keep whipping until soft peaks form.
6. Be careful not to overwhip; you want it light and airy.
Assembling the Cake
1. If using sponge cake, slice it into rounds.
2. Use ladyfinger cookies whole if you prefer.
3. In a 9×13 inch baking dish, place a layer of cake or cookies.
4. Spoon a thick layer of whipped cream over this base.
5. Add a layer of the macerated strawberries on top.
6. Pour some of the strawberry juice over the cream.
7. Repeat layering: cake, whipped cream, strawberries, until you reach the top.
8. Finish with a final layer of whipped cream for a lovely look.
9. Cover tightly with plastic wrap and refrigerate for at least 4 hours.
10. For best results, chill overnight to let flavors mix and soften.
11. Before serving, add fresh mint leaves and extra strawberry slices for garnish.
Tips & Tricks
Choosing the Right Strawberries
– Look for bright red strawberries.
– Check for firm texture.
– Avoid any soft or mushy ones.
– Buy them in season for the best taste.
– Summer months are ideal for fresh strawberries.
Choosing the right strawberries is key to a great icebox cake. Fresh, ripe strawberries burst with flavor. They should feel firm and have a shiny skin. Always check for any signs of spoilage. When they are in season, the taste is at its best. You can find them at local farms or markets during summer. This will ensure your cake shines with the best flavors.
Perfect Whipped Cream
– Start with cold heavy cream.
– Chill your mixing bowl and beaters.
– Beat until soft peaks form.
– Stop before it becomes too thick.
Whipped cream makes this cake dreamy. Start with cold heavy cream for the best results. Chilling your bowl and beaters helps it whip faster. Beat the cream slowly and stop when it forms soft peaks. Overwhipping will make it grainy, which is not what you want. A light and fluffy whipped cream is the goal for a perfect layer of cream.
Layering Techniques
– Use even layers for balance.
– Spread whipped cream smoothly.
– Add strawberries with their juice.
– Finish with a whipped cream layer.
Layering is important for a beautiful cake. Start with a layer of sponge or ladyfingers. Spread whipped cream evenly on each layer. When adding strawberries, include some juice. This adds moisture and flavor. Finish with a thick layer of whipped cream on top. It makes your cake look inviting and delicious. Remember, presentation is key, so take your time with each layer!
Pro Tips
- Use Fresh Strawberries: For the best flavor, opt for ripe, in-season strawberries. They will enhance the overall taste of your icebox cake.
- Whip Cream to Soft Peaks: Be careful not to overwhip the cream. Stop when you reach soft peaks for a light and airy texture that complements the cake.
- Chill Overnight: For optimal flavor and texture, let your cake chill overnight. This allows the layers to meld beautifully and the cake to soften.
- Garnish Just Before Serving: To keep the mint leaves fresh and vibrant, add them as a garnish right before serving the cake.

Variations
Fruit Alternatives
You can swap strawberries for other berries. Blueberries or raspberries work great too. Their tartness adds fun and flavor. You can also mix berries for a colorful look. Adding citrus zest brings a fresh twist. Orange or lemon zest brightens the cake. It gives a nice zing that enhances the fruit.
Vegan or Dairy-Free Options
For a vegan version, use coconut cream instead of heavy cream. It whips up nicely and adds a tropical flavor. You can also try almond milk or oat milk for a lighter cream. Egg-free sponges are easy to find or make. They keep the cake fluffy and light.
Flavor Enhancements
You can get creative with flavors! Add almond or lemon extract for a unique taste. Just a few drops can change the whole cake. If you want something special, try adding a splash of liqueur, like amaretto. For a warm note, sprinkle in some cinnamon or nutmeg. These small changes make a big difference!
Storage Info
Best Practices for Refrigeration
To store your Strawberry Shortcake Icebox Cake, cover it tightly with plastic wrap. This keeps it fresh and prevents odors from mixing. Place it in the fridge for up to three days. The longer it sits, the more the flavors blend.
Freezing Options
Yes, you can freeze the cake! It’s best to freeze it before adding the fresh mint or extra strawberries. Wrap the cake tightly in plastic wrap, then in aluminum foil. This protects it from freezer burn. You can keep it in the freezer for about one month.
Thawing Tips
When you are ready to enjoy your cake again, take it out of the freezer. Place it in the fridge overnight to defrost slowly. This helps maintain its texture. Avoid thawing at room temperature, as it can make the cake soggy. Enjoy the delicious layers of flavor!
FAQs
Can I make the cake ahead of time?
Yes, you can make the cake ahead of time. I recommend chilling it for at least 4 hours. For the best flavor, chill it overnight. The longer it rests, the better the flavors blend.
What can I substitute for heavy cream?
If you need a substitute for heavy cream, you have options. Use full-fat coconut milk for a non-dairy choice. You can also try whipping cream. Both will work well in this recipe.
How long does the cake last in the fridge?
The cake lasts about 3 days in the fridge. Keep it covered to maintain freshness. When the cake starts to look soggy or smells off, it’s time to throw it away.
This blog outlines how to create a delicious strawberry cake. You learned about the key ingredients like fresh strawberries, sugar, and whipped cream. I shared step-by-step instructions for preparation and tips for perfecting each layer. We also explored variations to suit any diet and discussed storage options. Remember, using the freshest strawberries is key to flavor. Enjoy experimenting with this recipe. You can impress friends and family with your own creations. Happy bakin

Strawberry Shortcake Icebox Cake
Ingredients
- 2 cups fresh strawberries, hulled and sliced
- 1/4 cup granulated sugar
- 1 cup heavy whipping cream
- 1/2 cup powdered sugar
- 1 teaspoon vanilla extract
- 1 package round sponge cake or ladyfinger cookies
- to taste fresh mint leaves for garnish
Instructions
- In a medium bowl, combine the sliced strawberries with the granulated sugar. Gently toss the strawberries until they are evenly coated. Let the mixture sit for 10-15 minutes at room temperature.
- In a separate bowl, use an electric mixer to beat the heavy cream on medium speed until it begins to thicken. Gradually add the powdered sugar and vanilla extract, then continue whipping until soft peaks form.
- If you are using sponge cake, slice it into evenly sized rounds. If you prefer ladyfingers, you can leave them whole.
- In a 9x13 inch baking dish, start your layers by placing a single layer of sponge cake rounds or ladyfingers at the bottom.
- Spoon a generous layer of the whipped cream mixture over the cake, spreading it evenly across the surface.
- Next, add a layer of the macerated strawberries on top of the whipped cream, including some of the strawberry juice.
- Continue to alternate the layers: cake, whipped cream, strawberries, repeating until the dish is nearly full. Finish with a layer of whipped cream on top.
- Once assembled, cover the dish tightly with plastic wrap and refrigerate for at least 4 hours, or preferably overnight.
- Just before serving, garnish the cake with fresh mint leaves and a few extra slices of strawberry.


![- 1 cup pumpkin puree - 1 ½ cups crushed graham crackers - ½ teaspoon pumpkin spice - ½ cup powdered sugar - 1 teaspoon vanilla extract - 8 oz dark chocolate - 1 tablespoon coconut oil - Flaky sea salt To create chocolate covered pumpkin truffles, you need simple yet flavorful ingredients. Start with pumpkin puree, either canned or homemade. This is the base for your truffles. Next, grab crushed graham crackers. They give the truffles a unique texture and sweetness. Pumpkin spice adds warmth and flavor. You can adjust the amount if you want a stronger taste. Powdered sugar sweetens the mixture, making each bite a delight. Vanilla extract rounds out the flavor profile beautifully. For the chocolate coating, use dark chocolate. It contrasts nicely with the sweetness of the truffles. Adding coconut oil to the chocolate helps it melt smoothly. Finally, a sprinkle of flaky sea salt on top enhances the flavor, making each truffle even more irresistible. - Mixing bowl - Spoon or spatula - Measuring cups and spoons - Parchment paper - Baking sheet - Double boiler or microwave-safe bowl You will need a few tools to make these truffles. A mixing bowl is essential for combining your ingredients. A spoon or spatula helps you mix everything well. Measuring cups and spoons ensure that your ingredients are precise. Parchment paper is key for lining your baking sheet. It keeps the truffles from sticking. You also need a baking sheet to hold the truffles while they chill. Finally, a double boiler or a microwave-safe bowl helps melt the chocolate evenly. With these ingredients and tools, you're ready to create chocolate covered pumpkin truffles that everyone will love. For the complete recipe, check out the Full Recipe link. Start by mixing the pumpkin puree with the dry ingredients. In a large bowl, add: - 1 cup pumpkin puree - 1 ½ cups crushed graham crackers - ½ teaspoon pumpkin spice - ½ cup powdered sugar - 1 teaspoon vanilla extract Use a spatula or wooden spoon to blend these together. Mix until you have a smooth, dough-like consistency. The mixture should be firm enough to hold its shape. Next, it’s time to shape the truffles. With clean hands, scoop out tablespoon-sized portions. Roll each portion into a ball, about 1 inch in diameter. Place the balls on a parchment-lined baking sheet. Make sure to space them apart. This helps them keep their shape. After shaping, cover the baking sheet with plastic wrap and chill in the fridge for about 30 minutes. While the truffles chill, let’s melt the chocolate. You can use a double boiler or the microwave. If you choose the double boiler, place a heatproof bowl over a pot of simmering water. Stir the chocolate and coconut oil together until smooth. If using the microwave, heat in 20-second bursts, stirring in between. Make sure the chocolate is silky before dipping. Once the truffles are chilled, it’s time to coat them. Dip each ball into the melted chocolate. Make sure it’s fully covered. Use a fork to lift it out, letting the excess chocolate drip back into the bowl. Place the coated truffles back on the parchment-lined sheet. While the chocolate is still wet, sprinkle a pinch of flaky sea salt on each truffle. This adds a burst of flavor that balances the sweetness. Let the truffles sit at room temperature until the chocolate sets. You can speed up this process by placing them in the fridge for about 15-20 minutes. Now, your delicious chocolate-covered pumpkin truffles are ready to enjoy. You can find the full recipe above for more details on each step. Chilling the truffles is key. It helps them hold their shape better when you dip them. After you roll the truffles, place them in the fridge for about 30 minutes. This step makes a big difference in texture. To roll smooth truffles, make sure your hands are clean and dry. Use a light touch as you form the balls. If your mixture is sticky, wet your hands slightly. This helps shape them without making a mess. Melting chocolate can be tricky. To melt chocolate evenly, I recommend using a double boiler. Fill a pot with a bit of water, then place a heatproof bowl on top. Stir the chocolate as it melts. This method prevents burning. If you want a nice shine, add a tablespoon of coconut oil to the chocolate. It will make your truffles look glossy and appealing. Get creative when it comes to serving. You can sprinkle a little cinnamon on top for extra flavor. Pumpkin seeds also add a nice crunch and look great on a dessert table. These truffles pair well with coffee or a spiced chai. Consider serving them at your next fall gathering or holiday party. They will surely impress your guests! For the full recipe, check the main section. {{image_4}} You can easily change the taste of your truffles. Try adding almond extract for a nutty twist. A bit of orange zest will give your truffles a fresh, fruity kick. You can also swap out the pumpkin spice for cinnamon or nutmeg. Each spice brings a new flavor to your truffles. If you need gluten-free options, look for gluten-free graham crackers. Many brands offer these, and they work just as well. For those who prefer dairy-free treats, use dairy-free chocolate for the coating. There are great dairy-free chocolate chips available that melt nicely. Want to make your truffles extra special? Roll them in crushed nuts like pecans or walnuts. This adds a nice crunch. You can also use colorful sprinkles for a fun look. If dark chocolate isn’t your thing, try coating the truffles in white chocolate instead. It adds a sweet, creamy flavor that pairs well with pumpkin. For the full recipe, check out the [Full Recipe]. To keep your chocolate covered pumpkin truffles fresh, store them in the fridge. The cool temperature helps maintain their texture and flavor. Place the truffles in an airtight container to prevent them from drying out. This way, they can stay yummy for up to one week. If you want to enjoy them longer, try to avoid leaving them out at room temperature for too long. If you want to save some truffles for later, freezing is a great option. First, place the truffles on a baking sheet, making sure they don’t touch. Freeze them for about an hour until they are firm. Once frozen, transfer the truffles to a freezer-safe bag or container. They can last for up to three months in the freezer. When you’re ready to enjoy them, simply take out the number of truffles you want. Let them thaw in the fridge for a few hours or at room temperature for about 30 minutes. Avoid using heat to thaw, as this can ruin their texture. Now they're ready to be devoured! Chocolate covered pumpkin truffles can last about one week in the fridge. Store them in an airtight container to keep them fresh. After a week, check for signs of spoilage, such as a change in smell or texture. If they feel sticky or smell off, it's best to toss them. Yes, you can easily make these truffles vegan! Use dairy-free chocolate instead of dark chocolate. Swap the coconut oil for a plant-based butter or more coconut oil. This keeps the rich flavor while making it suitable for a vegan diet. These truffles shine at holiday gatherings and parties. They also make great gifts for friends and family. Their festive look and delicious taste fit well with autumn themes. Serve them during Halloween, Thanksgiving, or any cozy get-together. Yes, you can find chocolate covered pumpkin truffles at many bakeries. Look for local shops that specialize in gourmet treats. Some popular brands also offer these truffles online. You can enjoy them without all the fuss of making them at home. For a homemade touch, check out the Full Recipe for a delightful DIY version! Creating chocolate covered pumpkin truffles is simple and fun. We covered key ingredients like pumpkin puree, graham crackers, and dark chocolate. You learned tools needed, step-by-step instructions, and tips for easy truffle-making. We also looked at flavors, variations, storage, and common questions. These truffles make a perfect treat for any occasion. Enjoy making these delightful bites and share them with friends! You’ll impress everyone with your tasty skills.](https://joymealplan.com/wp-content/uploads/2025/07/35417da5-91a5-48e5-8a48-b090ca73d24b-768x768.webp)

