Summer Berry Trifle Delightful and Easy Dessert Recipe

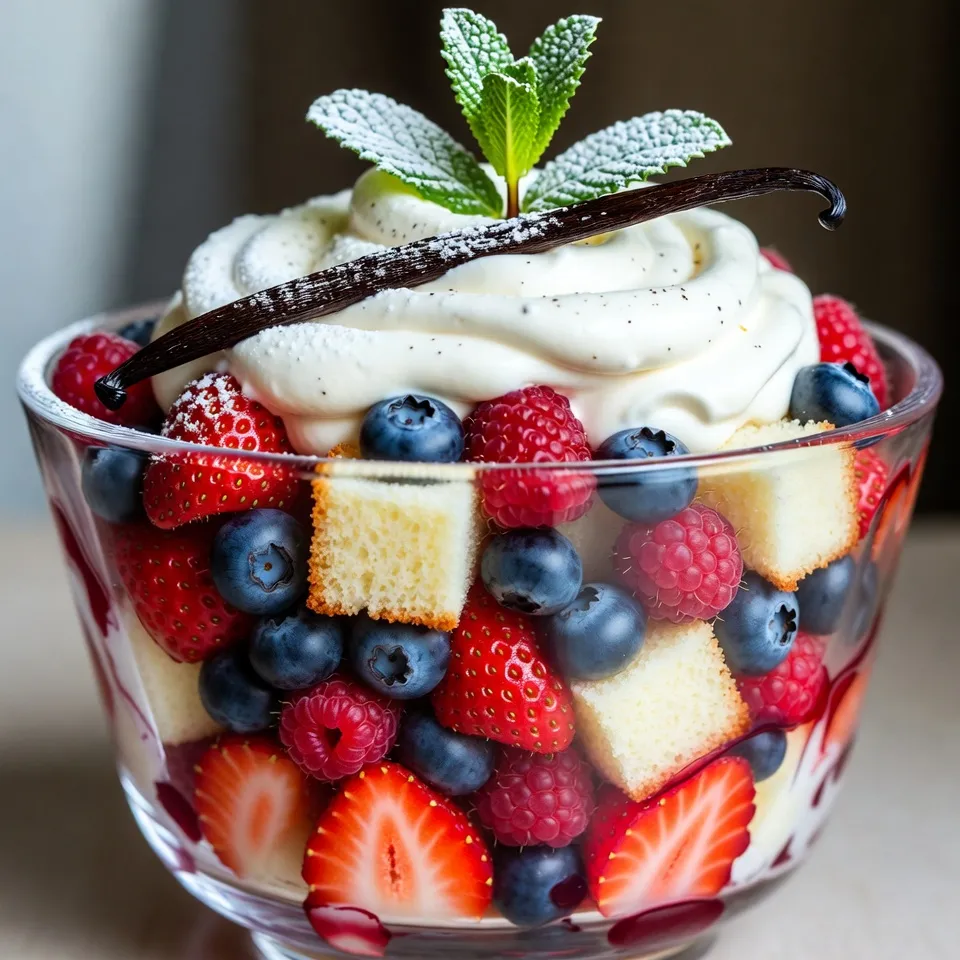
Looking for a sweet treat to brighten your summer days? This Summer Berry Trifle recipe is your answer! It’s simple, fresh, and packed with flavor. I’ll guide you through each step to create a stunning dessert that’s perfect for any occasion. With layers of cream, cake, and vibrant berries, this trifle will impress your guests and bring joy to your table. Let’s dive into this delightful dessert together!
Why I Love This Recipe
- Fresh and Fruity: This trifle is bursting with the vibrant flavors of summer berries, making it a refreshing dessert for warm days.
- Easy to Assemble: With simple layers of cake, yogurt, and cream, this recipe is quick to put together, perfect for last-minute gatherings.
- Visually Stunning: The colorful layers of the trifle create an eye-catching presentation that will impress your guests.
- Versatile Option: You can easily customize the trifle with different fruits or cake types to suit your taste or dietary preferences.
Ingredients
List of Ingredients for Summer Berry Trifle
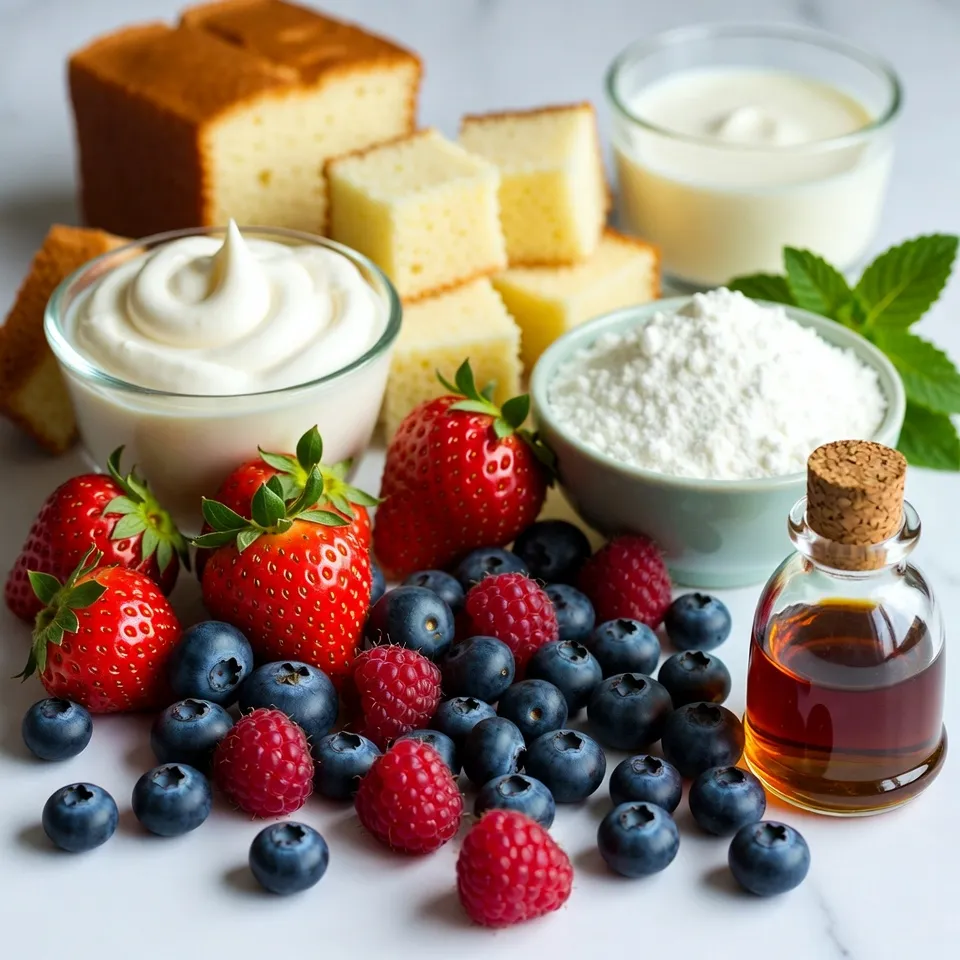
To make a delicious Summer Berry Trifle, you need:
– 2 cups mixed berries (strawberries, blueberries, raspberries)
– 1 cup heavy whipping cream
– 1/2 cup powdered sugar
– 1 teaspoon pure vanilla extract
– 1 cup vanilla sponge cake, cut into small cubes
– 1 cup creamy vanilla yogurt
– Fresh mint leaves for garnish
Substitutes for Ingredients
If you need substitutes, here are some great options:
– Heavy whipping cream: Use coconut cream for a dairy-free version.
– Powdered sugar: You can use granulated sugar, but it may not dissolve as easily.
– Vanilla sponge cake: Any light cake or ladyfingers will work well.
– Vanilla yogurt: You can use plain yogurt and add a little vanilla extract for flavor.
Tips for Choosing the Best Berries
Choosing the right berries is key for a great trifle. Here’s how to pick the best:
– Color: Look for bright, vibrant colors. This means they are ripe and flavorful.
– Freshness: Berries should feel firm and plump. Avoid any that are mushy or have spots.
– Smell: Fresh berries should have a sweet scent. If they don’t smell good, they may not taste good either.
– Season: Buy berries in season for the best flavor. Summer is the prime time for strawberries, blueberries, and raspberries.

Step-by-Step Instructions
Preparing the Cream Mixture
First, take a large bowl. Add 1 cup of heavy whipping cream, 1/2 cup of powdered sugar, and 1 teaspoon of pure vanilla extract. Use an electric mixer to beat the mixture. Set it to medium-high speed. Keep mixing until stiff peaks form, about 3 to 5 minutes. This means the cream should hold its shape well.
Layering the Trifle
Get your trifle bowl or a large, clear glass dish. Start with a layer of vanilla sponge cake cubes. Spread them evenly at the bottom. Next, take a spoon and spread 1 cup of vanilla yogurt over the cake. Make sure to cover it fully. Now, grab your mixed berries. Sprinkle them evenly over the yogurt. This is where it gets colorful!
Then, take half of the whipped cream mixture. Spoon it over the berries, using a spatula to smooth it out. Repeat this layering process. Start again with sponge cake, then yogurt, more berries, and finally top it with the remaining whipped cream.
Chilling and Serving Instructions
Cover the trifle with plastic wrap. Place it in the refrigerator for at least 2 hours. This helps the flavors blend and the cake soak up some moisture.
When you’re ready to serve, take it out of the fridge. Garnish the top with fresh mint leaves and some extra berries. This makes it look beautiful and fresh! Enjoy this delightful treat!
Tips & Tricks
How to Achieve Perfect Whipped Cream
To make the best whipped cream, start with cold tools. Chill your mixing bowl and beaters in the fridge for 10 minutes. Use heavy whipping cream for a rich texture. Add powdered sugar for sweetness and vanilla for flavor. Beat on medium-high speed for 3-5 minutes until stiff peaks form. Watch closely; over-mixing can lead to butter.
Best Practices for Layering Trifles
Layering is key for a great trifle. Start with a solid base of sponge cake cubes. Press them down gently, but don’t compact them too much. Follow with a smooth layer of yogurt. Make sure to cover the cake completely. Then, sprinkle berries evenly for color and taste. Finish with whipped cream, smoothing it out for a nice look. Repeat these layers for a stunning trifle.
Making Ahead: Can You Prepare in Advance?
Yes, you can prepare this trifle in advance. Assemble it up to 24 hours before serving. Just cover it with plastic wrap and chill in the fridge. This allows flavors to blend well. However, don’t add mint or extra berries until just before serving. This keeps them fresh and vibrant on top.
Pro Tips
- Freshness Matters: Use fresh, ripe berries for the best flavor. If possible, buy them the same day you plan to serve the trifle for optimal taste and texture.
- Layering Technique: To achieve a visually appealing trifle, layer the ingredients carefully and evenly. This creates a stunning display of colors and textures that enhances the dessert’s presentation.
- Chilling Time: Allow the trifle to chill for at least 2 hours, but if you can, let it sit overnight. This gives the flavors time to meld and the sponge to soak up moisture, enhancing the overall taste.
- Garnish for Style: Just before serving, add a sprinkle of extra berries and fresh mint leaves on top. This not only adds a pop of color but also enhances the aroma and freshness of the dessert.

Variations
Berry Variations: Using Different Fruits
You can switch the berries for other fruits. Try peaches, mangoes, or blackberries. Each fruit brings its own flavor. For a tropical twist, add pineapple chunks or kiwi slices. Mix and match your favorite fruits. This keeps your trifle fresh and fun!
Alternatives to Vanilla Cake
If you want a change from vanilla cake, use pound cake or angel food cake. Both options work well in a trifle. You can even use chocolate cake for a richer taste. Gluten-free cake is also a great choice for those with dietary needs.
Dairy-Free Options for the Cream and Yogurt
For a dairy-free version, use coconut cream instead of heavy cream. It whips up nicely and adds a subtle coconut flavor. Instead of yogurt, use dairy-free yogurt made from almond or soy milk. These swaps keep the trifle creamy and delicious without dairy.
Storage Info
How to Store Leftover Trifle
To store leftover trifle, cover it tightly with plastic wrap. This keeps the dessert fresh and prevents it from absorbing other fridge odors. Place the trifle in the fridge. It’s best to eat it within two days for the best taste and texture.
Shelf Life of Components
The different parts of the trifle each have a shelf life. The whipped cream lasts about two days in the fridge. The sponge cake can stay fresh for up to four days. Mixed berries are best eaten within three days. Yogurt usually lasts about a week, so keep that in mind.
Freezing Trifle: Is it Possible?
Freezing trifle is not ideal. The cream and yogurt can change texture when thawed. If you want to freeze it, keep the layers separate. Freeze the sponge cake and berries in airtight bags. When ready to serve, assemble the trifle fresh with the newly made whipped cream.
FAQs
Can I make Summer Berry Trifle a day ahead?
Yes, you can make Summer Berry Trifle a day ahead. This dessert benefits from sitting in the fridge. It lets the flavors mix well. Just prepare the layers and chill it overnight. The sponge cake absorbs moisture, making it even better.
What are the best berries to use for a trifle?
The best berries for a trifle are strawberries, blueberries, and raspberries. These fruits add color and flavor. Strawberries give a sweet taste, while blueberries add a slight tartness. Raspberries bring a bold flavor that stands out. You can also use blackberries or other seasonal berries for variety.
How many servings does this recipe yield?
This recipe yields about 6 to 8 servings. It depends on how big you scoop the portions. If you serve it in smaller cups, you might get more servings. The trifle is perfect for sharing at parties or family gatherings.
With the right ingredients and easy steps, you can create a delicious Summer Berry Trifle. You learned how to pick the best berries and substitute when needed. I shared tips for making perfect whipped cream and layering your trifle just right. Remember, you can make this treat ahead or mix up the fruits for fun.
Enjoy every layer and flavor. This dessert is a crowd-pleaser that brings joy. So gather your ingredients and get started on this sweet deligh

Summer Berry Trifle Delight
Ingredients
- 2 cups mixed berries (including strawberries, blueberries, and raspberries)
- 1 cup heavy whipping cream
- 1/2 cup powdered sugar
- 1 teaspoon pure vanilla extract
- 1 cup vanilla sponge cake, cut into small cubes
- 1 cup creamy vanilla yogurt
- to taste fresh mint leaves for garnish
Instructions
- In a large mixing bowl, combine the heavy whipping cream, powdered sugar, and vanilla extract. Using an electric mixer, beat the mixture on medium to high speed until stiff peaks form. This should take about 3-5 minutes. Once whipped, set aside.
- Gently rinse the mixed berries under cold running water to clean them thoroughly. Use a paper towel to pat them dry. For strawberries, remove the green stems and slice them in half, ensuring all berries are ready for layering.
- In a trifle bowl or a large, clear glass dish, start by placing a layer of vanilla sponge cake cubes at the bottom. Make sure the cubes are evenly distributed to create a solid base.
- Take a spoon and carefully spread a layer of vanilla yogurt over the sponge cake, making sure to cover it fully and smoothly.
- Next, evenly distribute a layer of the mixed berries over the yogurt. Try to sprinkle them uniformly for a beautiful aesthetic.
- Spoon half of the prepared whipped cream mixture over the berries, using a spatula to smooth it out gently.
- Repeat the layering process starting again with another layer of sponge cake, following up with yogurt, another layer of berries, and finishing with the remaining whipped cream on the very top.
- Cover the assembled trifle with plastic wrap and place it in the refrigerator. Let it chill for at least 2 hours to allow the flavors to meld together and for the sponge cake to absorb some moisture.
- After chilling, carefully remove the trifle from the fridge. Just before serving, garnish the top with fresh mint leaves and a scattering of extra berries for a vibrant finish.


![- 1 ½ cups all-purpose flour - 1 teaspoon baking powder - ½ teaspoon baking soda - ¼ teaspoon salt - ½ cup unsalted butter, softened - 1 cup granulated sugar - 2 large eggs, room temperature - Zest of 1 lemon - 2 tablespoons lemon juice - ½ teaspoon vanilla extract - ½ cup Greek yogurt - 1 cup fresh blueberries - 1 tablespoon flour (for coating blueberries) Gather these ingredients before you start baking. They are the stars of this loaf. The butter gives it a rich taste while the lemon adds brightness. The blueberries bring sweetness and color. Make sure your butter is softened. It helps mix well with sugar. Room temperature eggs also blend better. The Greek yogurt adds moisture and keeps the loaf fluffy. The flour, baking powder, baking soda, and salt work together to give the loaf structure. The lemon zest and juice infuse a fresh, zesty flavor. Coating the blueberries in flour helps them stay suspended in the batter. This step is key to a beautiful loaf. You will love how all these flavors come together. For the full recipe and instructions, check out the [Full Recipe]. - Preheat your oven to 350°F (175°C). - Grease a 9x5-inch loaf pan with butter or cooking spray. - Lightly dust the pan with flour, or line it with parchment paper. - In a medium bowl, whisk together 1 ½ cups of all-purpose flour, 1 teaspoon of baking powder, ½ teaspoon of baking soda, and ¼ teaspoon of salt. - In a large bowl, cream together ½ cup of softened butter and 1 cup of granulated sugar until light and fluffy, about 2 to 3 minutes. - Add 2 large eggs, one at a time, mixing well after each. Stir in the zest of 1 lemon, 2 tablespoons of lemon juice, and ½ teaspoon of vanilla extract until well combined. - Gradually add the dry mixture to the wet ingredients, alternating with ½ cup of Greek yogurt. Start and end with the flour mixture. Mix gently to combine without overmixing. - In a small bowl, toss 1 cup of fresh blueberries with 1 tablespoon of flour to coat them. - Fold the blueberries into the batter gently, ensuring they are spread evenly throughout. - Pour the batter into your prepared loaf pan, smoothing the top if needed. Bake for 50 to 60 minutes, or until a toothpick inserted in the center comes out clean. - If the top browns too quickly, cover it with aluminum foil. Allow the loaf to cool in the pan for about 10 minutes. Then, transfer it to a wire rack to cool completely. For more details on the ingredients and instructions, check the Full Recipe. To make a great loaf, avoid overmixing the batter. This keeps your loaf light and fluffy. When you mix the wet and dry ingredients, do it gently. Also, use eggs and butter at room temperature. This helps them blend better and gives your loaf a nice rise. For a beautiful presentation, slice the loaf neatly. Dust each slice with powdered sugar. Add a few lemon slices beside the loaf. This adds color and a fresh look. Serve your loaf with tea or coffee. The flavors of lemon and blueberry pair well with these drinks. If your loaf is overcooked, it may be dry. Lower the oven temperature next time. Check it a few minutes earlier to avoid this. If it’s undercooked, bake it longer. Insert a toothpick into the center; it should come out clean. For a moist loaf, make sure to measure your ingredients correctly. Adding Greek yogurt helps keep it tender. Follow the Full Recipe for detailed steps and tips. {{image_4}} You can make this loaf even more fun! Try adding other fruits like raspberries or strawberries. These fruits will give a nice twist to the flavor. Spices like cinnamon or nutmeg can also add warmth. Just a pinch can change the whole taste. If you need a gluten-free version, use almond flour or coconut flour instead of all-purpose flour. For a dairy-free option, swap Greek yogurt with coconut yogurt. You can also use vegan butter instead of regular butter. These small changes still keep the loaf tasty. In summer, add more citrus flavors. Try using orange zest or juice for a bright note. For the holidays, consider adding cranberries or spices like ginger and cloves. These seasonal changes will make your loaf fit the time of year. Mix and match these ideas to create your perfect buttery lemon blueberry loaf. For the complete recipe, check out the Full Recipe. Enjoy baking! To keep your buttery lemon blueberry loaf fresh, store it in an airtight container. This prevents moisture loss and keeps the loaf soft. You can also wrap it in plastic wrap before placing it in the container for extra protection. If you have leftover slices, I suggest placing parchment paper between them. This helps avoid sticking. For the best storage, use a glass or plastic container with a tight seal. Avoid metal containers, as they can affect the loaf's flavor. Keep the container at room temperature, away from direct sunlight. If you want to freeze the loaf, wrap it tightly in plastic wrap. After that, place it in a freezer-safe bag. Make sure to remove as much air as possible to prevent freezer burn. You can freeze the loaf for up to three months. When you're ready to enjoy it, thaw the loaf in the fridge overnight. For the best texture, let it sit at room temperature for a few hours after thawing before slicing. This helps restore the moisture lost during freezing. At room temperature, the buttery lemon blueberry loaf stays fresh for about three days. If you store it properly, it can last up to a week in the fridge. Watch for signs of spoilage, such as an off smell or mold. If you notice any changes in texture, it’s best to discard the loaf. Enjoy every slice while it’s fresh for the best flavor! Yes, you can use frozen blueberries. They add great flavor. Just follow these tips for best results: - Do not thaw them before adding to the batter. This helps keep the color bright. - Coat them in flour before mixing in. This keeps them from sinking to the bottom. - Reduce baking time slightly. Frozen berries can add moisture, so check for doneness a few minutes early. If you don’t have Greek yogurt, here are some great options: - Sour cream works well and gives a nice tang. - Plain yogurt can be used, but choose a thicker variety if possible. - Cottage cheese blended smooth can also work as a substitute. You can check for doneness using these signs: - The top should be golden brown and spring back when touched. - A toothpick inserted in the center should come out clean or with a few moist crumbs. - The loaf should pull away from the sides of the pan slightly. Absolutely! Here’s how to adjust: - For mini loaves, divide the batter into smaller pans. Bake for about 25-30 minutes. - For muffins, fill each muffin cup about 2/3 full. Bake for 18-22 minutes. Keep an eye on them as baking times may vary. Serving this loaf can elevate your experience: - Slice it neatly and place it on a wooden board for a rustic look. - Dust with powdered sugar for a sweet touch. - Add lemon slices or fresh blueberries on the side for color. Pair it with tea or coffee for a delightful treat. Try the Full Recipe to create your own buttery lemon blueberry loaf! This blog post covered everything you need for a delicious lemon blueberry loaf. We went through the simple ingredients, step-by-step instructions, and helpful tips. You learned about variations, storage methods, and common questions. Baking this loaf is easy and fun. Enjoy the fresh taste and share it with others. Dive in and let your baking journey begin!](https://joymealplan.com/wp-content/uploads/2025/07/6f5180c5-8cb8-4276-b09e-ab74a4ecf0f2-768x768.webp)


![The ingredients for Raspberry Almond Thumbprint Cookies are simple and delightful. Each one plays a key role in creating the perfect cookie. - 1 cup unsalted butter, softened to room temperature - 3/4 cup granulated sugar - 1 cup almond flour - 2 cups all-purpose flour - 1/2 teaspoon fine sea salt - 1 teaspoon pure vanilla extract - 1/4 teaspoon pure almond extract - 1/2 cup raspberry jam - Optional: Sliced almonds for garnish Using high-quality ingredients makes a big difference. The unsalted butter gives a rich flavor and smooth texture. Granulated sugar adds sweetness and helps the cookies spread just right. Almond flour brings a nutty taste that pairs well with raspberry jam. The fine sea salt balances the sweetness and enhances all the flavors. Vanilla and almond extracts add depth to the cookies. Raspberry jam gives that burst of fruity goodness, making each bite a treat. If you want a bit of crunch, sliced almonds add a lovely touch. For the complete recipe, check out the Full Recipe. Make sure you have everything ready before you start. Happy baking! - Preheat the oven to 350°F (175°C). This step ensures your cookies bake evenly and rise well. While the oven heats, line two baking sheets with parchment paper. This prevents cookies from sticking. - Cream the butter and sugar. In a large bowl, mix the softened butter and sugar until light and fluffy. This takes about 2-3 minutes. - Combine the dry ingredients and mix in the flavorings. Gradually add almond flour, all-purpose flour, and sea salt. Stir until a soft dough forms. Then, pour in vanilla and almond extracts and mix until smooth. - Roll the dough into balls. Use your hands to shape 1-inch balls and place them on the baking sheets. Make sure to space them about 2 inches apart, so they have room to spread. - Create indentations in each ball. Use your thumb or a small spoon to press down in the center of each dough ball. This creates a well for the jam. - Fill each indentation with raspberry jam. Carefully add about 1 teaspoon of jam to each well. Be careful not to overfill, or it may spill during baking. - Optional: For a crunchy texture, press sliced almonds around the edges of the filled indentations. - Bake the cookies. Place the baking sheets in the oven and bake for 12 to 15 minutes. Look for lightly golden edges. - Cooling instructions: After baking, let the cookies sit for about 5 minutes on the baking sheets. This helps them firm up. Then, transfer them to a wire rack to cool completely. - Presentation tips: Once cooled, dust the cookies lightly with powdered sugar. Arrange them on a decorative platter with fresh raspberries and mint leaves for a vibrant look. Check out the Full Recipe for more details and tips! Achieving the perfect texture To get soft and chewy cookies, use softened butter. This helps create the right mix of air and fat. Make sure to cream it well with the sugar. Mixing should take about 2 to 3 minutes. If you want a slight crunch, use finely ground almond flour. This gives the cookies a nice bite. Ensuring even cooking For even baking, space the cookie balls well on the baking sheet. Place them about 2 inches apart. This helps prevent them from sticking together. Additionally, rotate the baking sheets halfway through the baking time. This ensures all cookies bake evenly. Recommended amendments for enhanced flavor To boost the almond flavor, add a bit more almond extract. Just a few extra drops can make a big difference. You can also add a pinch of cinnamon for warmth. It pairs well with the raspberry jam and adds depth to the taste. Alternative fillings for the thumbprint While raspberry jam is great, try other flavors too! Strawberry, apricot, or even lemon curd can work well. Each jam gives a unique twist to the cookies. You can also use chocolate ganache for a rich, sweet center. Avoiding overfilling the jam When filling the cookie indentations, use about 1 teaspoon of jam. If you add too much, it can overflow during baking. This can make a mess on your baking sheet. Stick to the recommended amount for best results. Preventing dough from spreading too much in the oven If your dough spreads too much, try chilling it for about 30 minutes before baking. This helps firm up the butter. You can also bake on parchment paper, which helps maintain shape. Keeping your dough cold is key to keeping those lovely thumbprint shapes! {{image_4}} You can play with flavors in Raspberry Almond Thumbprint Cookies. Using different fruit jams can change the taste. Try strawberry, apricot, or blueberry jam for a fun twist. Each jam brings its unique flavor, making each bite special. You can also add chocolate or citrus flavors. Mix in some cocoa powder for a chocolatey touch. Or, add a hint of lemon zest for a fresh kick. These small changes can give your cookies a new vibe. Making these cookies gluten-free is easy. Substitute regular flour with gluten-free flour blends. Look for blends that include almond or coconut flour. These options keep the cookies soft and chewy. To maintain the right texture, watch the moisture levels. Gluten-free flour often absorbs more liquid. You may need to adjust the butter or add a bit of milk. This keeps the cookies from being too dry or crumbly. You can make these cookies vegan too. Replace butter with coconut oil or vegan butter. Both options keep the cookies rich and tasty. For eggs, use flaxseed meal or applesauce. These act as great binding agents. Flaxseed meal is simple to use. Mix one tablespoon with three tablespoons of water. Let it sit for a few minutes until it thickens. This blend works well and keeps the cookies together. To keep your Raspberry Almond Thumbprint Cookies fresh, store them in an airtight container at room temperature. This helps prevent them from getting stale. I recommend enjoying them within 5 to 7 days for the best taste. If you want to save some cookies for later, you can freeze them. For baked cookies, let them cool completely. Then, place them in a freezer-safe bag or container. They will stay good for up to three months. If you prefer to freeze the dough, wrap it tightly in plastic wrap, then place it in a freezer bag. When ready, thaw the dough in the fridge overnight for the best results. Reheating your cookies is easy! To keep their soft texture, preheat your oven to 300°F (150°C). Place the cookies on a baking sheet and warm them for about 5 to 8 minutes. This method helps restore their fresh-baked taste. Enjoy them warm, and they will feel like new! To make these cookies, follow these key steps: 1. Preheat your oven to 350°F (175°C). 2. Cream butter and sugar until fluffy in a bowl. 3. Combine dry ingredients: mix almond flour, all-purpose flour, and salt. 4. Add extracts: stir in vanilla and almond extracts. 5. Shape dough into 1-inch balls and place on a baking sheet. 6. Create indentations in the dough using your thumb. 7. Fill with jam: add raspberry jam to each well. 8. Bake cookies for 12 to 15 minutes until edges are golden. 9. Cool cookies on a wire rack after baking. This simple process leads to delicious treats. For the full recipe with detailed instructions, check the [Full Recipe]. Yes, you can use different nuts! If you are allergic to almonds, consider these options: - Pecans: Their rich flavor pairs well with fruit jams. - Walnuts: They add a nice crunch and depth to the cookies. - Cashews: These nuts give a creamy texture and mild taste. Feel free to experiment with your favorite nuts. Just chop them finely to mix into the dough or use them as a garnish. Many fun variations exist for thumbprint cookies. Here are some popular adaptations: - Different jams: Try strawberry, apricot, or blueberry for a twist. - Chocolate filling: Use chocolate ganache instead of jam for a rich flavor. - Citrus zest: Add lemon or orange zest to the dough for a fresh taste. These variations keep the recipe interesting. Mixing flavors can lead to delightful surprises! This blog post covered how to make delicious Raspberry Almond Thumbprint Cookies. We explored the ingredients, preparation steps, and tips for the best results. You learned about variations, storage methods, and common mistakes to avoid. Remember, baking is fun and rewarding. Try these cookies with different jams or flavors for new twists. Keep practicing to refine your skills. Enjoy baking and sharing these tasty treats with others. You now have the tools to impress your friends and family with your cookie-making expertise.](https://joymealplan.com/wp-content/uploads/2025/07/587afd51-3098-4c90-9a32-308dc83d9cb5-768x768.webp)