Ready to make a spooky snack that delights every taste bud? This Sweet & Salty Halloween Trail Mix is the ultimate festive treat! Packed with the perfect blend of crunchy, sweet, and salty flavors, it’s great for parties or just a fun night in. I’ll guide you through easy steps, tips, and fun variations to make it uniquely yours. Let’s dive in and create this tasty Halloween mix together!
Ingredients
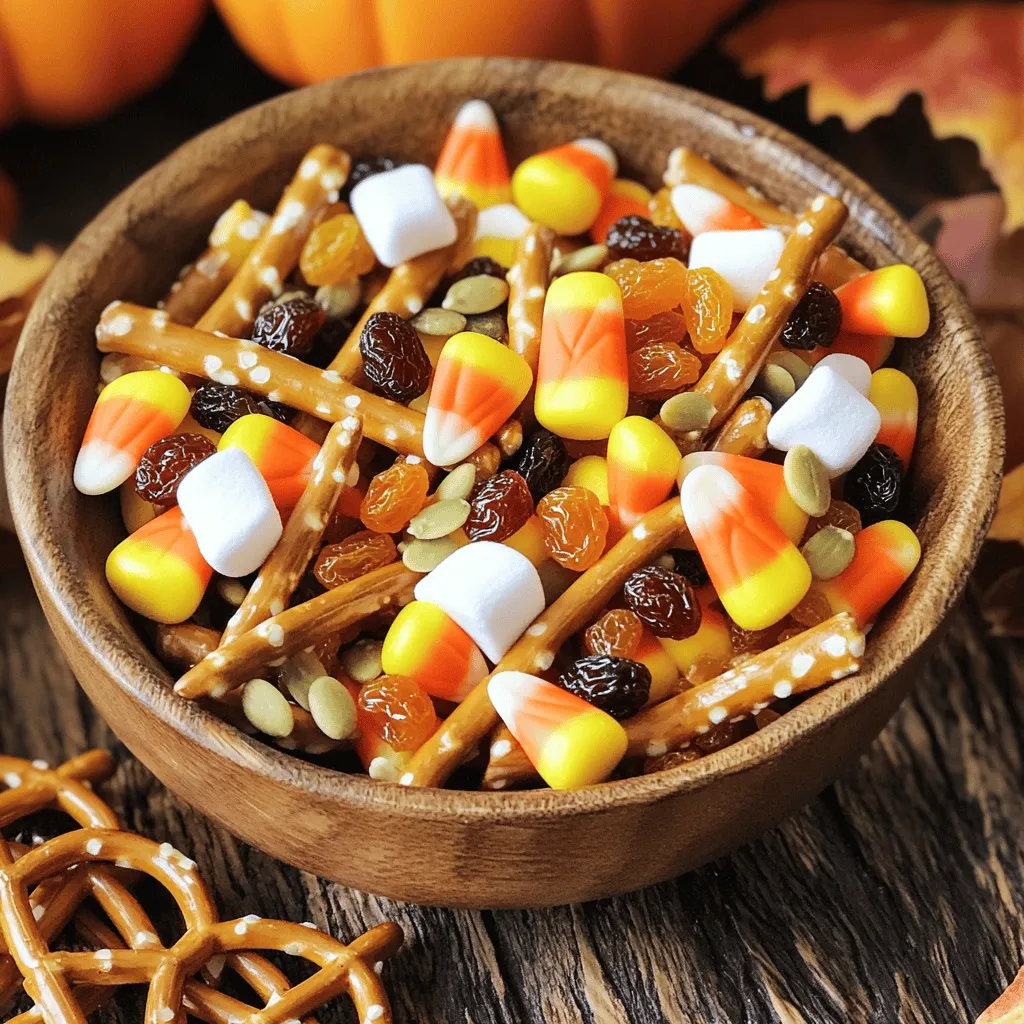
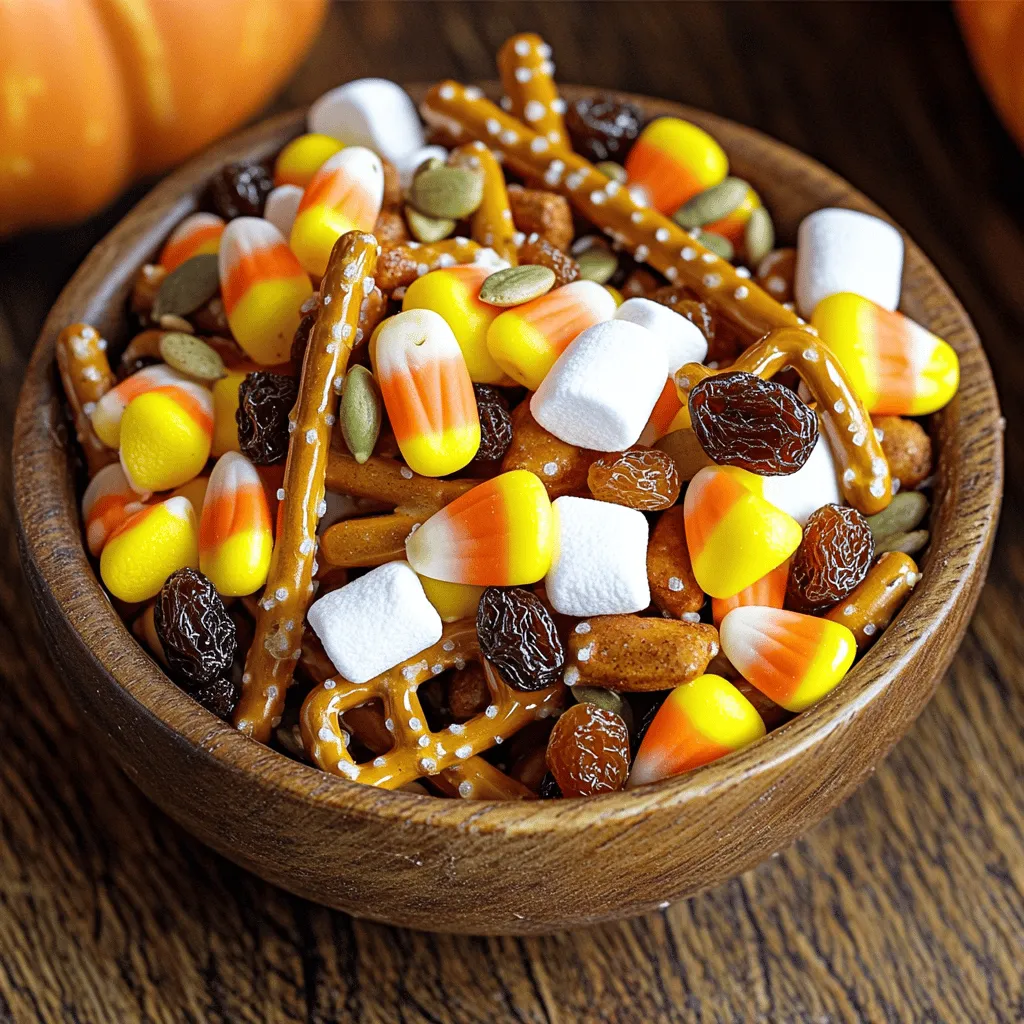
Key Ingredients for Sweet & Salty Halloween Trail Mix
To make your Sweet & Salty Halloween Trail Mix, gather these key ingredients:
– 1 cup salted mixed nuts (almonds, cashews, and walnuts work well)
– 1 cup pretzel sticks (or twists for extra crunch)
– 1 cup candy corn (adds festive fun)
– 1 cup chocolate-covered raisins (or any dark chocolate treat)
– 1/2 cup mini marshmallows (for a fluffy bite)
– 1/4 cup pumpkin seeds (for seasonal flair)
– 1/4 teaspoon ground cinnamon (for warmth)
– 1 tablespoon pure maple syrup (optional sweetness)
– A pinch of sea salt (to enhance flavors)
Optional Ingredients for Personalization
You can customize your trail mix with these optional ingredients:
– Dried fruit, like cranberries or apricots, for a chewy texture
– Coconut flakes for a tropical twist
– Sunflower seeds for added crunch
– White chocolate chips for a sweeter taste
Feel free to mix and match as you like.
Seasonal Additions for a Festive Touch
To make your trail mix even more festive, consider these seasonal additions:
– Candy pumpkins for more Halloween spirit
– Chocolate-covered pretzels for a sweet and salty combo
– Spooky-shaped candies, like bats or ghosts, for fun
These additions can create a colorful and exciting mix that everyone will love.
Step-by-Step Instructions
Preparation Process
Start by gathering your ingredients. You will need a large mixing bowl. Begin by adding the salted mixed nuts, pretzel sticks, candy corn, chocolate-covered raisins, mini marshmallows, and pumpkin seeds. Stir gently to mix them well. This blend gives your trail mix its sweet and salty flavor.
Mixing Techniques for Best Flavor
If you want to add a little extra sweetness, grab a small bowl. Add the ground cinnamon to the pure maple syrup. Stir until smooth. This step is key for enhancing the flavor. Drizzle this cinnamon-maple mixture over your trail mix. Use a spatula or large spoon to toss everything together. Make sure every piece is coated. This helps create a tasty, even flavor in each bite.
Final Touches and Serving Suggestions
Taste your trail mix once it’s mixed. If you feel it needs more flavor, sprinkle a pinch of sea salt over the top. This adds a nice kick. Now, divide the mix into an airtight container or individual snack bags. For a fun presentation, serve in jars with Halloween ribbons or colorful bowls. This makes your mix look festive and ready for sharing!
Tips & Tricks
How to Achieve the Perfect Flavor Balance
To get the best flavor, mix sweet and salty well. Use a blend of nuts like almonds, cashews, and walnuts. They add crunch and saltiness. Candy corn brings sweetness and color. Add chocolate-covered raisins for a rich taste. The mini marshmallows give a fluffy feel, while pumpkin seeds add a nice crunch. A sprinkle of cinnamon warms the mix. If you want more sweetness, drizzle with maple syrup.
Storing Your Trail Mix for Freshness
Keep your trail mix fresh by using airtight containers. A glass jar works great. Avoid any moisture; it makes the mix soggy. Store in a cool, dry place away from sunlight. Your trail mix stays good for about two weeks. For longer storage, freeze it in small bags. Just remember to let it thaw before you snack!
Suggestions for Upscaling or Downsizing Recipe
If you want to make more, double the ingredients easily. Just mix more nuts, pretzels, and sweets. For smaller batches, cut the recipe in half. This way, you can enjoy fresh trail mix without waste. Don’t be afraid to swap ingredients based on what you have. Use your favorite snacks to make this mix truly yours.
Variations
Sweet Alternatives to Consider
If you want to switch up the flavors, try using dried fruits. Dried cranberries or cherries add a nice tartness. You can also use yogurt-covered treats for a creamy twist. Swap out candy corn for chocolate chips or M&M’s for a fun pop of color. This gives your trail mix a sweeter kick.
Salty Variations for Extra Crunch
To boost the salty flavor, add cheese-flavored crackers. They provide a great contrast to the sweet elements. You could also mix in popcorn, which adds a light and airy crunch. Another option is to include wasabi peas for a spicy surprise. These salty treats will keep everyone reaching for more.
Dietary Substitutions for Health-Conscious Options
If you want a healthier mix, use unsalted nuts. They keep the crunch but lower the sodium. Choose dark chocolate-covered nuts for a richer flavor without added sugars. You can also use puffed quinoa instead of pretzels for a gluten-free twist. Consider swapping out mini marshmallows for coconut flakes for a tropical touch.
Storage Info
Best Storage Practices for Trail Mix
To keep your Sweet & Salty Halloween Trail Mix fresh, store it in an airtight container. Glass jars work great, but plastic containers also do the job. Make sure to keep it in a cool, dry place. Avoid direct sunlight. This helps keep the nuts and chocolate from getting stale.
Shelf Life and Signs of Spoilage
When stored properly, your trail mix can last up to two weeks. After that, the nuts may lose their crunch. Chocolate-covered items may become sticky or clumpy. If you see any odd smells or mold, toss it out. Always trust your senses; they know best!
Tips for Portioning and Sharing
Portioning your trail mix makes it easy to share. Use small snack bags or cups. This way, everyone can grab a treat without digging into the whole batch. You can also make fun labels for each bag. Kids love that! Plus, it’s a great way to control how much you eat. Enjoy your tasty mix!
FAQs
What can I substitute for candy corn?
You can use chocolate chips or dried fruit. Dried cranberries or apricots work well. These options add sweetness and color. You could also try yogurt-covered raisins. They offer a nice twist and keep it fun. If you want to stick with the theme, use pumpkin-shaped candies instead. This keeps your trail mix festive and tasty.
How can I make this trail mix healthier?
To make this trail mix healthier, reduce or skip the candy. You can replace it with more nuts or seeds. Add more dried fruit for natural sweetness. Using unsweetened coconut flakes adds flavor without extra sugar. You can also opt for dark chocolate instead of chocolate-covered treats. This swap can lower sugar and boost antioxidants.
Can I prepare Sweet & Salty Halloween Trail Mix in advance?
Yes, you can prepare this trail mix ahead of time. Make it a day or two before your event. Store it in an airtight container to keep it fresh. This way, you save time and stress on the big day. Just remember to keep it cool and dry. This keeps all the flavors crisp and delicious.
In this post, we explored how to create the perfect Sweet & Salty Halloween Trail Mix. We discussed key and optional ingredients, along with festive seasonal additions. You learned step-by-step preparation, mixing techniques, and final serving tips.
Remember to balance flavors well and store your mix fresh. Don’t hesitate to customize the recipe with your favorite treats. With these tips, you can enjoy a fun and tasty treat this Halloween season.


