Taco Bell Copycat Chicken Quesadilla Easy Recipe

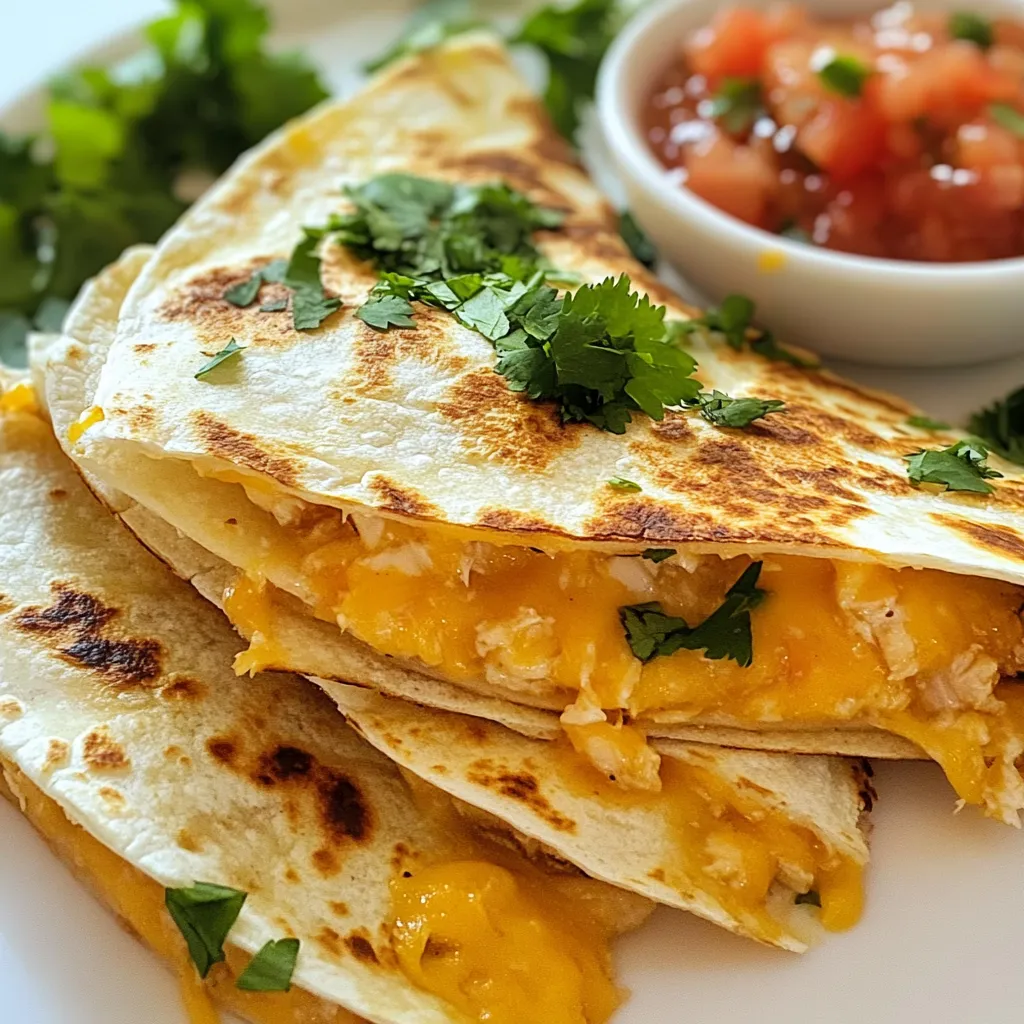
Craving a Taco Bell Chicken Quesadilla but don’t want to head out? I’ve got you covered! This easy Taco Bell Copycat Chicken Quesadilla recipe lets you enjoy that cheesy goodness right at home. With just a few simple ingredients and steps, you can whip up a tasty meal. Let’s dive into the ingredients and cooking methods to create your favorite version without the drive-thru!
Why I Love This Recipe
- Quick and Easy: This recipe comes together in just 30 minutes, making it perfect for busy weeknights.
- Customizable Filling: You can easily adjust the spices and add your favorite ingredients to personalize each quesadilla.
- Cheesy Goodness: The combination of cheddar and cream cheese creates a melty, creamy filling that’s irresistible.
- Perfect for Sharing: These quesadillas are great for gatherings, allowing everyone to enjoy a tasty treat together.
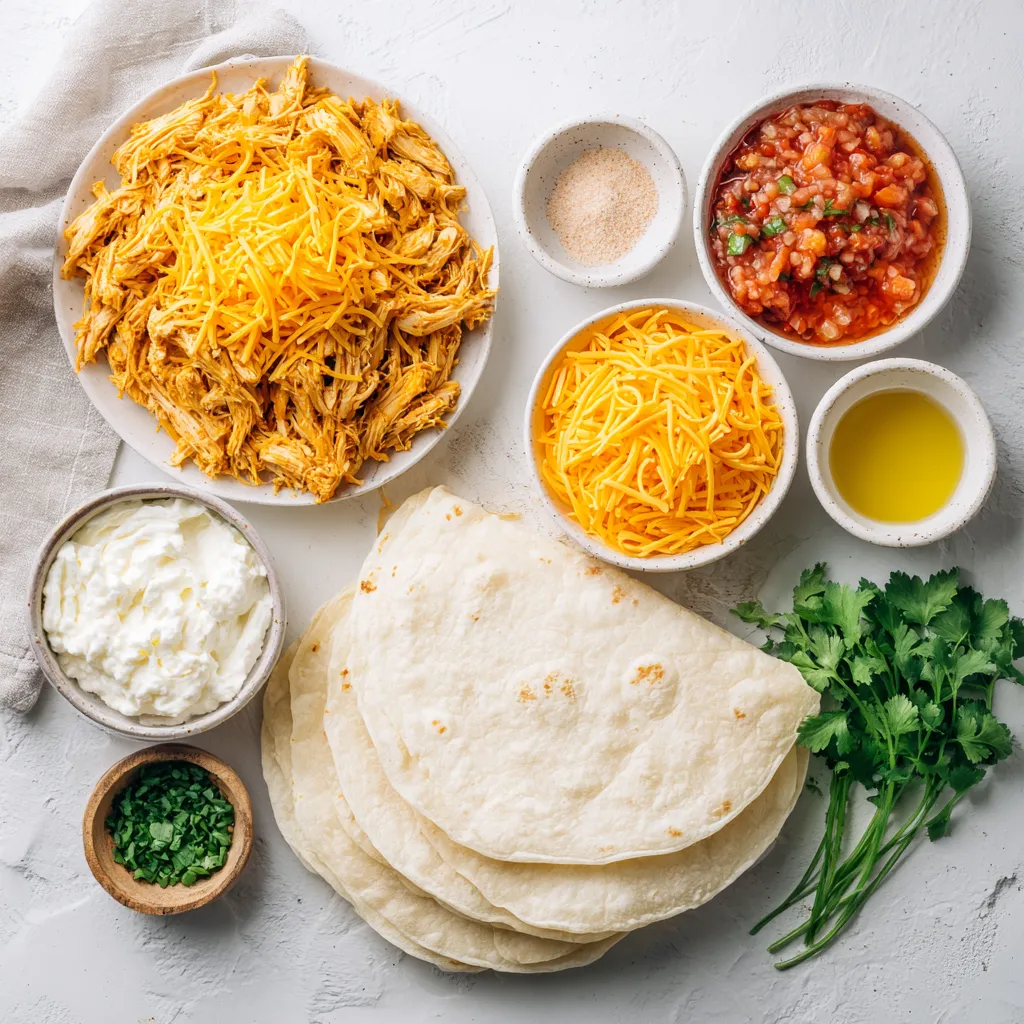
Ingredients
List of Ingredients
– 2 cups cooked chicken, shredded
– 1 ½ cups shredded cheddar cheese
– ½ cup cream cheese, softened
– ½ teaspoon garlic powder
– ½ teaspoon onion powder
– 1 teaspoon taco seasoning
– 4 large flour tortillas
– 2 tablespoons olive oil (for frying)
– Salsa (for serving)
– Fresh cilantro, chopped (for garnish)
Measurement Conversions
– 1 cup = 8 ounces
– ½ cup = 4 ounces
– 1 tablespoon = 3 teaspoons
Optional Ingredients
– Add some diced jalapeños for heat.
– Swap cheddar for pepper jack cheese for a spicy kick.
– Include black beans for extra protein and fiber.

Step-by-Step Instructions
Preparation of Chicken Mixture
Start by gathering your ingredients. In a medium bowl, mix together:
– 2 cups cooked chicken, shredded
– ½ cup cream cheese, softened
– ½ teaspoon garlic powder
– ½ teaspoon onion powder
– 1 teaspoon taco seasoning
Stir well until the chicken mixture is smooth and creamy. This blend gives the quesadilla its rich taste.
Assembling the Quesadilla
Next, take one large flour tortilla. Spread a quarter of the chicken mixture over half of the tortilla. Ensure it covers the area well. Then, sprinkle about ⅓ cup of shredded cheddar cheese on top. The cheese adds flavor and helps bind the quesadilla.
Carefully fold the tortilla in half, making sure the filling is sealed inside. Press gently to keep it closed.
Cooking the Quesadilla
Heat 1 tablespoon of olive oil in a large skillet over medium heat. Once hot, place one folded quesadilla in the skillet. Cook for about 2-3 minutes until the bottom is golden brown.
Using a spatula, flip the quesadilla carefully. If needed, add another tablespoon of olive oil to the skillet. Cook the other side for another 2-3 minutes until it’s crispy and the cheese melts.
After cooking, take the quesadilla out. Use a sharp knife or pizza cutter to slice it into wedges. Repeat this process for the rest of the tortillas and chicken filling.
Serve your quesadillas warm with salsa for dipping. Don’t forget to garnish with fresh cilantro for extra flavor!
Tips & Tricks
Achieving the Perfect Crispiness
To get a crispy quesadilla, use enough oil. Olive oil works great for frying. Heat the skillet until it is hot but not smoking. This helps the quesadilla crisp up nicely. Cook it for just long enough on each side. Aim for 2-3 minutes per side. If you want more crunch, increase the heat slightly. Just watch it closely to avoid burning.
Flavor Enhancements for Authentic Taste
For a taste that hits just right, use fresh spices. Try adding more garlic powder or onion powder. Fresh cilantro on top gives a bright flavor. You can drizzle some lime juice over the quesadilla too. This adds a nice zing. If you like heat, add some jalapeños or hot sauce to the chicken mix.
Common Mistakes to Avoid
Many people overfill their quesadillas. This makes them hard to cook and flip. Stick to a quarter of the filling per tortilla. Another mistake is not sealing them well. Press the edges to keep the filling inside. Lastly, don’t rush the cooking. Let each side get crispy before flipping. This will give you that lovely golden color and melt the cheese perfectly.
Pro Tips
- Use Leftover Chicken: This recipe is perfect for using up leftover rotisserie chicken, saving you time and enhancing the flavor.
- Customize Your Cheese: Feel free to mix different types of cheese, such as Monterey Jack or Pepper Jack, for a unique twist.
- Don’t Overfill: Make sure not to overload the quesadillas with filling, as this can make them difficult to flip and may cause them to break apart.
- Keep It Warm: If making multiple quesadillas, keep the finished ones warm in a low oven while you cook the rest.

Variations
Vegetarian Options
You can easily make a vegetarian quesadilla. Replace the chicken with black beans or sautéed veggies. Try bell peppers, onions, or mushrooms for great flavor. Use the same cream cheese mixture. It will be just as creamy and tasty!
Spice Level Adjustments
Want more heat? Add diced jalapeños or a pinch of cayenne pepper to the filling. If you like mild food, skip the spices or use sweet peppers. You can control the spice to fit your taste.
Alternative Fillings
Get creative with your fillings! You can use shredded beef, pork, or even shrimp. For a twist, try adding fresh spinach or corn. Mix and match ingredients to find your favorite combination. The possibilities are endless!
Storage Info
How to Store Leftover Quesadillas
To keep your leftover quesadillas fresh, let them cool first. Place them in an airtight container. You can store them in the fridge for up to three days. Make sure to separate layers with parchment paper to avoid sticking.
Reheating Instructions
When you’re ready to enjoy your quesadillas again, reheat them in a skillet. Place the quesadilla in the skillet over medium heat. Cook for about 2-3 minutes on each side. This method keeps them crispy and warm. You can also use a microwave. Heat on high for about 30-45 seconds. However, this may make them less crispy.
Freezing Quesadillas for Later
If you want to freeze your quesadillas, wrap each one tightly in plastic wrap. Then, place them in a freezer bag. They can last up to three months in the freezer. To reheat, let them thaw in the fridge overnight. Then, follow the same reheating steps to enjoy a delicious meal later!
FAQs
What types of chicken are best to use?
You can use any cooked chicken. Shredded rotisserie chicken works great. You can also boil or grill chicken breasts. Just make sure the chicken is tender and easy to shred. Dark meat adds more flavor, but light meat is fine too.
Can I make these quesadillas in advance?
Yes, you can prepare the chicken filling ahead of time. Store it in the fridge for up to three days. You can also assemble the quesadillas and keep them in the fridge. Just cook them fresh when you are ready to eat. This keeps them crispy and delicious.
How can I make this recipe healthier?
To make this recipe healthier, use whole wheat tortillas. They have more fiber and nutrients. You can also reduce the cheese or use low-fat cheese. Adding veggies like spinach or bell peppers boosts nutrition too. Use grilled chicken instead of fried for a lighter option.
You learned about the key ingredients for perfect quesadillas. We covered how to prep the chicken, assemble, and cook them for tasty results. I shared tips for a crispy texture and flavor boosts. You can explore fun variations and proper storage to keep your quesadillas fresh. Remember, with practice, you’ll make delicious quesadillas that everyone will love. Enjoy your cooking journey and impress your family and friend

Taco Bell Inspired Chicken Quesadilla
Ingredients
- 2 cups cooked chicken, shredded
- 1.5 cups shredded cheddar cheese
- 0.5 cups cream cheese, softened
- 0.5 teaspoon garlic powder
- 0.5 teaspoon onion powder
- 1 teaspoon taco seasoning
- 4 large flour tortillas
- 2 tablespoons olive oil (for frying)
- to taste salsa (for serving)
- to taste fresh cilantro, chopped (for garnish)
Instructions
- In a medium bowl, mix together the shredded chicken, softened cream cheese, garlic powder, onion powder, and taco seasoning. Stir until thoroughly combined and creamy.
- Take one flour tortilla and evenly spread a quarter of the chicken mixture over half of the tortilla, ensuring the filling is spread out well. Sprinkle about ⅓ cup of shredded cheddar cheese on top of the chicken mixture.
- Carefully fold the tortilla in half to encase the filling, pressing gently to seal it closed.
- In a large skillet, heat 1 tablespoon of olive oil over medium heat until shimmering. Place the folded quesadilla into the skillet and cook for 2-3 minutes, or until the bottom is golden brown and crispy.
- Using a spatula, carefully flip the quesadilla over. Add the remaining tablespoon of olive oil to the skillet if needed. Cook for an additional 2-3 minutes until the second side is crispy and the cheese has melted beautifully.
- Once cooked, remove the quesadilla from the skillet and use a sharp knife or pizza cutter to slice it into wedges for easier serving.
- Repeat the process with the remaining tortillas and chicken filling to create additional quesadillas.
- Serve the quesadillas warm alongside salsa for dipping, and garnish with a generous sprinkle of chopped fresh cilantro for an extra burst of flavor.


![- 1 block (14 oz) firm tofu, pressed and drained - 1/2 cup cornstarch - 3 tablespoons vegetable oil - 1/4 cup honey - 2 tablespoons soy sauce - 4 cloves garlic, minced - 1 teaspoon fresh ginger, grated - 1 tablespoon sesame seeds, toasted - 2 green onions, sliced - Salt and pepper to taste To make crispy honey garlic tofu, you need simple ingredients that pack big flavor. Start with firm tofu. It holds its shape well and crisps up nicely. Press and drain it to get rid of excess water. This step is key for crispy tofu. Next, grab some cornstarch. It’s your secret weapon for that crunchy coating. It sticks to the tofu and gets crispy in the hot oil. Vegetable oil helps fry the tofu evenly. Use a good amount, but don’t drown the tofu. For the sauce, honey adds sweetness. Soy sauce brings saltiness, and garlic and ginger give it a warm kick. These flavors blend perfectly. You can adjust the honey and soy sauce to fit your taste. Finally, sesame seeds and sliced green onions are for garnishing. They add a nice crunch and color to your dish. This crispy honey garlic tofu is not just tasty; it's visually appealing too. For the full recipe, check out the detailed steps. - Cut the tofu into 1-inch cubes. - Toss tofu cubes in cornstarch with salt and pepper. Start by cutting your block of firm tofu into 1-inch cubes. Make sure the pieces are even for cooking. Next, take a shallow dish and add cornstarch. Sprinkle in some salt and pepper. Toss those tofu cubes in the cornstarch mixture, coating each piece well. Shake off any extra cornstarch to keep them light and crispy. - Heat vegetable oil in a skillet over medium-high. - Sauté tofu until golden brown and crispy. Now, heat 3 tablespoons of vegetable oil in a skillet over medium-high heat. Wait until the oil is hot. Carefully place the tofu cubes in the skillet in a single layer. Sauté them for about 5 to 7 minutes. Turn the pieces so they cook evenly. You want them to turn golden brown and get nice and crispy. Once done, transfer the tofu to a paper towel-lined plate to absorb excess oil. - Sauté garlic and ginger in the skillet. - Combine honey and soy sauce, allowing to thicken. In the same skillet, lower the heat to medium. Add 4 minced garlic cloves and 1 teaspoon of grated ginger. Sauté these for about 1 minute. You'll know they're ready when they smell great and turn golden. Now, pour in 1/4 cup of honey and 2 tablespoons of soy sauce. Stir well and let it cook for 2 to 3 minutes until it thickens a bit. - Coat crispy tofu in the honey garlic sauce. - Serve with garnishes. Gently place the crispy tofu back into the skillet. Toss it in the honey garlic sauce until every piece is coated. Remove from heat and sprinkle 1 tablespoon of toasted sesame seeds and 2 sliced green onions over the dish. This adds flavor and makes it look nice. For the full recipe, check the details above! - Use firm tofu for best results: Firm tofu holds its shape and crisps up nicely. - Ensure the tofu is properly pressed and drained: Pressing removes excess water. This helps the tofu absorb flavors and get crispy. - Adjust honey and soy sauce ratios to taste: You can make it sweeter or saltier by changing these amounts. - Experiment with adding red pepper flakes for heat: A little spice can really elevate the dish. Add to your liking. - Consider using an air fryer for an even crispier finish: Air frying gives a great crunch without extra oil. - Double-fry method for ultimate crunch: Fry the tofu once, let it rest, and fry again. This makes it super crispy. For more details, check the Full Recipe. {{image_4}} You can switch tofu for other proteins. Tempeh is a great choice. It has a nutty flavor and a firmer texture. Just cut it into cubes like tofu. Cook it the same way for a tasty dish. Seitan is another option. It mimics meat well and offers a chewy texture. It absorbs flavors easily. Use seitan if you're looking for a heartier bite. Want a kick? Add sriracha to the sauce. This gives a spicy twist to the sweet honey. You can also try orange juice or maple syrup. These swaps change the flavor profile. Orange adds a fresh zest, while maple syrup gives a rich taste. Both can make your dish stand out. Crispy honey garlic tofu shines when paired with sides. Steamed vegetables bring color and nutrition. A fresh salad can add crunch. You can also use this tofu in wraps or tacos. Just fill them with your favorite veggies and tofu. It makes for a fun and easy meal. For the full recipe, follow the steps and enjoy your cooking journey! You can keep crispy honey garlic tofu in the fridge. Place it in an airtight container. It will stay fresh for up to 3 days. This way, you can enjoy it later without losing flavor. To reheat your tofu, use the oven or a skillet. This keeps it crispy and tasty. Avoid using the microwave. It makes the tofu soggy, which we want to prevent. You can also freeze cooked tofu. It will last for up to 2 months in the freezer. When you want to eat it, simply thaw it out. After thawing, re-crisp it in a skillet or oven before serving. This method helps regain its crunchy texture. Typically, crispy honey garlic tofu lasts up to 3 days when stored properly. To keep it fresh, place it in an airtight container. Ensure the tofu is cool before sealing. This helps maintain its flavor and texture. Yes, you can make this recipe vegan. Simply replace honey with agave or maple syrup. Both options add sweetness without using animal products. This change keeps the dish plant-based and equally delicious! Crispy honey garlic tofu pairs well with rice, noodles, or a fresh vegetable stir-fry. You can serve it over steamed jasmine rice for a classic combo. Noodles coated in a light sauce also work great. Adding a side of colorful stir-fried veggies brings extra nutrition and flavor. Firm or extra-firm tofu works best for a crispy texture. These types hold their shape and don’t crumble. For the best results, make sure you press and drain the tofu well before cooking. This removes excess moisture, allowing for a delightful crunch. For the full recipe, check out the [Full Recipe]. In this post, we covered how to make crispy honey garlic tofu. You learned about the key ingredients, from firm tofu to the sweet and savory sauce. I shared step-by-step cooking tips and tricks for the perfect texture and flavor. Remember, you can customize the recipe with different proteins or sauces. Store leftovers correctly to enjoy this dish later. Overall, this recipe is fun, flexible, and delicious. Give it a try, and you’ll impress your friends or family!](https://joymealplan.com/wp-content/uploads/2025/07/a62a8118-0118-41a9-8dcd-10793e5e2e73-768x768.webp)