Teriyaki Chicken Rice Bowls Flavorful and Easy Recipe

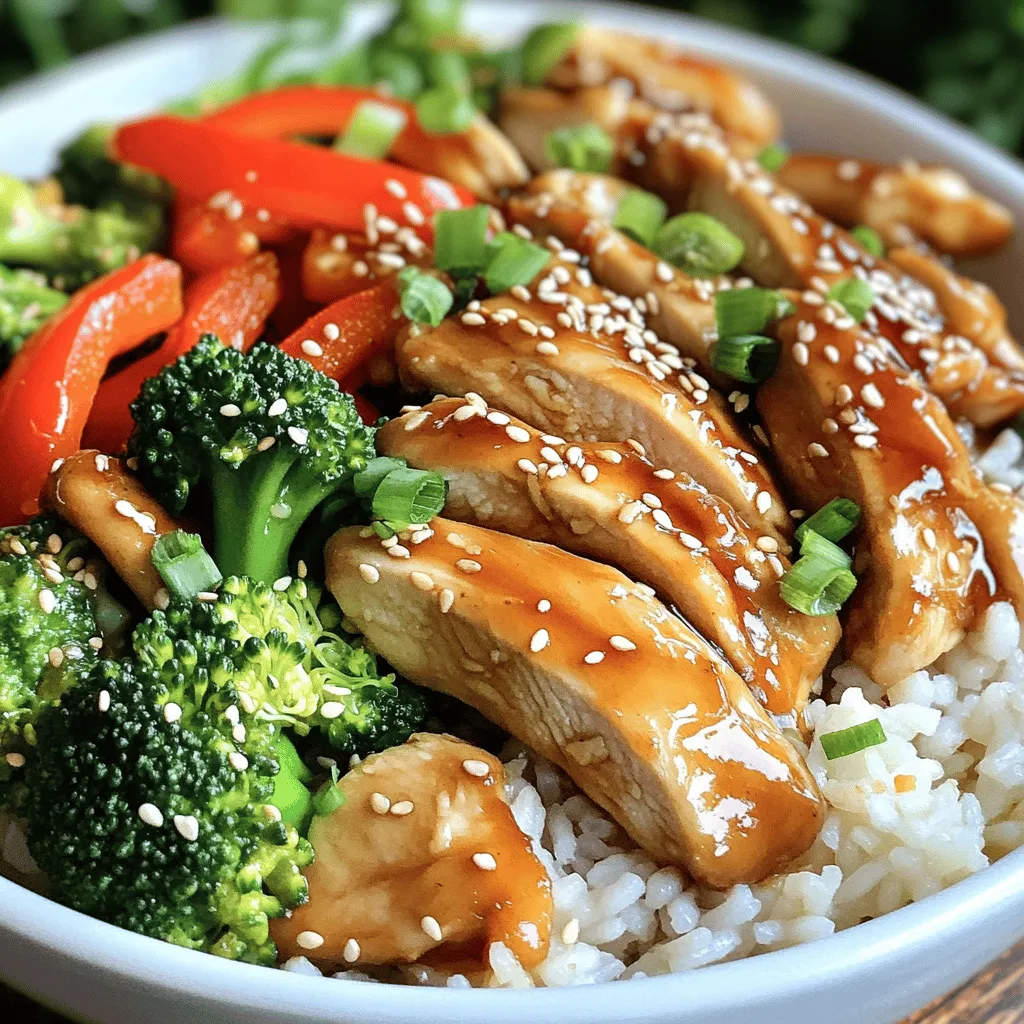
Looking for a quick and tasty meal? Let me introduce you to Teriyaki Chicken Rice Bowls! This easy recipe combines juicy chicken, fragrant jasmine rice, and colorful veggies. With a simple marinade and just a few ingredients, you can whip up a delicious dinner that everyone will love. Ready to dive into this flavorful dish? Let’s get started on making your new favorite meal!
Ingredients
Main Ingredients for Teriyaki Chicken Rice Bowls
– 2 boneless, skinless chicken breasts
– 1 cup jasmine rice
– 1 bell pepper, sliced (red or yellow)
– 1 cup broccoli florets
– Sesame seeds for garnish
Marinade Ingredients
– 2 tablespoons low-sodium soy sauce
– 2 tablespoons honey
– 1 tablespoon rice vinegar
– 1 teaspoon fresh ginger, grated
– 2 cloves garlic, minced
Additional Seasoning
– Salt and pepper to taste
– 1 tablespoon sesame oil
– 2 green onions, thinly sliced (for garnish)
The ingredients play a key role in creating tasty Teriyaki Chicken Rice Bowls. You start with chicken and rice, which form the base. I love jasmine rice for its soft texture and sweet flavor. The bell pepper and broccoli add color and crunch.
Next, the marinade gives the chicken its signature taste. Low-sodium soy sauce helps balance the sweetness of honey. Rice vinegar adds a nice tang, while ginger and garlic deepen the flavor.
For seasoning, salt and pepper enhance the dish. Sesame oil adds a nutty taste. Finally, green onions and sesame seeds bring freshness and crunch.
When you gather these ingredients, you set the stage for a fun cooking adventure. This recipe is simple, yet it delivers big flavors. Enjoy the process, and get ready to savor your delicious Teriyaki Chicken Rice Bowls!
Step-by-Step Instructions
Marinating the Chicken
– Whisk together the soy sauce, honey, rice vinegar, ginger, and garlic in a bowl.
– Coat the chicken breasts thoroughly in the marinade.
– Refrigerate the chicken for at least 15 minutes to enhance the flavor.
Cooking the Rice
– Rinse the jasmine rice until the water runs clear.
– Boil the rinsed rice with 1 cup of water.
– After boiling, lower the heat and simmer for 15 minutes, then fluff the rice.
Cooking the Chicken and Vegetables
– Heat sesame oil in a skillet over medium heat.
– Cook the marinated chicken in the skillet, reserving the marinade.
– After about 5-6 minutes, transfer the chicken. Sauté the bell pepper and broccoli.
– Pour the reserved marinade into the skillet, thickening the sauce by simmering.
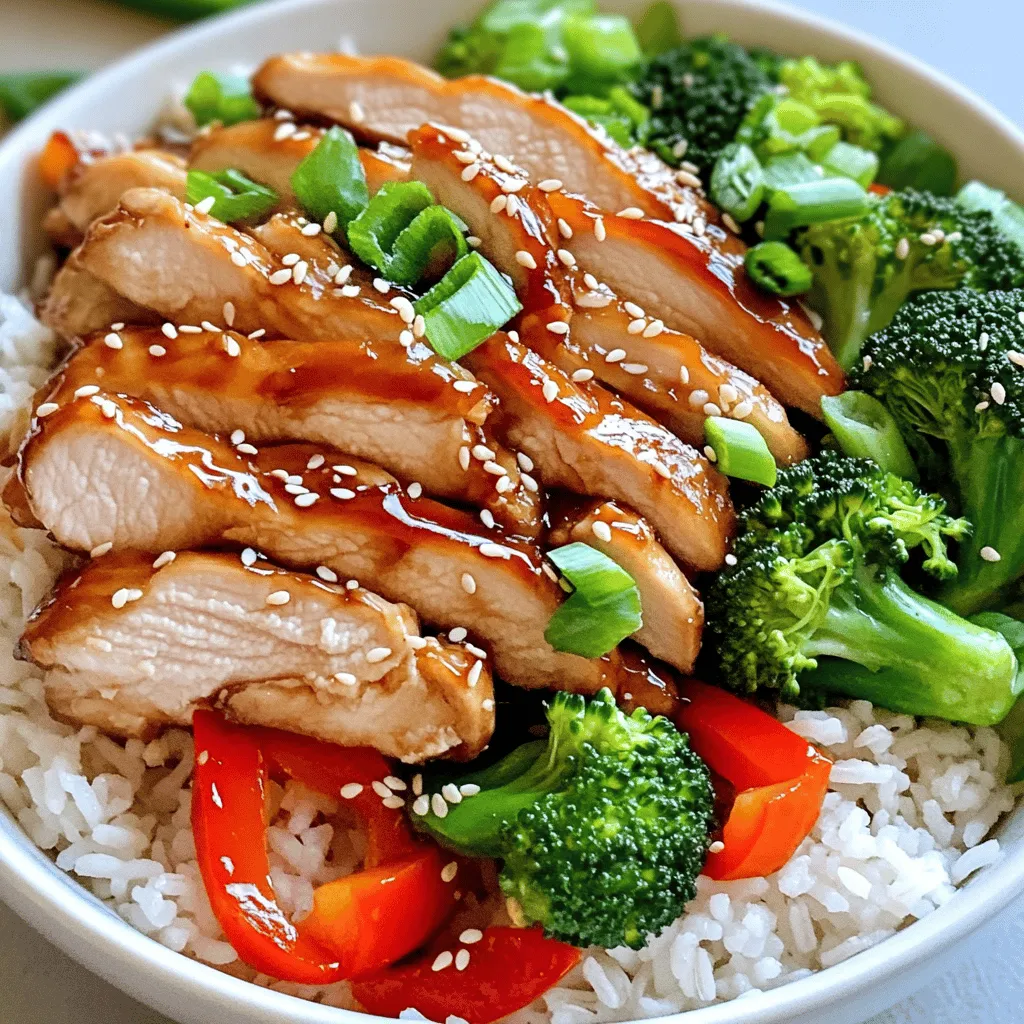
Assembling the Rice Bowls
– Start by spooning jasmine rice into bowls.
– Top each bowl with sliced chicken and sautéed vegetables.
– Drizzle the remaining sauce over each bowl for extra flavor.
Tips & Tricks
Perfecting the Marinade
– Let chicken marinate for longer if possible.
– Use fresh ingredients for the best taste.
– Adjust soy sauce for a lower sodium preference.
A longer marinate makes the chicken more tasty. If you have time, let it sit in the fridge for up to an hour. Fresh ginger and garlic add a big flavor boost. If you want less salt, cut back on the soy sauce.
Cooking Tips for Chicken
– Use a meat thermometer for perfect doneness.
– Let chicken rest before slicing for juiciness.
A meat thermometer is helpful to check if chicken is safe to eat. The right temp is 165°F. After cooking, let the chicken rest for five minutes. This keeps the juices inside, making it tender.
Enhancing Flavor
– Add extra vegetables like carrots or snap peas.
– Incorporate crushed red pepper for heat.
– Experiment with different rice varieties.
Want more color and crunch? Toss in some carrots or snap peas. For a spicy kick, add crushed red pepper. You can use brown rice or sushi rice instead of jasmine rice for new textures and flavors.

Variations
Different Protein Options
You can easily swap out chicken for other proteins. Tofu is a great choice for a vegetarian option. It soaks up the teriyaki flavor well. Just cube it and cook it until golden. Shrimp is another quick option. It cooks fast and pairs nicely with the rice and sauce. For a heartier meal, grilled steak works well, too. Slice it thin and let it shine in your bowl.
Alternative Sauce Variations
Not every home cook has time to make sauce from scratch. A store-bought teriyaki sauce is a quick fix. It saves time and still tastes good. If you want more flavor, consider making your own. Mixing soy sauce, honey, and ginger gives you a richer taste. Homemade sauce adds a nice touch to your meal.
Serving Suggestions
To enhance your meal, think about side dishes. Seaweed salad adds a fresh crunch. It’s light and complements the savory bowl. Pickled ginger is another great addition. It offers a tangy contrast to the sweetness of the teriyaki sauce. Both sides can brighten your dish and make it more exciting.
Storage Info
Storing Leftovers
Keep your Teriyaki Chicken Rice Bowls in an airtight container. This helps keep them fresh. Store in the fridge for up to 3 days.
Reheating Tips
To reheat, use the microwave on medium power. Heat until warm throughout. For a better texture, reheat on the stovetop. This method keeps the chicken juicy and the rice fluffy.
Freezing Guidelines
To freeze, separate the chicken and rice. This helps maintain their texture. Place in freezer-safe bags or containers. Thaw overnight in the fridge before reheating. This way, you’ll enjoy a tasty meal again!
FAQs
How long does it take to prepare Teriyaki Chicken Rice Bowls?
– Prep Time: 15 minutes | Cook Time: 25 minutes
Can I use brown rice instead of jasmine rice?
– Yes, but adjust cooking time as needed. Brown rice takes longer to cook.
What should I serve with Teriyaki Chicken Rice Bowls?
– Consider a side of steamed vegetables or a light salad. This adds freshness.
Is this recipe healthy?
– Yes, it includes lean protein and vegetables. You can adjust portions based on your needs.
Teriyaki Chicken Rice Bowls are easy and tasty. We talked about simple ingredients, step-by-step cooking, and storage tips. Remember, marinating your chicken boosts flavor, and you can adjust it to your taste.
Feel free to swap proteins or add vegetables. You can even try different rice types. With these bowls, you create a healthy meal in no time. Enjoy making this dish for your next family dinner or lunch!


![To make sticky orange chicken, you'll need a few simple yet flavorful items. Here is a complete list of ingredients you'll need for this recipe: - 1.5 lbs boneless, skinless chicken thighs - 1/2 cup cornstarch - 2 tablespoons vegetable oil - 3 cloves garlic, finely minced - 1-inch piece of fresh ginger, grated - 1/4 cup low sodium soy sauce - 1/2 cup freshly squeezed orange juice - Zest of 1 medium orange - 1/4 cup honey - 2 tablespoons rice vinegar - 1/2 teaspoon red pepper flakes (optional) - 2 green onions, finely chopped, for garnish - Sesame seeds, for garnish Using high-quality chicken is key for this dish. Chicken thighs stay juicy and tender. Cornstarch is essential for a crispy texture. Vegetable oil helps with frying and flavor. Fresh garlic and ginger bring bold taste to the sauce. Orange juice and zest create a bright, zesty flavor. Honey adds sweetness that balances the dish. Rice vinegar gives a touch of tang. If you like spice, add red pepper flakes for heat. Don’t forget the green onions and sesame seeds for garnish. They add color and crunch. This recipe is simple yet packed with flavor. You can find the full recipe in earlier sections. Coating with Cornstarch Start by placing the chicken pieces in a big bowl. Pour in the cornstarch. Mix it well with your hands or a spoon. Make sure all chicken pieces are covered. This step is key for a crispy finish. Sautéing the Chicken Pieces Next, heat the vegetable oil in a large skillet or wok on medium-high heat. Once hot, add the chicken in batches. Avoid crowding the pan. Cook for about 5-7 minutes. Stir it often until the chicken turns golden brown. Check that each piece reaches 165°F inside. Remove the chicken and place it on a plate with paper towels to soak up extra oil. Sautéing Garlic and Ginger Lower the heat to medium. In the same skillet, add the minced garlic and grated ginger. Sauté for about 30 seconds. You want to smell the rich aroma of garlic and ginger. This signals it’s time to mix the sauce. Mixing the Sauce Ingredients Pour in the soy sauce, orange juice, orange zest, honey, and rice vinegar. If you like some heat, add the red pepper flakes. Stir it all together. Increase the heat slightly and let it bubble. Allow the sauce to simmer for 3-5 minutes. You want it to thicken and develop a rich flavor. Glazing the Chicken Now, return the cooked chicken to the skillet. Use a spatula to toss the chicken in the sauce. Ensure every piece gets coated. Let it cook for another 2-3 minutes. This will heat the chicken through and make it sticky and flavorful. Garnishing for Serving Take the skillet off the heat. Sprinkle the chopped green onions and sesame seeds over the chicken. These add color and crunch. Serve this dish hot and enjoy the zesty flavors of your sticky orange chicken. Check the Full Recipe for more details! Importance of Cornstarch Coating Coating the chicken in cornstarch is key for a crispy bite. It helps create a crunchy layer when you fry it. The cornstarch seals in moisture, keeping the chicken juicy. You want to ensure every piece is coated well. This simple step makes a big difference in texture and taste. Avoiding Overcrowding the Pan Do not overcrowd the pan when cooking the chicken. If you add too much at once, the chicken will steam instead of fry. This means less crispiness. Cook in batches and give each piece space. This way, you get that golden-brown color you want. Using Fresh Ingredients Using fresh ingredients makes your dish taste better. Fresh garlic and ginger give a bright flavor. Squeeze your own orange juice for the best taste. Fresh zest adds a lovely aroma. These small details make your sticky orange chicken shine. Adjusting Spice Levels If you like heat, add red pepper flakes. Start with a small amount and taste as you go. You can always add more if you want a kick. If you prefer a milder dish, skip the spice. Tailor the recipe to your taste buds. Pairing with Sides This sticky orange chicken goes well with many sides. Serve it over fluffy jasmine rice for a complete meal. Steamed broccoli or green beans also work nicely. These sides balance the sweetness of the chicken. Presentation Ideas Make your dish look as good as it tastes. Use a white plate to make the orange color pop. Drizzle some extra sauce on top. Sprinkle sesame seeds and green onions for a final touch. A pretty plate makes every meal special. For the full recipe, check out the Sticky Orange Chicken Delight. {{image_4}} You can easily switch up the protein in this dish. - Using Chicken Breasts: You can replace chicken thighs with chicken breasts. They are leaner and will still taste great. Just be sure to cook them until they are juicy. - Substituting with Tofu or Tempeh: For a plant-based option, try tofu or tempeh. Cut them into bite-sized pieces and follow the same steps as the chicken. They soak up the sauce well and give a nice texture. Feel free to play with flavors to make this dish your own. - Adding More Citrus: Want more zing? Add lime or lemon juice. A splash at the end brightens the dish and gives it a fresh twist. - Experimenting with Herbs and Spices: You can also try adding fresh herbs like cilantro or basil. A sprinkle of these can add depth and freshness. This recipe can fit many dietary needs. - Gluten-Free Modifications: If you're gluten-free, use tamari instead of soy sauce. This keeps the flavor while making it safe for your diet. - Low-Sugar Alternatives: For a low-sugar version, substitute honey with a sugar-free sweetener. This still gives sweetness without the extra calories. These variations help you enjoy Sticky Orange Chicken in your own way. Check the Full Recipe for more details! After you enjoy your sticky orange chicken, you may have some leftovers. To keep them fresh, store the chicken in an airtight container. Place it in the fridge. It will last for about 3 to 4 days. When reheating, use the microwave or a skillet. Heat it gently to avoid drying it out. A splash of water can help keep it moist. If you want to keep your sticky orange chicken longer, consider freezing it. Allow the chicken to cool completely before freezing. Place it in a freezer-safe bag or container. Remove as much air as possible to prevent freezer burn. It can stay in the freezer for up to 3 months. When you're ready to use it, thaw the chicken overnight in the fridge. For a quicker method, you can use the defrost setting on your microwave. Just be careful not to start cooking it. To maintain the best flavor, always serve your sticky orange chicken fresh. If you prepare it ahead of time, store the sauce separately. This will help keep the chicken crispy. When you are ready to serve, reheat both the chicken and sauce. Toss them together just before serving for that sticky goodness. For more details on how to make this dish, check out the Full Recipe. You can enjoy Sticky Orange Chicken with a few tasty sides. Here are some great options: - Fluffy jasmine rice - Steamed broccoli - Fried rice - Sautéed snap peas - Crisp green salad For drinks, pair it with: - Iced tea - Sparkling water with lemon - A light white wine These sides and drinks will balance the sweet and sticky flavors of the chicken. To kick up the heat in your Sticky Orange Chicken, try these tips: - Adding Heat with Pepper Flakes: Sprinkle red pepper flakes into the sauce. Start with a little and add more if needed. This gives a nice kick without overpowering the dish. - Experimenting with Hot Sauces: Mix in your favorite hot sauce. A few drops can add flavor and heat. Choose a sauce that complements the orange taste. You can adjust the heat to match your taste! Yes, you can prep Sticky Orange Chicken in advance. Here’s how: - Prep Tips for Making in Advance: Marinate the chicken in the sauce for a few hours or overnight. This adds great flavor. You can also chop the garlic and ginger ahead of time. - Adjusting Cooking Times: When cooking, make sure the chicken is heated through. If you make it ahead, just warm it on low heat in the skillet. This keeps it from drying out. These tips help you enjoy a delicious meal even on busy days. For the full recipe, check out the [Full Recipe]. This blog post guided you through making Sticky Orange Chicken, from ingredients to storage tips. Remember to coat the chicken in cornstarch for that perfect crunch. Use fresh ingredients to enhance flavor and feel free to experiment with proteins and spices. With these straightforward steps and variations, you can enjoy a tasty meal that suits your needs. Keep these tips in mind for a delicious outcome every time. Now, it’s time to bring this vibrant dish to your table!](https://joymealplan.com/wp-content/uploads/2025/06/0fb5afb5-059d-4b64-a6dc-9cc9d9794f9b-768x768.webp)

![- 12 oz cheese tortellini (fresh or frozen) - 1 cup heavy cream - 1/2 cup prepared basil pesto - 1/4 cup finely grated Parmesan cheese, plus extra for garnish - 1 cup cherry tomatoes, halved - 2 cups fresh baby spinach - 2 cloves garlic, minced - 2 tablespoons extra virgin olive oil - Salt and black pepper to taste - Optional garnish: toasted pine nuts Gather these ingredients to make your creamy pesto tortellini. The heart of this dish is the cheese tortellini. It adds richness and texture. Heavy cream makes the sauce smooth and creamy. Basil pesto brings bright flavors that pop. The Parmesan cheese adds a salty kick. Next, you need some extra ingredients. Cherry tomatoes give a sweet burst. Fresh baby spinach adds color and nutrients. Garlic gives a warm, aromatic note. Extra virgin olive oil helps to sauté the garlic. Finally, don't forget your pantry staples. Salt and black pepper enhance all the flavors. If you want a crunchy finish, use toasted pine nuts as a garnish. For the full recipe, follow the steps to bring this delightful dish to life! Start by boiling a large pot of salted water. Once it reaches a rolling boil, add the cheese tortellini. Cook it according to the package instructions until it is al dente. This usually takes around 2 to 4 minutes. After cooking, drain the tortellini in a colander. Remember to save a little pasta water for later, just in case you need it. In a large skillet, heat olive oil over medium heat. Add minced garlic and sauté it for about one minute. You want the garlic to become fragrant but not brown. Next, pour in the heavy cream, stirring it into the oil and garlic. Then, add the basil pesto and mix until it is well combined. Let the sauce warm up on low heat. First, stir in the fresh spinach and half of the grated Parmesan cheese. Cook and stir until the spinach wilts and the cheese melts into the sauce. This creates a rich and creamy base. Now, add the drained tortellini into the skillet. Toss the pasta gently with the creamy pesto sauce, ensuring every piece is well coated. If the sauce feels too thick, add a splash of the reserved pasta water. Finally, mix in the halved cherry tomatoes. Season with salt and black pepper to taste. Allow the dish to warm for another 2 to 3 minutes. For the complete details, check out the Full Recipe. Using fresh tortellini gives you a soft and tender bite. Frozen tortellini works too, but it may be chewier. If you want to adjust the creaminess, add more cream. For a thicker sauce, let it simmer longer to reduce. You can also add a splash of pasta water to change the thickness. For a lovely look, garnish with extra Parmesan cheese and toasted pine nuts. The nuts add crunch and a nice flavor. When plating, scoop the tortellini into bowls. Drizzle some extra pesto over the top for color. This makes your dish pop and look inviting. When sautéing garlic, heat the oil on medium. Add minced garlic and stir for about one minute. Don’t let it brown, or it will taste bitter. To keep pasta texture, avoid overcooking. Cook the tortellini until al dente, so it stays firm when mixed with sauce. Try the full recipe to create this rich and flavorful dish at home! {{image_4}} You can easily add protein to your creamy pesto tortellini. - Grilled chicken or shrimp: These options offer a tasty boost. Cook them separately and mix them in. - Tofu for a vegetarian option: Tofu absorbs flavors well. Sauté it until golden for a nice texture. Adding veggies gives your dish a fresh touch. - Asparagus or bell peppers: These add color and crunch. Sauté them briefly before adding to the sauce. - Seasonal vegetables for freshness: Use what’s in season. Zucchini and peas work well in spring and summer. Experimenting with sauces keeps it interesting. - Alternative pesto options: Try sun-dried tomato or arugula pesto for a new taste. Each brings a unique flavor profile. - Creamy versus non-creamy sauce variations: You can skip the cream for a lighter dish. Just add more pesto and a splash of pasta water. These changes let you make creamy pesto tortellini your own. For the complete recipe, check the Full Recipe section. To keep your creamy pesto tortellini fresh, store it in an airtight container. This helps prevent the dish from drying out. It will stay good in the fridge for about 3 to 4 days. Make sure to label the container with the date you made it. If you want to save your creamy pasta for later, freezing is a great choice. To freeze, place the dish in a freezer-safe container. Leave some space for expansion. It can last up to 2 months in the freezer. When you're ready to eat it, take it out and thaw it in the fridge overnight. To reheat, you can use a microwave or a skillet. If using a skillet, add a splash of water to help it heat evenly. Stir gently until it's hot all the way through. Creamy pesto tortellini pairs well with a fresh salad or warm bread. A simple green salad with vinaigrette is a great match. For reheating, make sure you warm it gently. This keeps the flavors intact. Enjoy your creamy delight with your favorite sides! For the full recipe, check out the [Full Recipe]. You can make this dish vegan by swapping dairy ingredients. Here are some great substitutes: - Use vegan tortellini made from plant-based ingredients. - Replace heavy cream with coconut cream or cashew cream. - For Parmesan, try nutritional yeast or a store-bought vegan cheese. These swaps keep the flavor tasty and rich while removing all animal products. You will enjoy a creamy, satisfying meal without losing the essence of the dish. Yes, you can use store-bought pesto in this recipe. It saves time and still tastes great. However, homemade pesto has unique benefits: - You can control the ingredients for freshness. - You can adjust flavors to your liking. - Homemade pesto often tastes brighter and more vibrant. If you have the time, I recommend making your own for the best flavor. Pair this dish with side dishes and drinks that enhance its taste. Here are some ideas: - A simple arugula salad with lemon vinaigrette. - Garlic bread for a crunchy side. - A glass of chilled white wine like Pinot Grigio. These choices complement the creamy, rich flavor of the tortellini. They make for a delightful meal experience. For the full recipe, check out the instructions above! This blog post covered how to make a tasty creamy pesto tortellini. We discussed the key ingredients like cheese tortellini, heavy cream, and basil pesto, plus optional veggies and proteins. I shared simple steps and helpful tips for the best outcome. You can enjoy this dish any way you like, with fresh veggies or proteins. Remember, your choices make it your own. Whether you serve it to family or friends, it’s sure to please!](https://joymealplan.com/wp-content/uploads/2025/07/0fb47cb4-74c6-4375-a4d7-53564a398b2f-768x768.webp)