Looking for a quick, flavorful meal? My Tex-Mex Zucchini Skillet is perfect for you! Packed with healthy veggies, black beans, and spices, it’s a dish that delivers big on taste without the hassle. Whether you’re a busy parent or a novice cook, this recipe will delight your taste buds and fit your schedule. Let’s dive in and make a skillet meal that’s both satisfying and simple!
Ingredients
Main Ingredients
– 3 medium zucchinis, sliced into half-moons
– 1 red bell pepper, diced
– 1 yellow onion, diced
– 1 can (15 oz) black beans, drained and rinsed
– 1 cup corn kernels (fresh or frozen)
Spices and Seasonings
– 1 teaspoon ground cumin
– 1 teaspoon smoked paprika
– 1 teaspoon chili powder
– ½ teaspoon garlic powder
– ¼ teaspoon cayenne pepper (optional, for heat)
Cooking Essentials
– 2 tablespoons olive oil
– Salt and pepper to taste
– Fresh cilantro, roughly chopped, for garnish
– ½ cup shredded cheddar cheese (or a dairy-free alternative)
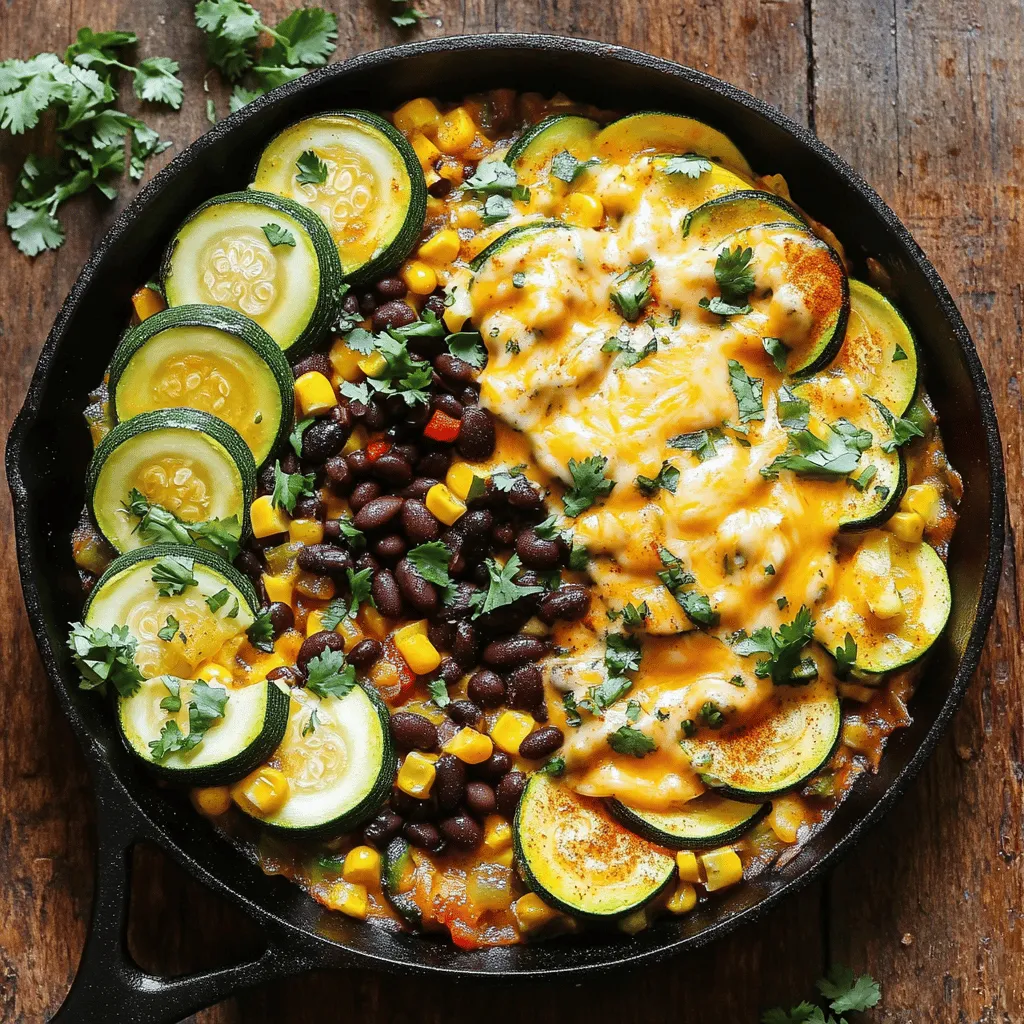
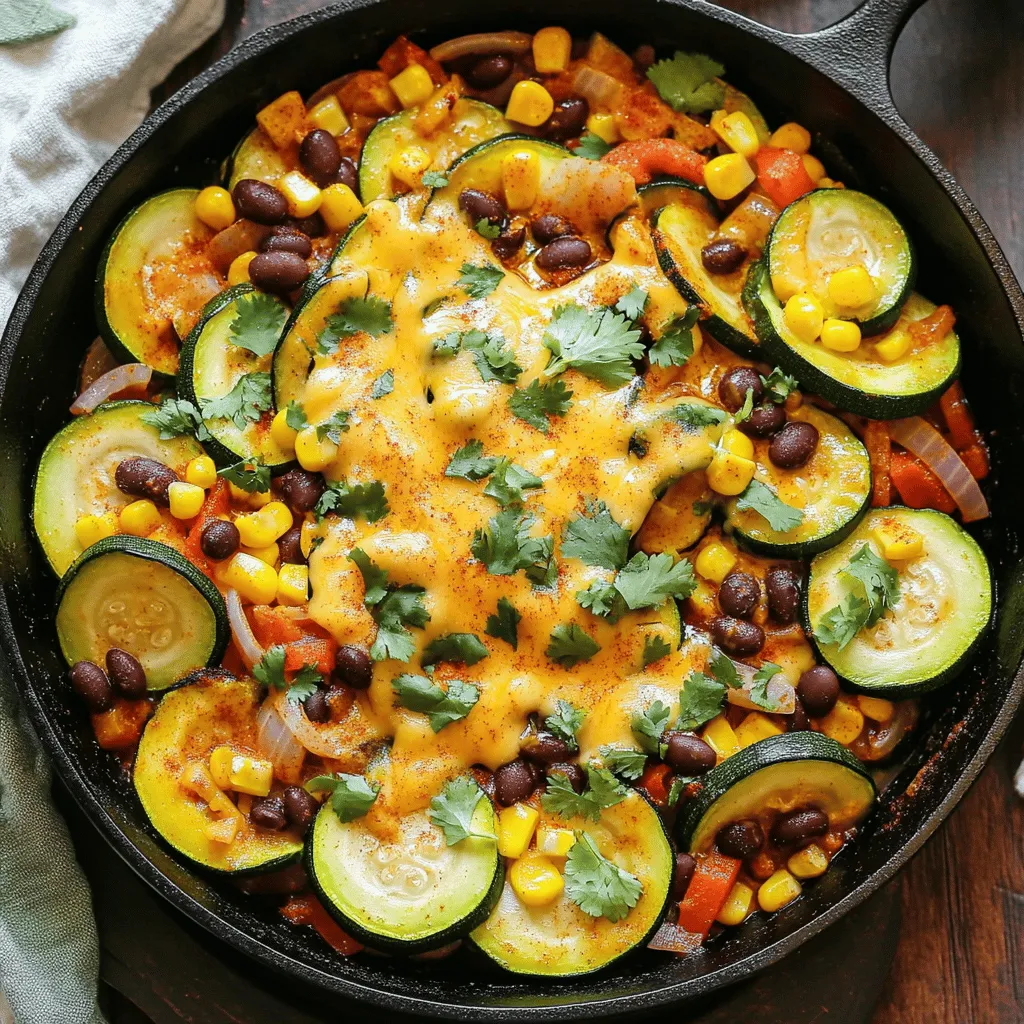
Gather these ingredients to make a delicious Tex-Mex Zucchini Skillet.Each item plays a key role in building flavor. Zucchini adds great texture and absorbs spices well. The bell pepper and onion bring sweetness and depth. Black beans offer protein, while corn adds a touch of sweetness. The spices give a warm kick, with cumin and paprika standing out. Olive oil helps the veggies cook evenly. Salt and pepper enhance all flavors. Finally, cheese gives a rich, creamy finish. Enjoy cooking!
Step-by-Step Instructions
Cooking the Vegetables
– Heat olive oil in a large skillet over medium heat.
– Sauté diced onion and red bell pepper for about 3-4 minutes.
– Add sliced zucchini and cook for another 5 minutes, stirring often.
Combining Ingredients
– Incorporate rinsed black beans and corn into the skillet.
– Add spices: cumin, smoked paprika, chili powder, garlic powder, and optional cayenne pepper.
– Season with salt and pepper to taste, mixing well.
Final Cooking Steps
– Cook the mixture for another 5-7 minutes to meld the flavors.
– Sprinkle shredded cheese over the top and cover to melt.
– Garnish with freshly chopped cilantro before serving.Enjoy!
Tips & Tricks
Cooking Tips
– Ensure olive oil is hot before adding vegetables.
– Stir frequently to avoid sticking and ensure even cooking.
These tips help your veggies cook just right. Hot oil makes veggies sizzle. Stirring often keeps them from burning.
Flavor Enhancers
– Adjust spice levels according to your taste preferences.
– Add lime juice for a zesty finish.
You can make this dish mild or spicy. If you like heat, add more cayenne. Lime juice adds a fresh twist and brightens the whole dish.
Presentation Ideas
– Serve directly from the skillet for a rustic look.
– Top with sliced avocado or serve with tortilla chips.
Serving from the skillet gives a cozy feel. Sliced avocado adds creaminess. Tortilla chips add crunch and fun.
Variations
Ingredient Customizations
You can change some ingredients in the Tex-Mex Zucchini Skillet. For a fun twist, try using different colored bell peppers. Green or yellow peppers add unique flavors and colors. You can also switch out black beans for pinto or kidney beans. This gives the dish a new taste and texture. Feel free to mix and match as you like!
Dietary Adjustments
If you want a dairy-free version, use vegan cheese or skip the cheese entirely. This still gives you a tasty meal without the dairy. You can also cut back on fat by swapping olive oil for cooking spray. This way, you enjoy a lighter version without losing flavor.
Side Dishes
To make your meal heartier, serve the skillet with quinoa or rice. Both options add more filling goodness. You can also pair it with a fresh salad. This adds extra nutrition and a crisp contrast to the warm skillet.
Storage Info
Refrigeration
Store leftovers in an airtight container, refrigerated for up to 3 days. This helps keep flavors fresh. Make sure the container seals well to avoid any odors from mixing.
Freezing Guidelines
You can freeze this dish. First, allow it to cool completely. Then, transfer it to freezer-safe bags. Squeeze out as much air as possible to prevent freezer burn. When you want to enjoy it again, remember to reheat thoroughly before serving to ensure the best taste and texture.
Reheating Instructions
To reheat, use a microwave or stovetop. If using the microwave, place it in a bowl and add a splash of water. This keeps the dish moist and prevents it from drying out. On the stovetop, heat it gently over low heat, stirring often. This way, you bring back that fresh Tex-Mex flavor. Enjoy your meal!
FAQs
How long does it take to make Tex-Mex Zucchini Skillet?
– Prep Time: 10 min | Cook Time: 25 min
Can I make Tex-Mex Zucchini Skillet ahead of time?
– Yes, you can prepare it in advance and store it as directed.
Is this recipe suitable for meal prep?
– Absolutely, it can be portioned and stored for convenient meals throughout the week.
Can I substitute zucchini with other vegetables?
– Yes, other vegetables like bell peppers, squash, or eggplant can be used as well.
What to serve with Tex-Mex Zucchini Skillet?
– Great with tortilla chips, warm tortillas, or alongside rice/quinoa.
You will love how easy this Tex-Mex Zucchini Skillet is to make. The recipe only takes 35 minutes total. By prepping ahead, you save time for busy days. Meal prep fans will enjoy storing this dish for quick lunches or dinners.
If you want to switch up the veggies, feel free to experiment. Bell peppers and squash work great. You can also try eggplant for a different taste.
When it comes to serving, this dish shines with tortilla chips. Warm tortillas are perfect too. If you want something hearty, serve it with rice or quinoa. Enjoy each bite of this flavorful meal!
This blog post shared a simple and tasty Tex-Mex Zucchini Skillet recipe. We talked about the main ingredients, spices, and step-by-step cooking directions. I highlighted helpful tips, variations, and how to store leftovers. You can adjust flavors or change ingredients to fit your needs. This dish is perfect for meal prep or a quick dinner. Enjoy making and sharing this healthy meal!


