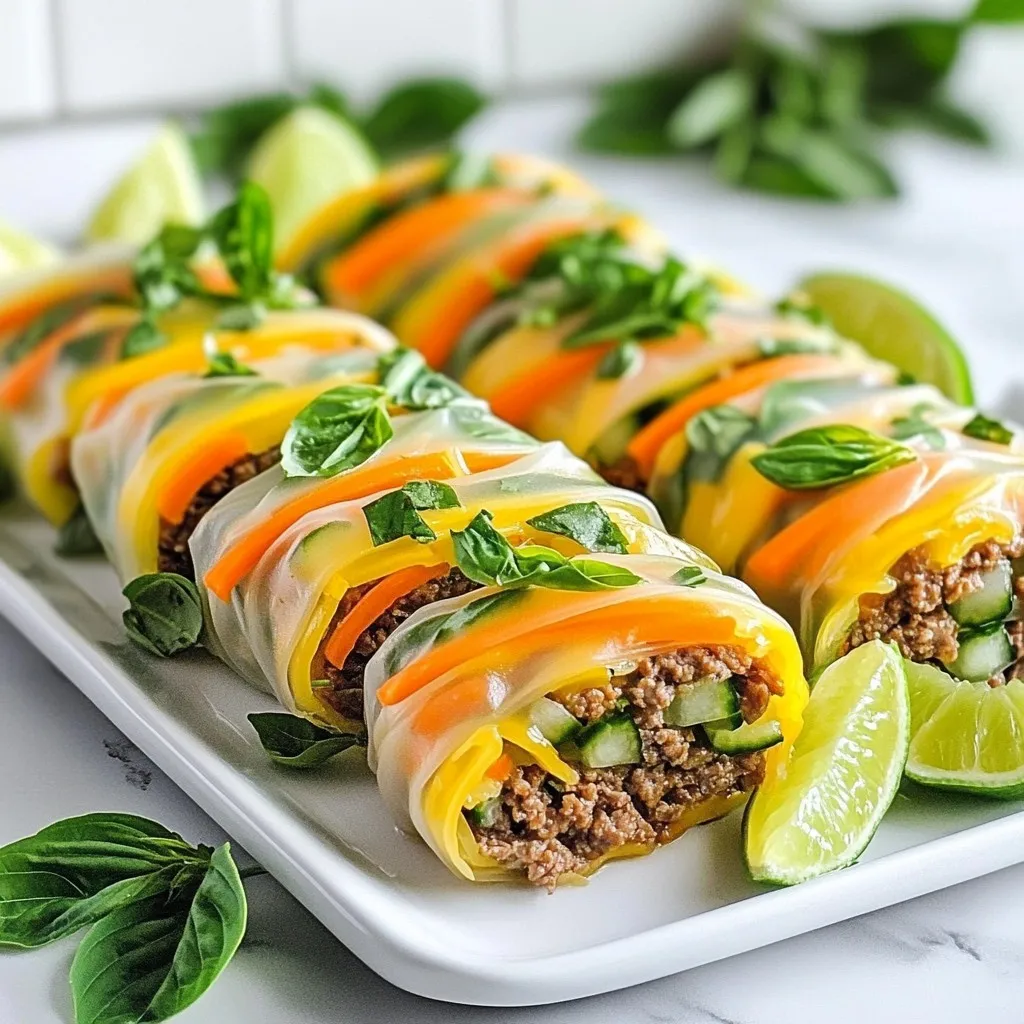
Welcome to my kitchen, where simple meets flavorful! Today, I’ll show you how to make Thai Basil Beef Rolls. These tasty rolls are quick to prepare and packed with fresh flavors. You’ll need just a few main ingredients to create a delightful dish. Whether you’re hosting a dinner or craving a snack, this recipe fits the bill. Let’s dive into how to make these delicious rolls that will impress anyone!
Why I Love This Recipe
- Fresh Ingredients: The use of fresh Thai basil and vibrant vegetables brings a burst of flavor that is hard to resist.
- Quick and Easy: With a total preparation time of just 30 minutes, this recipe is perfect for a weeknight dinner.
- Customizable: You can easily adjust the spice level and add your favorite veggies to suit your taste.
- Fun to Eat: Rolling the ingredients in rice paper makes for a fun and interactive dining experience!
Ingredients
Main Ingredients for Thai Basil Beef Rolls
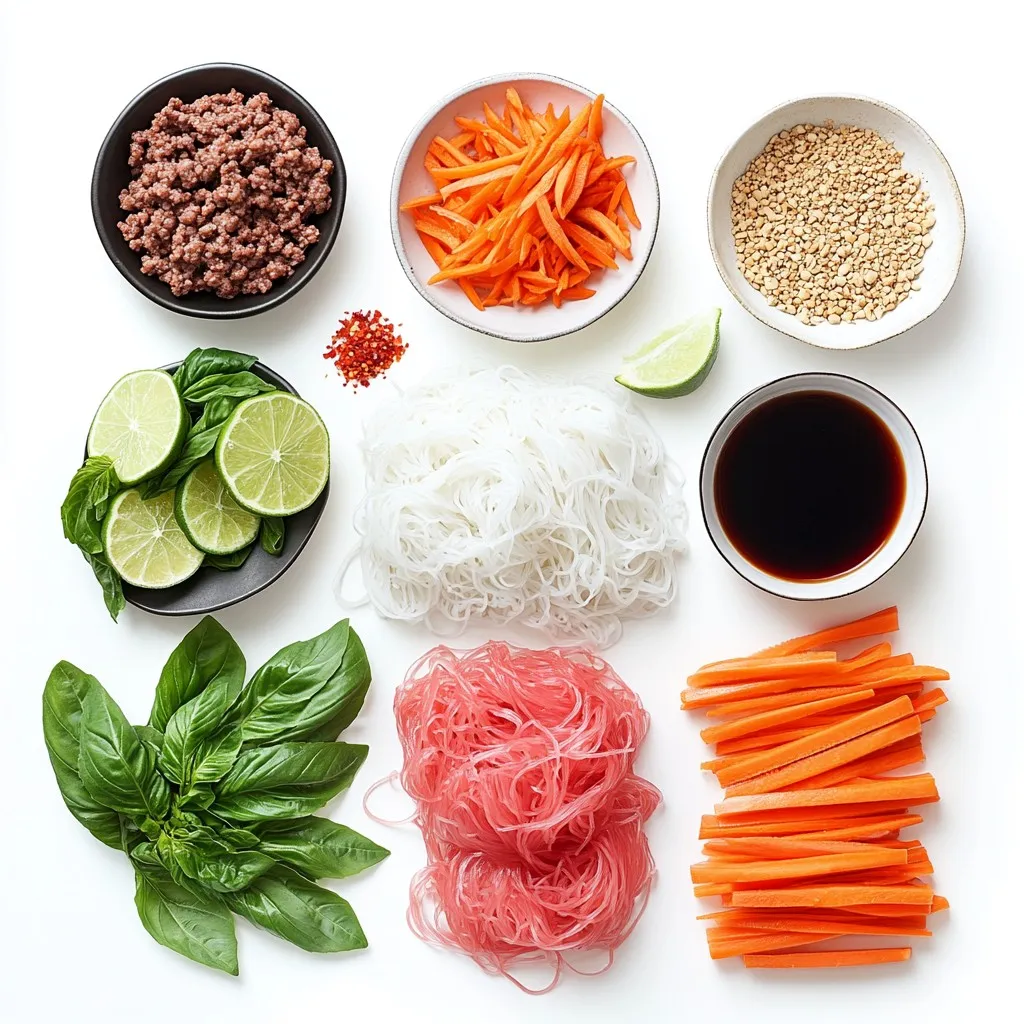
To make delicious Thai basil beef rolls, you need the following main ingredients:
– 1 lb ground beef
– 1 cup fresh Thai basil leaves, packed
– 2 cloves garlic, minced
– 1 tablespoon soy sauce
– 1 tablespoon fish sauce
– 1 tablespoon brown sugar
– 1 teaspoon red pepper flakes
– 8 rice paper wrappers
– 1 cup cooked vermicelli noodles
– 1 large carrot, julienned
– 1 cucumber, julienned
– Fresh lime wedges for serving
These ingredients create a tasty mix of flavors. The ground beef gives a hearty base. The Thai basil adds a fresh and bright touch. Garlic brings a warm aroma. Soy and fish sauces add depth, while brown sugar balances the saltiness.
Optional Ingredients for Extra Flavor
If you want to boost the flavor even more, consider these optional ingredients:
– Fresh mint leaves
– Chopped peanuts for crunch
– Sriracha for extra heat
Adding fresh mint gives a nice twist. Chopped peanuts will add a satisfying crunch. Sriracha can bring more spice if you like it hot.
Substitutions and Additions
You can swap some ingredients based on what you have. Here are some ideas:
– Use ground turkey or chicken instead of beef.
– Try rice noodles instead of vermicelli.
– Use lettuce leaves for a low-carb option.
These swaps keep the fun while changing the taste. Feel free to experiment!
Step-by-Step Instructions
Cooking the Beef
First, grab a large skillet and heat it over medium heat. Add 1 pound of ground beef to the skillet. Cook the beef for about 5 to 7 minutes. Stir it often and break it up with a wooden spoon. You want it browned and cooked through. Next, add 2 cloves of minced garlic to the meat. Sauté this for 1 to 2 minutes. You want the garlic fragrant but not burned. Now, stir in 1 tablespoon of soy sauce, 1 tablespoon of fish sauce, 1 tablespoon of brown sugar, and 1 teaspoon of red pepper flakes. Let it cook for another 2 minutes. Finally, fold in 1 cup of fresh Thai basil leaves. The heat will wilt the basil. Remove the skillet from the heat and let the mixture cool slightly.
Preparing the Rice Paper
Next, find a large shallow dish or skillet. Fill it with warm water. Take one rice paper wrapper and dip it into the water. Hold it in for about 15 to 20 seconds. You want the wrapper to soften and become easy to handle. Once it’s ready, take it out and place it on a clean, flat surface. Make sure it doesn’t stick to anything.
Assembling and Wrapping the Rolls
Now it’s time to assemble your rolls! On the softened rice paper, add a few tablespoons of your beef mixture in the center. Then, add a small handful of cooked vermicelli noodles. Next, include some of the julienned carrots and cucumbers. Now, fold the sides of the rice paper over the filling. Roll it away from you to keep everything secure inside. Repeat this with the rest of the wrappers and filling. Once you finish, arrange the rolls on a platter. Serve them with fresh lime wedges for a zesty touch.
Tips & Tricks
Best Cooking Techniques for Flavorful Rolls
To make the best Thai basil beef rolls, start with good beef. Use fresh ground beef. Cook it on medium heat. This keeps the beef juicy. Stir it often. This helps it brown nicely. Add garlic after the beef is cooked. Garlic adds so much flavor. Mix in soy sauce, fish sauce, and brown sugar next. These seasonings create a rich taste. Lastly, fold in the Thai basil gently. Let the heat wilt the leaves. This keeps their fresh taste.
Common Mistakes to Avoid
One mistake is overcooking the beef. This can make it tough. Cook just until brown and no longer pink. Another mistake is not soaking the rice paper long enough. It should be soft but not falling apart. If it tears, it won’t hold the filling well. Don’t skip the fresh lime. It adds brightness to the dish. A common error is using too much filling. This makes it hard to roll. Keep it balanced for easier wrapping.
Serving Suggestions for an Impressive Meal
Arrange the rolls neatly on a platter. This makes them look nice. Add fresh basil sprigs on top for color. Serve with lime wedges for squeezing. It helps enhance the flavors. A small bowl of sweet chili sauce is a great dip. You can also offer hoisin or peanut sauce. These add more flavor options. Enjoy these delicious rolls with friends at your next meal!
Pro Tips
- Use Fresh Ingredients: Always opt for fresh Thai basil and vegetables to enhance the flavor and texture of your rolls.
- Customize Your Spice Level: Adjust the amount of red pepper flakes based on your heat preference; you can also add sliced fresh chili for extra kick.
- Make Ahead: Prepare the beef filling in advance and store it in the refrigerator for up to 2 days, making assembly quicker when you’re ready to serve.
- Perfectly Soften Rice Paper: Ensure you don’t over-soak the rice paper; it should be pliable but not mushy to maintain a good structure for rolling.
Variations
Vegetarian or Vegan Alternatives
If you want a meat-free option, try using tofu or tempeh. Both can soak up flavors well. You can sauté them just like the beef. For a burst of taste, add more garlic and soy sauce. Use the same fresh Thai basil and veggies to keep it vibrant. You will still enjoy that great flavor!
Different Proteins to Use
Ground chicken or turkey works great in this recipe. These meats have a lighter taste, and they absorb the spices well. You can also try shrimp for a seafood twist. Just make sure to cook it until it’s opaque. Each protein brings its own flavor to the rolls.
Flavor Pairing Ideas
Pair these rolls with sweet chili sauce for dipping. This adds a nice kick to each bite. You could also serve them with a side of peanut sauce. It adds creaminess and depth. For a fresh touch, lime juice is perfect. Just squeeze it over the rolls before you eat. This brightens all the flavors!
Storage Info
How to Store Leftover Rolls
To keep your Thai Basil Beef Rolls fresh, place them in an airtight container. Make sure to separate layers with parchment paper. This helps prevent sticking. Store them in the fridge for up to three days. If you see any moisture, dry the rolls with a paper towel before storing.
Reheating Instructions
When you’re ready to eat the leftover rolls, you have a few options. You can microwave them for about 30 seconds. Check if they are warm. If not, heat for another 15 seconds. You can also reheat them in a skillet. Just place them over low heat for a few minutes. This keeps the wrapper crispy.
Freezing Tips for Meal Prep
If you want to freeze the rolls, wrap each one in plastic wrap. Place the wrapped rolls in a freezer bag. They can last up to two months in the freezer. When you’re ready to eat, thaw them in the fridge overnight. Reheat them as mentioned above before serving. Enjoy your tasty rolls anytime!
FAQs
What is the best way to wrap rice paper?
To wrap rice paper, start with warm water. Dip one rice paper wrapper for 15-20 seconds. It should feel soft and bendy. Lay the wrapper flat on a clean surface. Add your filling in the center. Fold the sides in, then roll from the bottom up. Tuck tight for a good seal. Practice makes perfect!
Can I make Thai Basil Beef Rolls ahead of time?
Yes, you can prepare these rolls ahead of time. Just wrap them and store them in the fridge. Use a damp cloth to keep them fresh. For the best taste, eat them within a day. If you wait too long, the wrappers may dry out.
How to adjust spice levels in the recipe?
To adjust spice levels, change the red pepper flakes. Use less for milder rolls. You can also add more if you like heat. For a different flavor, try fresh sliced chili peppers. Taste your filling before wrapping. This way, you can find your perfect spice level!
In this blog post, we explored making Thai Basil Beef Rolls. We covered main and optional ingredients, cooking methods, and common mistakes. You learned how to prepare, assemble, and store your rolls. Variations allow you to adapt this dish to your taste.
Always remember, practice makes perfect! Enjoy creating and sharing these rolls with friends and family. Try different flavors to find the mix you love bes


