Are you craving a delicious and simple meal? In this guide, I’ll show you how to make flavorful Thai Peanut Noodles that are packed with fresh veggies and a creamy peanut sauce. No need to be a chef! With easy steps and handy tips, you’ll impress your friends and family in no time. Let’s dive into this tasty adventure that brings a taste of Thailand right to your kitchen!
Ingredients
Main Ingredients for Thai Peanut Noodles
– 8 oz rice noodles
– 1 cup snap peas, trimmed
– 1 red bell pepper, thinly sliced
– 1 medium carrot, julienned
– 1 cucumber, julienned
– 3 green onions, chopped
– 1/4 cup fresh cilantro, chopped
– 1/2 cup creamy peanut butter
– 1/4 cup low-sodium soy sauce
– 2 tablespoons fresh lime juice
– 1 tablespoon honey or maple syrup
– 1 tablespoon sesame oil
– 1 teaspoon fresh ginger, minced
– 1 clove garlic, minced
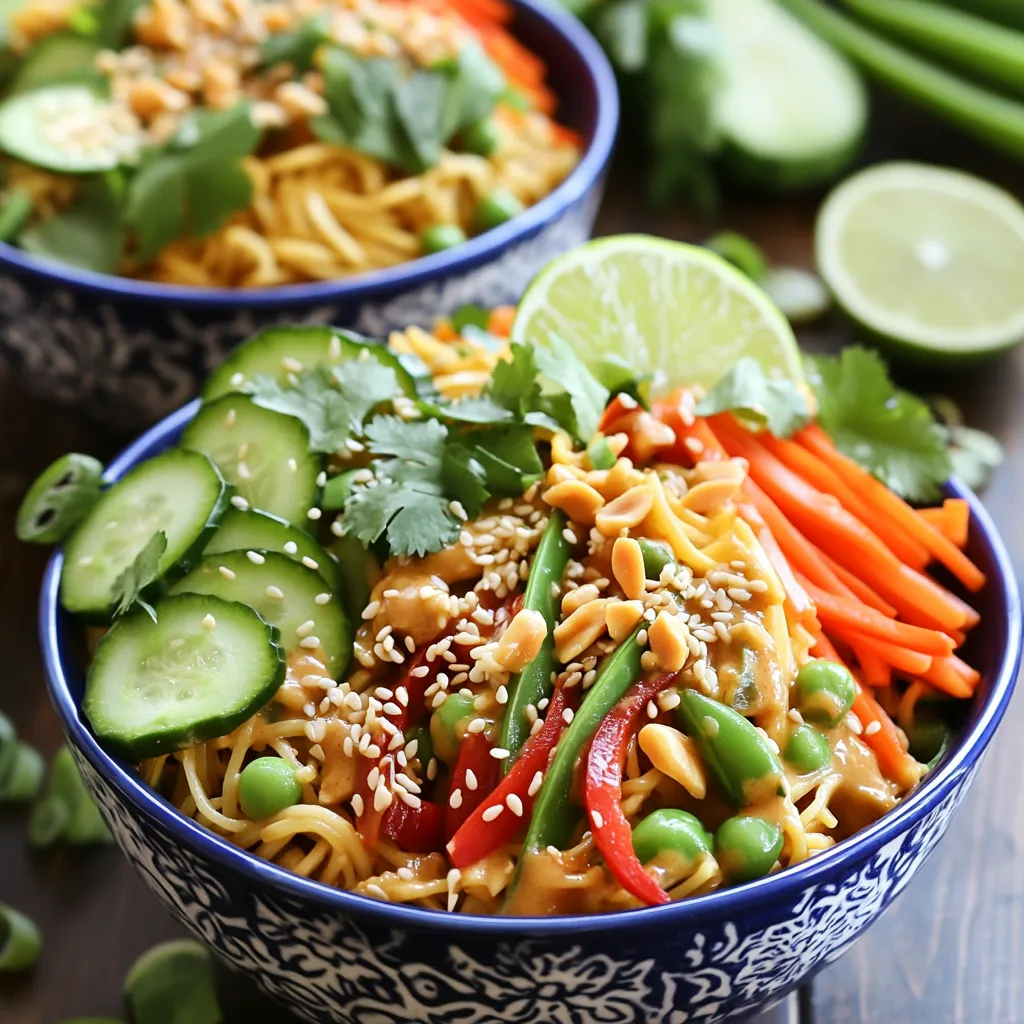
The main ingredients make the dish shine. Rice noodles provide a soft base. Fresh vegetables add color and crunch. Snap peas, red bell pepper, carrot, and cucumber bring flavor and nutrients. The peanut sauce combines creamy peanut butter, soy sauce, lime juice, honey, sesame oil, ginger, and garlic. This mix gives the noodles their rich and tangy taste.
Optional Garnishes
– Crushed peanuts
– Toasted sesame seeds
– Fresh cilantro and green onions
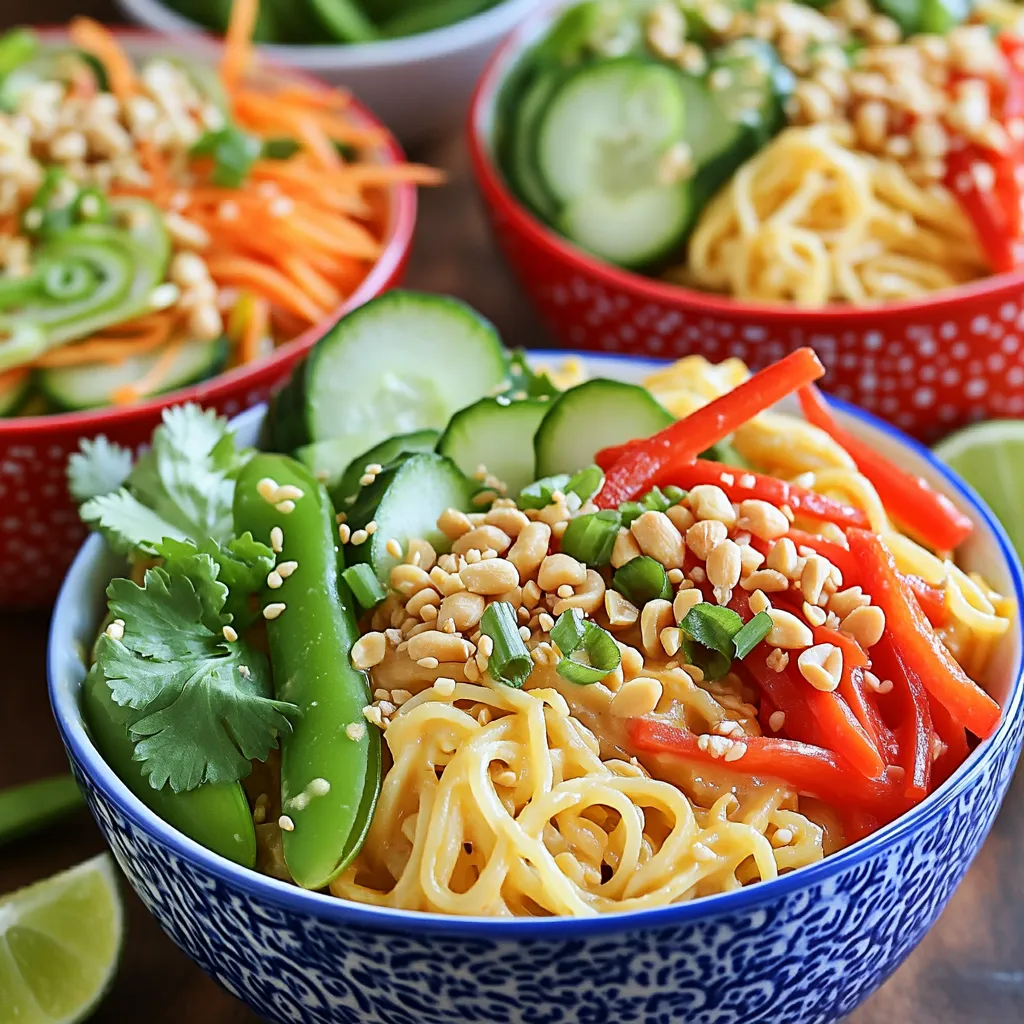
Garnishes take your dish to the next level. Crushed peanuts add crunch and a nutty flavor. Toasted sesame seeds give a nice touch and extra taste. Fresh cilantro and green onions add brightness and color. These garnishes make your Thai peanut noodles look beautiful and inviting.
Step-by-Step Instructions
Cooking the Rice Noodles
To start, you need a large pot of salted water. Bring it to a rolling boil. Once it’s boiling, add 8 oz of rice noodles. Cook them according to the package instructions until they are al dente. This usually takes about 4 to 6 minutes. After that, drain the noodles. Rinse them immediately under cold water to stop the cooking. Set them aside while you prepare the other parts of the dish.
Making the Peanut Sauce
Next, grab a medium bowl. In it, mix together the creamy peanut butter, low-sodium soy sauce, fresh lime juice, honey or maple syrup, sesame oil, minced ginger, and minced garlic. Whisk these ingredients until smooth. If you find the sauce too thick, add a tablespoon of warm water. Keep mixing until you reach the right consistency.
Sautéing the Vegetables
Now it’s time for the veggies! Heat a large skillet over medium heat. Add a splash of water or drizzle some sesame oil. Once it’s hot, toss in 1 cup of snap peas, 1 thinly sliced red bell pepper, and 1 julienned carrot. Sauté these for about 3 to 4 minutes. Stir them often until they are tender but still crisp.
Combining Noodles and Sauce
Add the cooled rice noodles into the skillet with the sautéed vegetables. Pour the peanut sauce over everything. Use tongs or a spatula to gently toss everything together. Make sure the noodles and veggies are evenly coated in the sauce. This step is key to getting the best flavor.
Adding Fresh Ingredients
Once everything is mixed, take the skillet off the heat. Stir in the julienned cucumber, chopped green onions, and fresh cilantro. Be gentle while mixing to keep these ingredients crunchy and fresh. This adds a nice bite to the dish.
Serving Suggestions
Dish the Thai peanut noodles into bright bowls. For a fun touch, sprinkle crushed peanuts and toasted sesame seeds on top. You can also drizzle a bit of extra peanut sauce for extra flavor. Don’t forget to add a lime wedge on the side! This adds a zesty kick to each serving.
Tips & Tricks
Perfecting the Sauce Texture
To get the right sauce thickness, start with the base. Mix the creamy peanut butter, soy sauce, lime juice, honey, sesame oil, ginger, and garlic in a bowl. If the sauce is too thick, don’t worry! Just add warm water, one tablespoon at a time. Stir well after each addition. This way, you can control how thick or thin you want it.
Ensuring Vegetable Crispness
Keep your veggies crisp and fresh! Heat your skillet and add a splash of water or sesame oil. Toss in your snap peas, red bell pepper, and carrots. Stir them often for about 3-4 minutes. This quick cooking time keeps them tender but still crunchy. Don’t let them sit too long, or they will get too soft.
Cooking Noodles Al Dente
Cooking noodles just right is key for great texture. Follow the package instructions carefully. Bring a pot of salted water to a boil before you add the rice noodles. Cook them until they are al dente, which means they should have a slight bite to them. Once cooked, drain and rinse under cold water. This stops the cooking process and keeps them from getting mushy.
Variations
Vegan Option
If you want a vegan dish, swap honey for maple syrup. This change keeps the sweet flavor. Maple syrup blends well with the peanut sauce. You will still enjoy the creamy taste without using animal products.
Gluten-Free Version
For a gluten-free meal, look for gluten-free soy sauce. Brands like Tamari or coconut aminos work great. They give the same salty taste without gluten. Always check the label to ensure it’s certified gluten-free.
Ingredient Substitutions
Feel free to switch up the nut butter. Almond or sunflower seed butter are good choices. You can also add different veggies. Try bell peppers, broccoli, or zucchini for a new twist. Each brings its own flavor and crunch to the dish.
Storage Info
How to Store Leftovers
To keep your Thai peanut noodles fresh, store them in an airtight container. Make sure the noodles cool to room temperature first. Place the container in the fridge. If you want to save them for a longer time, you can freeze them. Just portion them out in freezer bags. Remove as much air as possible before sealing.
Reheating Tips
When it’s time to eat your leftovers, you’ll want to reheat them carefully. The best way is to use a skillet. Heat it over medium-low heat and add a splash of water or oil. Toss the noodles gently until they warm up. This method helps keep the noodles from getting mushy. You can also use the microwave. Just cover the bowl with a damp paper towel to keep moisture in.
Shelf Life
Thai peanut noodles can stay fresh in the fridge for about 3 to 4 days. If you freeze them, they can last for up to 2 months. However, for the best taste and texture, try to eat them sooner. Eating them fresh always tastes best!
FAQs
Can I make Thai peanut noodles ahead of time?
Yes, you can make Thai peanut noodles ahead of time. This dish stores well. Here are some tips:
– Prepare the noodles and sauce separately.
– Cook and cool the noodles, then store them in an airtight container.
– Keep the sauce in a jar with a tight lid in the fridge.
– When ready to eat, combine them and add the fresh veggies.
– These noodles taste great after a day in the fridge!
Is this recipe spicy?
This recipe is not very spicy. The peanut sauce has a rich, nutty flavor. If you want more heat, try these tips:
– Add red pepper flakes or sriracha to the sauce.
– You can also sprinkle chili powder on top when serving.
– Adjust the spice to fit your taste.
What are the nutritional benefits of Thai peanut noodles?
Thai peanut noodles offer many health benefits. Here’s a quick overview:
– Rice noodles are gluten-free and low in calories.
– Vegetables add vitamins and minerals, plus fiber for digestion.
– Peanut butter is high in protein and healthy fats.
– Fresh lime juice boosts vitamin C and helps your immune system.
Can I add protein to this dish?
Yes, you can add protein to Thai peanut noodles! Here are some suggestions:
– Tofu is a great plant-based option.
– Cooked chicken adds a nice flavor.
– Shrimp is quick to cook and pairs well with the sauce.
– Try marinating proteins in the sauce for extra taste.
Thai peanut noodles offer a simple yet delicious dish. We covered key ingredients, including rice noodles, fresh vegetables, and peanut sauce components. You learned how to cook the noodles, mix the sauce, and sauté the veggies for crunch. We also discussed variations, storage tips, and answered common questions.
Now, you have all the tools to make great Thai peanut noodles. Enjoy cooking and discovering new flavors!


