Vegan Chocolate Mousse Decadent and Simple Recipe

Are you ready to indulge in a rich and creamy dessert that’s entirely plant-based? This Vegan Chocolate Mousse is not only decadent but also simple to make. With just a few key ingredients like silken tofu and dairy-free chocolate chips, you’ll create a treat that pleases every palate. Let’s dive into this delightful recipe and discover how to whip up a chocolatey masterpiece that everyone will love!
Ingredients
Main Ingredients for Vegan Chocolate Mousse
– 1 cup silken tofu, thoroughly drained
– 1/2 cup dairy-free dark chocolate chips
– 1/4 cup pure maple syrup
– 2 tablespoons unsweetened cocoa powder
The main ingredients in this vegan chocolate mousse make it rich and creamy. Silken tofu gives a smooth texture. It acts as a great base, offering protein without any dairy. Dairy-free dark chocolate chips add a deep chocolate flavor. They melt well and mix perfectly with the tofu. Pure maple syrup sweetens the mousse naturally. It balances the bitterness of cocoa powder. Unsweetened cocoa powder enhances the chocolate taste. This mix creates a tasty dessert that feels indulgent.
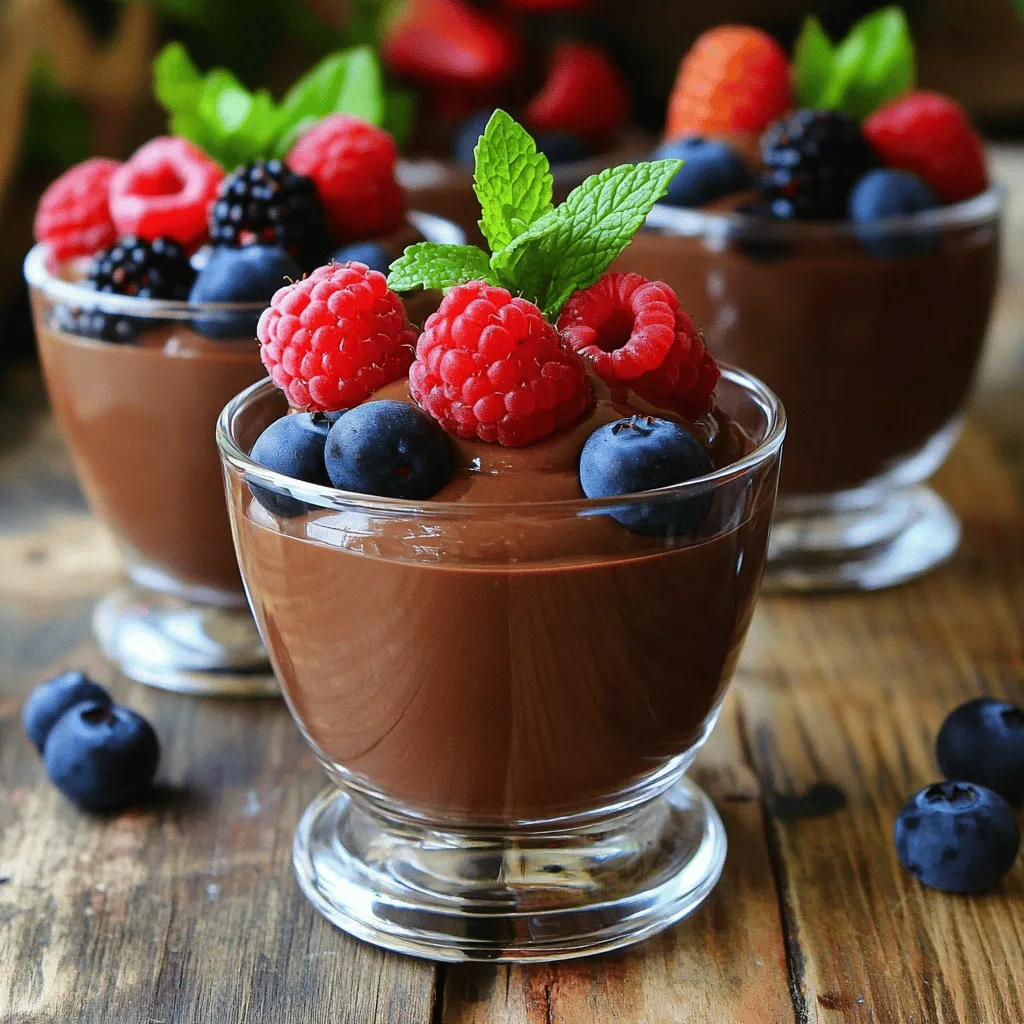
Optional Garnishes
– Fresh berries (raspberries or strawberries)
– Mint leaves
Adding fresh berries makes the mousse look vibrant. They also add a nice tartness. Mint leaves bring a fresh flavor that lifts the chocolate taste. These garnishes are not just pretty; they make the mousse even better.
Ingredient Notes
For the milk, I recommend almond milk or any plant-based milk you enjoy. Soy milk or oat milk works too. Each type will give a slightly different taste. You can also switch the sweetener. Agave nectar or coconut sugar are good choices. Just remember, each sweetener has a unique flavor. Adjust the amount based on your preference.
Step-by-Step Instructions
Melting the Chocolate
To melt the chocolate, I use the microwave. First, place the dairy-free dark chocolate chips in a microwave-safe bowl. Heat them in 30-second bursts. Stir well after each round to mix in the heat. This helps prevent hot spots. Be careful not to overheat, as it can change the texture. If the chocolate starts to look thick or grainy, stop heating immediately.
Blending the Ingredients
Next, it’s time to blend. I add the drained silken tofu first. Then, I pour in the melted chocolate. After that, I add the maple syrup, cocoa powder, vanilla extract, sea salt, and almond milk. This order helps everything mix better. Blend on high speed until it’s creamy and smooth. Stop now and then to scrape the sides. This way, all the bits get mixed in well. The mousse should be velvety and rich when done.
Chilling the Mousse
Chilling is crucial for the mousse. After blending, spoon the mixture into cups. Place them in the fridge for at least 1 to 2 hours. This time helps the mousse firm up. It also lets the flavors meld together. If you skip chilling, the mousse will be runny. Trust me, cooling is key for a delightful texture.
Tips & Tricks
Achieving the Perfect Texture
To get a velvety mousse, start with a strong blender. Combine your silken tofu and melted chocolate. Blend on high speed. Stop often to scrape the sides. This keeps everything even. If your mousse is too thick, add almond milk a little at a time. Blend again until smooth.
Flavor Enhancements
You can change the sweetness easily. Taste your mousse after blending. If it needs more sweetness, add maple syrup. Blend again. For a twist, add extracts like almond or orange. A dash of cinnamon can also bring warmth and depth.
Serving Suggestions
Serve your mousse in individual cups for a nice touch. You can layer it with fresh berries for color and flavor. Mint leaves on top add a fresh taste. For more fun, try serving it in chocolate cups or with a drizzle of nut butter. This makes every bite special!

Variations
Different Chocolate Options
You can mix up your mousse by using various types of dairy-free chocolate. Dark chocolate gives a rich taste. You can also try semi-sweet or even white chocolate. Each type brings a unique flavor. Flavored chocolates, like orange or mint, add an exciting twist. Just melt them the same way as dark chocolate. This lets you play with taste and make it your own.
Alternative Ingredients
If you want to swap silken tofu, avocados work great. They create a creamy texture, too. Simply blend ripe avocados with the melted chocolate and other ingredients. For sweeteners, maple syrup is popular, but you can use agave nectar or coconut sugar instead. They provide sweetness without changing the mousse’s texture. Experimenting with these ingredients keeps your mousse fresh and fun.
Unique Garnishing Ideas
Garnishes can change the look and taste of your mousse. Fresh fruits like bananas, cherries, or kiwi add a pop of color and taste. You can also sprinkle chopped nuts on top for crunch. If you want something special, use edible flowers. They make your mousse look stunning and add a touch of elegance. Get creative and see what combinations you enjoy the most!
Storage Info
How to Store Leftover Mousse
Store leftover mousse in airtight containers. This keeps it fresh and safe. Glass or plastic containers work well. Avoid using metal, as it may react with the mousse. Make sure to seal the containers tightly. Keep the mousse in the fridge at a temperature below 40°F (4°C). This helps maintain its creamy texture.
Shelf Life of Vegan Chocolate Mousse
Vegan chocolate mousse lasts about 3 to 5 days in the fridge. Check for signs that it has gone bad. If you see any discoloration or an off smell, it’s best to discard it. The texture may also change. If it becomes grainy or watery, it’s time to let it go.
Freezing Instructions
Yes, you can freeze vegan chocolate mousse. Use an airtight container for freezing. Leave some space at the top, as it may expand. When you are ready to eat it, defrost it in the fridge overnight. Avoid thawing at room temperature, as this can change the texture. After defrosting, you may need to blend it again for a creamy finish.
FAQs
Can I use firm tofu instead of silken tofu?
Firm tofu and silken tofu have different textures. Silken tofu is creamy and smooth. It blends well to create a light mousse. Firm tofu is denser and may result in a thicker texture. Using firm tofu can change the taste, making it less delicate. If you want a light mousse, stick with silken tofu.
Is vegan chocolate mousse gluten-free?
Yes, this vegan chocolate mousse is gluten-free! All the ingredients are safe for gluten-free diets. The silken tofu, dairy-free chocolate chips, and cocoa powder do not contain gluten. Always check labels to ensure no cross-contamination. Enjoy your delicious treat without worry.
How can I make this recipe nut-free?
To make this mousse nut-free, you can swap almond milk for oat milk or soy milk. Both options work well and keep the mousse creamy. For garnishes, instead of nuts, use fresh berries or coconut flakes. This way, you can still enjoy a beautiful dessert that suits your needs.
This blog post covered how to make a delicious vegan chocolate mousse. I shared the main ingredients, like silken tofu and dairy-free chocolate. You learned the step-by-step process, from melting chocolate to chilling the mousse for the best texture. I also gave tips on variations and storage to keep your mousse fresh.
With these insights, you can enjoy a rich and creamy dessert that’s simple and versatile. Try different flavors and enjoy every bite!


![- 1 cup pumpkin puree - 1 ½ cups crushed graham crackers - ½ teaspoon pumpkin spice - ½ cup powdered sugar - 1 teaspoon vanilla extract - 8 oz dark chocolate - 1 tablespoon coconut oil - Flaky sea salt To create chocolate covered pumpkin truffles, you need simple yet flavorful ingredients. Start with pumpkin puree, either canned or homemade. This is the base for your truffles. Next, grab crushed graham crackers. They give the truffles a unique texture and sweetness. Pumpkin spice adds warmth and flavor. You can adjust the amount if you want a stronger taste. Powdered sugar sweetens the mixture, making each bite a delight. Vanilla extract rounds out the flavor profile beautifully. For the chocolate coating, use dark chocolate. It contrasts nicely with the sweetness of the truffles. Adding coconut oil to the chocolate helps it melt smoothly. Finally, a sprinkle of flaky sea salt on top enhances the flavor, making each truffle even more irresistible. - Mixing bowl - Spoon or spatula - Measuring cups and spoons - Parchment paper - Baking sheet - Double boiler or microwave-safe bowl You will need a few tools to make these truffles. A mixing bowl is essential for combining your ingredients. A spoon or spatula helps you mix everything well. Measuring cups and spoons ensure that your ingredients are precise. Parchment paper is key for lining your baking sheet. It keeps the truffles from sticking. You also need a baking sheet to hold the truffles while they chill. Finally, a double boiler or a microwave-safe bowl helps melt the chocolate evenly. With these ingredients and tools, you're ready to create chocolate covered pumpkin truffles that everyone will love. For the complete recipe, check out the Full Recipe link. Start by mixing the pumpkin puree with the dry ingredients. In a large bowl, add: - 1 cup pumpkin puree - 1 ½ cups crushed graham crackers - ½ teaspoon pumpkin spice - ½ cup powdered sugar - 1 teaspoon vanilla extract Use a spatula or wooden spoon to blend these together. Mix until you have a smooth, dough-like consistency. The mixture should be firm enough to hold its shape. Next, it’s time to shape the truffles. With clean hands, scoop out tablespoon-sized portions. Roll each portion into a ball, about 1 inch in diameter. Place the balls on a parchment-lined baking sheet. Make sure to space them apart. This helps them keep their shape. After shaping, cover the baking sheet with plastic wrap and chill in the fridge for about 30 minutes. While the truffles chill, let’s melt the chocolate. You can use a double boiler or the microwave. If you choose the double boiler, place a heatproof bowl over a pot of simmering water. Stir the chocolate and coconut oil together until smooth. If using the microwave, heat in 20-second bursts, stirring in between. Make sure the chocolate is silky before dipping. Once the truffles are chilled, it’s time to coat them. Dip each ball into the melted chocolate. Make sure it’s fully covered. Use a fork to lift it out, letting the excess chocolate drip back into the bowl. Place the coated truffles back on the parchment-lined sheet. While the chocolate is still wet, sprinkle a pinch of flaky sea salt on each truffle. This adds a burst of flavor that balances the sweetness. Let the truffles sit at room temperature until the chocolate sets. You can speed up this process by placing them in the fridge for about 15-20 minutes. Now, your delicious chocolate-covered pumpkin truffles are ready to enjoy. You can find the full recipe above for more details on each step. Chilling the truffles is key. It helps them hold their shape better when you dip them. After you roll the truffles, place them in the fridge for about 30 minutes. This step makes a big difference in texture. To roll smooth truffles, make sure your hands are clean and dry. Use a light touch as you form the balls. If your mixture is sticky, wet your hands slightly. This helps shape them without making a mess. Melting chocolate can be tricky. To melt chocolate evenly, I recommend using a double boiler. Fill a pot with a bit of water, then place a heatproof bowl on top. Stir the chocolate as it melts. This method prevents burning. If you want a nice shine, add a tablespoon of coconut oil to the chocolate. It will make your truffles look glossy and appealing. Get creative when it comes to serving. You can sprinkle a little cinnamon on top for extra flavor. Pumpkin seeds also add a nice crunch and look great on a dessert table. These truffles pair well with coffee or a spiced chai. Consider serving them at your next fall gathering or holiday party. They will surely impress your guests! For the full recipe, check the main section. {{image_4}} You can easily change the taste of your truffles. Try adding almond extract for a nutty twist. A bit of orange zest will give your truffles a fresh, fruity kick. You can also swap out the pumpkin spice for cinnamon or nutmeg. Each spice brings a new flavor to your truffles. If you need gluten-free options, look for gluten-free graham crackers. Many brands offer these, and they work just as well. For those who prefer dairy-free treats, use dairy-free chocolate for the coating. There are great dairy-free chocolate chips available that melt nicely. Want to make your truffles extra special? Roll them in crushed nuts like pecans or walnuts. This adds a nice crunch. You can also use colorful sprinkles for a fun look. If dark chocolate isn’t your thing, try coating the truffles in white chocolate instead. It adds a sweet, creamy flavor that pairs well with pumpkin. For the full recipe, check out the [Full Recipe]. To keep your chocolate covered pumpkin truffles fresh, store them in the fridge. The cool temperature helps maintain their texture and flavor. Place the truffles in an airtight container to prevent them from drying out. This way, they can stay yummy for up to one week. If you want to enjoy them longer, try to avoid leaving them out at room temperature for too long. If you want to save some truffles for later, freezing is a great option. First, place the truffles on a baking sheet, making sure they don’t touch. Freeze them for about an hour until they are firm. Once frozen, transfer the truffles to a freezer-safe bag or container. They can last for up to three months in the freezer. When you’re ready to enjoy them, simply take out the number of truffles you want. Let them thaw in the fridge for a few hours or at room temperature for about 30 minutes. Avoid using heat to thaw, as this can ruin their texture. Now they're ready to be devoured! Chocolate covered pumpkin truffles can last about one week in the fridge. Store them in an airtight container to keep them fresh. After a week, check for signs of spoilage, such as a change in smell or texture. If they feel sticky or smell off, it's best to toss them. Yes, you can easily make these truffles vegan! Use dairy-free chocolate instead of dark chocolate. Swap the coconut oil for a plant-based butter or more coconut oil. This keeps the rich flavor while making it suitable for a vegan diet. These truffles shine at holiday gatherings and parties. They also make great gifts for friends and family. Their festive look and delicious taste fit well with autumn themes. Serve them during Halloween, Thanksgiving, or any cozy get-together. Yes, you can find chocolate covered pumpkin truffles at many bakeries. Look for local shops that specialize in gourmet treats. Some popular brands also offer these truffles online. You can enjoy them without all the fuss of making them at home. For a homemade touch, check out the Full Recipe for a delightful DIY version! Creating chocolate covered pumpkin truffles is simple and fun. We covered key ingredients like pumpkin puree, graham crackers, and dark chocolate. You learned tools needed, step-by-step instructions, and tips for easy truffle-making. We also looked at flavors, variations, storage, and common questions. These truffles make a perfect treat for any occasion. Enjoy making these delightful bites and share them with friends! You’ll impress everyone with your tasty skills.](https://joymealplan.com/wp-content/uploads/2025/07/35417da5-91a5-48e5-8a48-b090ca73d24b-768x768.webp)


