Vegetable Frittata Tasty and Simple Recipe Guide

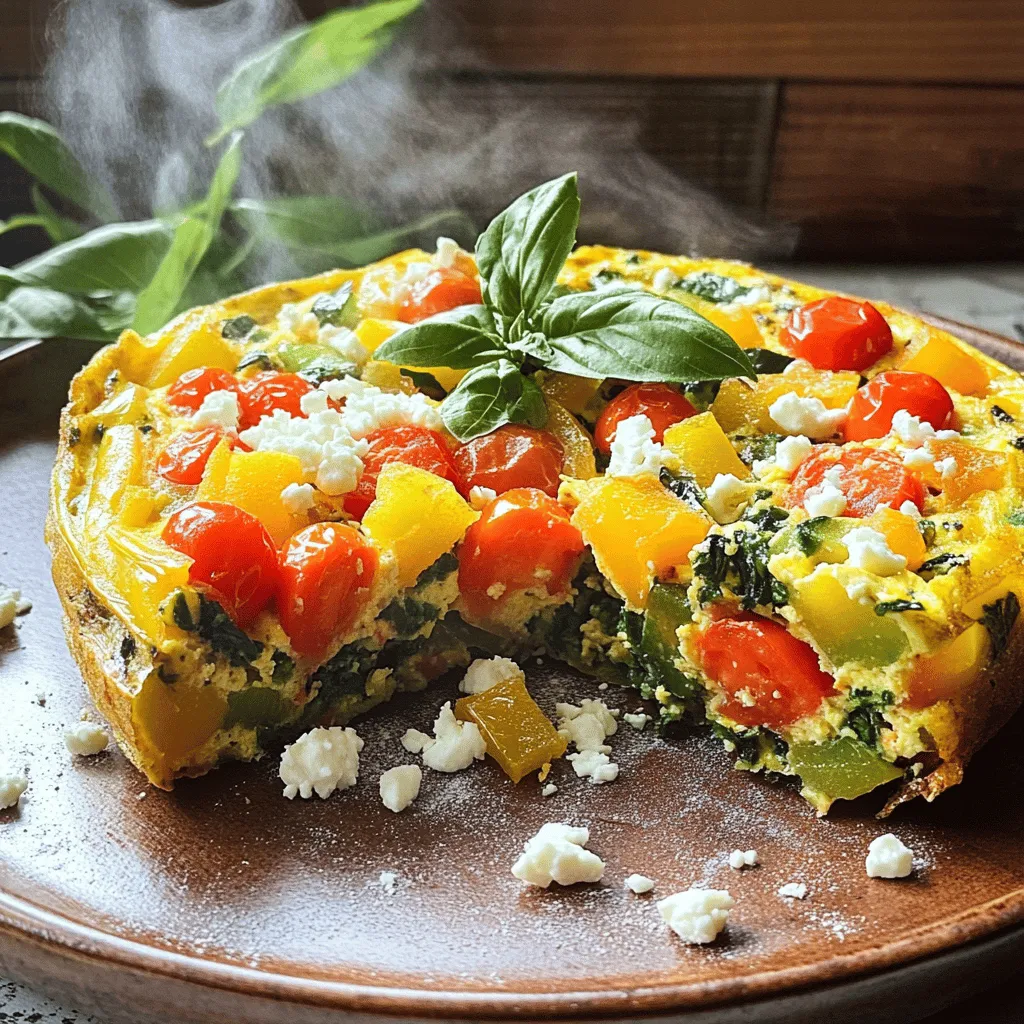
Are you ready to whip up a delicious and healthy meal? This Vegetable Frittata is not just tasty; it’s simple to make and packed with nutrients! With fresh veggies and eggs at its core, you can customize it to your liking. Whether you’re cooking for breakfast or brunch, this guide will walk you through every step. Let’s dive in and create something wonderful together!
Ingredients
Main Ingredients for Vegetable Frittata
– 6 large eggs
– 1/2 cup milk
– 1 cup fresh spinach, chopped
– 1/2 cup cherry tomatoes, halved
– 1/2 cup bell pepper, diced
– 1/4 cup red onion, finely chopped
– 1/2 cup feta cheese, crumbled
– 2 tablespoons olive oil
The main ingredients form the base of your frittata. Eggs and milk create a fluffy texture. Fresh spinach adds color and nutrients. Cherry tomatoes bring sweetness. Bell peppers and onions provide crunch and flavor. Feta cheese adds a salty kick, making each bite special.
Seasonings and Flavors
– 1 teaspoon garlic powder
– 1 teaspoon dried oregano
– Salt and pepper, to taste
Seasonings enhance the taste. Garlic powder adds depth. Dried oregano brings an herbal note. Salt and pepper balance flavors. Adjust these to fit your taste.
Optional Ingredients for Extra Flavor
– Types of cheese (e.g., cheddar, goat cheese)
– Additional vegetables (e.g., zucchini, mushrooms)
– Fresh herbs (e.g., basil, parsley)
Want to change it up? Use different cheeses for a new twist. Add veggies like zucchini or mushrooms for more variety. Fresh herbs, like basil or parsley, make it fresh and vibrant.
Step-by-Step Instructions
Prepping the Ingredients
– Preheat the oven to 375°F (190°C).
– In a large bowl, whisk together 6 eggs and 1/2 cup of milk.
Cooking the Vegetables
– Heat 2 tablespoons of olive oil in an oven-safe skillet.
– Add 1/4 cup of finely chopped red onion and 1/2 cup of diced bell pepper. Sauté for 3-4 minutes until soft.
– Now, add 1 cup of chopped spinach and 1/2 cup of halved cherry tomatoes. Stir for 2 minutes until the spinach wilts.
Baking the Frittata
– Pour the egg and milk mixture over the cooked veggies.
– Sprinkle 1/2 cup of crumbled feta cheese on top.
– Cook the frittata on the stove for 2 minutes until the edges set.
– Move the skillet to the oven and bake for 15-20 minutes. Check for a slight jiggle in the center.
– Let the frittata cool for a few minutes before slicing.
This simple recipe makes a delicious meal that anyone can enjoy.
Tips & Tricks
Ensuring the Best Texture
To make a great frittata, you need to whisk the eggs well. This helps create a light texture. Use a large bowl and a whisk. Mix until the eggs and milk are fully blended. Aim for a smooth and airy mixture.
For a fluffy frittata, cook it gently. Start on the stove, then move it to the oven. This helps the frittata rise nicely. Bake it just until the center is firm but slightly jiggly. Letting it rest before slicing helps keep it fluffy.
Serving Suggestions
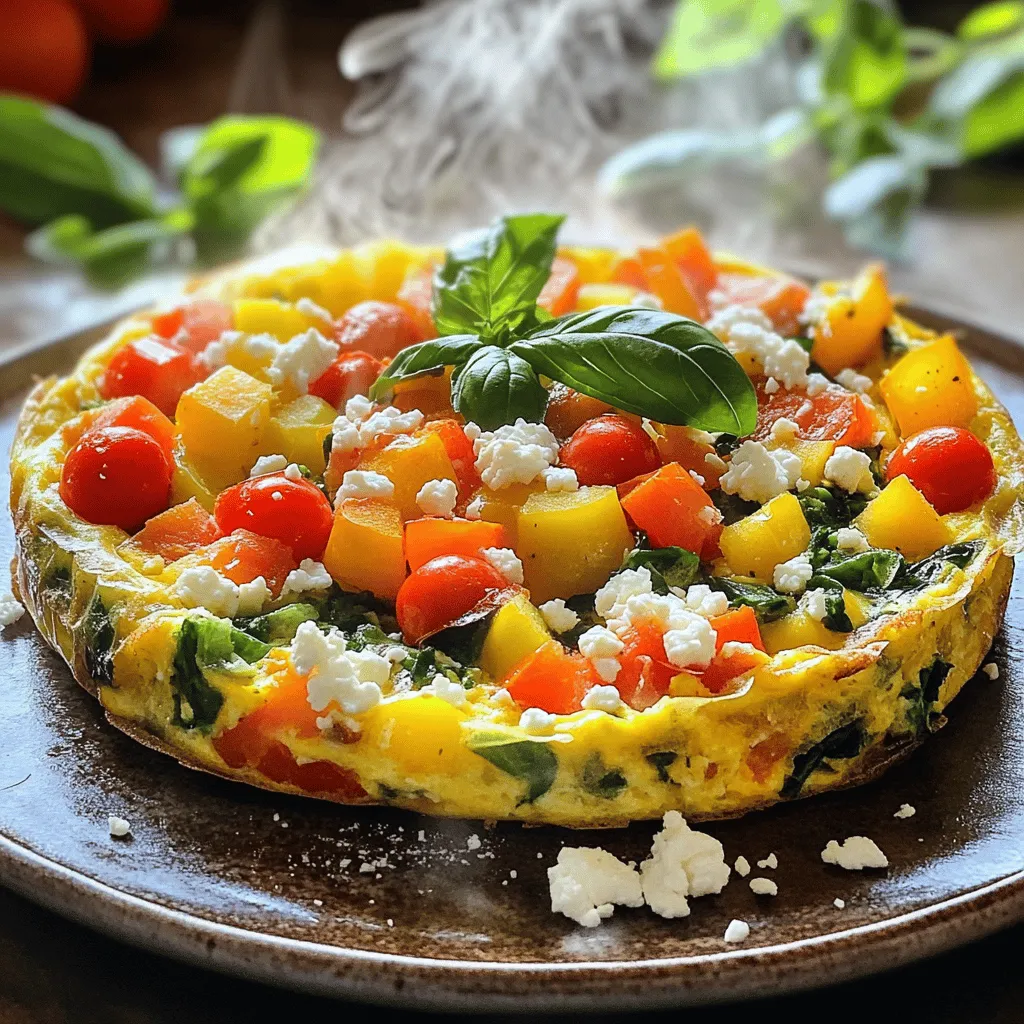
When serving, cut the frittata into wedges. Use a bright plate to make it stand out. You can add fresh herbs or extra cheese on top for a nice touch. Pair the frittata with a light salad. This adds color and freshness to your meal.
Cooking Equipment Recommendations
For the best frittata, use an oven-safe skillet. A cast iron skillet works great. It conducts heat evenly and gives a nice crust. You’ll also need a whisk and a spatula. These tools help with mixing and serving. Keep them handy to make cooking easier.Happy cooking!

Variations
Different Vegetable Combinations
You can use many vegetables in a frittata. Seasonal veggies are a great choice. In spring, try asparagus and peas. In summer, use zucchini and corn. Fall brings squash and kale. In winter, root veggies like carrots and potatoes work well.
If you have leftover veggies, use them! Mix in cooked broccoli, roasted peppers, or sautéed mushrooms. This saves food and adds flavor. Your frittata will always taste fresh and new.
Cheese Options
Cheese can change the flavor of your frittata. Feta adds a tangy taste, while cheddar gives it a sharp flavor. Goat cheese makes it creamy and rich. Each cheese brings a unique twist.
If you prefer plant-based options, try vegan cheese. Many brands offer good taste and texture. Nutritional yeast is another great choice. It adds a cheesy flavor without dairy.
Global Flavors
Adding spices can give your frittata a global touch. For a Mediterranean flair, use herbs like basil and thyme. A sprinkle of paprika or cumin can give it a Mexican twist.
Consider how the flavors match your ingredients. If you use spinach and feta, Mediterranean spices shine. Pair bell peppers and black beans with Mexican spices. This way, you create a frittata that fits your mood and taste.
Storage Info
How to Store Leftovers
To store leftovers, let the frittata cool to room temperature. Then, wrap it in plastic wrap or place it in an airtight container. This keeps the frittata fresh. Make sure to refrigerate it right away. The frittata stays good for up to four days in the fridge.
For reheating, slice a piece and place it on a microwave-safe plate. Heat it in the microwave for about 30 seconds to 1 minute. Check if it’s warm throughout. You can also reheat it in a skillet over low heat for a few minutes. This gives it a nice texture.
Freezing Frittata
If you want to freeze frittata, wait until it cools completely. Then, slice it into wedges. Wrap each piece in plastic wrap, and then place them in a freezer bag. This helps prevent freezer burn. Frittata can last for about three months in the freezer.
To thaw, take a piece out of the freezer and place it in the fridge overnight. You can also microwave it directly from frozen. Just add a minute or two to the cooking time. This way, you enjoy a quick meal anytime.
Serving Temperature
The best serving temperature for frittata is warm, around 150°F (65°C). This temperature enhances the flavors. You can also enjoy it cold as a snack or in a lunchbox. Cold frittata is tasty and easy to eat on the go.
For a fun twist, try serving it with a side salad or fresh herbs. This adds color and flavor to your meal. If you like, experiment with dipping sauces for added taste.
FAQs
What is the difference between a frittata and an omelette?
A frittata and an omelette have key differences. An omelette cooks quickly and is folded. It has a soft texture and usually fills with ingredients. In contrast, a frittata cooks slowly and is baked. It incorporates more ingredients and has a firm texture. You can also serve a frittata in slices, while an omelette is served whole. This makes the frittata great for sharing, while the omelette is perfect for one.
How do I know when my frittata is done baking?
You can tell a frittata is done by its appearance and feel. Look for a puffed-up, golden top. Gently shake the pan; if the center jiggles slightly, it is fine. The edges should be set, and the center firm. You can also insert a knife into the middle. If it comes out clean, your frittata is ready to enjoy! Allow it to cool slightly before slicing for easy serving.
Can I make a frittata in advance?
Yes, you can make a frittata in advance! This is a great meal prep idea. Cook the frittata and let it cool completely. You can store it in an airtight container in the fridge for up to four days. When ready to eat, reheat slices in the oven or microwave. This saves time and makes for a quick meal. You can enjoy it hot or at room temperature as a tasty snack!
We covered how to make a great vegetable frittata with simple steps. You learned about key ingredients, cooking methods, and tips for perfect texture.
Remember, frittatas are flexible. Use fresh or leftover veggies and adjust cheese to your taste. This dish is great for any meal. Enjoy your tasty creations and share your favorites with friends!


![- 4 medium zucchinis - 1 pound ground turkey (or beef) - 1 small onion, finely diced - 2 cloves garlic, minced - 1 tablespoon taco seasoning - 1 can (14 oz) diced tomatoes, drained - 1 cup canned black beans, rinsed and drained - 1 cup corn kernels (fresh or frozen) - 1 cup shredded cheese (cheddar or Mexican blend) - 2 tablespoons olive oil - Fresh cilantro, chopped (for garnish) - Sour cream (optional) - Salt and pepper to taste When picking zucchinis, look for ones that are firm and bright. They should feel heavy for their size. Avoid any that are soft or have blemishes. For measuring, use a scale for the ground meat and a measuring cup for the beans and corn. When chopping onions and garlic, a sharp knife helps avoid tears. This ensures even cooking and great flavor in your dish. This taco stuffed zucchini boats recipe is full of fun and taste. You can find the full recipe above. Enjoy every bite! - Preheat your oven to 375°F (190°C). - Take 4 medium zucchinis and cut them in half lengthwise. Scoop out the seeds carefully. Leave enough flesh for support. - Brush the insides of the zucchini halves with 2 tablespoons of olive oil. Arrange them cut-side up on a baking sheet. - In a large skillet, heat 1 tablespoon of olive oil over medium heat. - Add 1 small onion, finely diced, and sauté until it is soft, about 3-4 minutes. - Next, add 2 minced cloves of garlic. Sauté for another minute until fragrant. - Add 1 pound of ground turkey (or beef) to the skillet. Break the meat apart with a spatula. Cook until it is browned, about 5-7 minutes. - Season with 1 tablespoon taco seasoning, salt, and pepper to taste. - Stir in 1 can of drained diced tomatoes, 1 cup of rinsed black beans, and 1 cup of corn kernels. Cook for another 2-3 minutes until everything is hot. - Remove from heat and fold in half of the 1 cup of shredded cheese until it melts slightly. - Carefully fill each zucchini boat with the taco mixture. Press down gently to pack it in. - Sprinkle the remaining cheese over the top of each stuffed zucchini. - Place the baking sheet in the oven and bake for 20-25 minutes. Check for tenderness and ensure the cheese is melted and golden. - Once cooked, remove from the oven and garnish each zucchini with chopped cilantro. - Serve warm with a dollop of sour cream, if desired. For the full recipe, check the Full Recipe section above. To make your zucchinis tender yet not mushy, follow these tips: - Choose medium zucchinis: They cook evenly and hold their shape well. - Scoop carefully: Leave enough flesh for support, but remove the seeds. - Preheat your oven: A hot oven helps the zucchinis cook just right. For sautéing your filling, use these methods: - Heat your skillet well: This helps to cook onions and garlic faster. - Add oil before ingredients: Olive oil prevents sticking and enhances flavor. - Stir often: This keeps your mixture from burning and ensures even cooking. Garnishing your taco stuffed zucchini boats adds a fresh touch. Here are some ideas: - Chop fresh cilantro: Sprinkle it on top for a pop of color and flavor. - Add a dollop of sour cream: It adds creaminess and balances the spice. Pair your zucchini boats with sides or salads. Some great options include: - Rice or quinoa: These grains add texture and heartiness. - A fresh garden salad: Crisp greens complement the warm, savory boats. For the full recipe, check out the [Full Recipe]. {{image_4}} You can change the meat in this dish easily. Ground chicken works great in place of turkey or beef. It gives a lighter flavor while still being filling. If you want a plant-based option, try using lentils or crumbled tofu. Both can soak up the tasty taco seasoning. You can also swap out the black beans. Try pinto beans or kidney beans for a new twist. They add different textures and flavors that make the dish fun. Adding spices can really change the taste. Try cumin or smoked paprika for an extra kick. You could also mix in some chili powder if you like it hot. Each spice brings its own personality to your zucchini boats. Cheese is another place to get creative. Instead of cheddar, use pepper jack for a spicy twist. Or, try a mix of different cheeses for depth. Condiments can also change the game. Consider adding salsa or guacamole on top. These add fresh flavors and make every bite exciting. You can find the full recipe for Taco Stuffed Zucchini Boats to explore all these variations! Store leftover zucchini boats in an airtight container. Use parchment paper to separate layers if stacking. This keeps them fresh for up to three days. Make sure to cool them down before sealing to avoid moisture buildup. To maximize freshness, place them in the fridge as soon as they cool. Reheat zucchini boats in the oven for the best results. Set your oven to 350°F (175°C) and bake for about 10-15 minutes. This method warms them evenly and keeps the texture nice. If you want a quicker option, use the microwave. Heat them for 1-2 minutes, but watch for sogginess. To avoid this, place a paper towel under the zucchini boats while reheating. This helps absorb extra moisture. For detailed cooking steps, check the Full Recipe. Enjoy your tasty leftovers! To make taco stuffed zucchini boats healthier, use low-fat ground turkey instead of beef. You can also choose low-fat cheese or skip it entirely for a lighter option. Adding more veggies boosts the nutrition. Consider mixing in diced bell peppers, spinach, or mushrooms. You can also serve them with a side salad for extra greens. This way, you enjoy a tasty dish while keeping it nutritious! Yes, you can freeze taco stuffed zucchini boats! Start by letting them cool completely. Wrap each boat in plastic wrap or foil. Place them in a freezer bag to save space. They can stay in the freezer for up to three months. When you’re ready to eat, let them thaw overnight in the fridge. Then, heat them in the oven until warm. Taco stuffed zucchini boats pair well with rice or quinoa. You can also serve them with tortilla chips and salsa for a fun crunch. For gatherings, consider adding some guacamole as a dip. Fresh fruit like watermelon or mango is a great side too. These options make your meal more exciting and flavorful! Taco stuffed zucchini boats offer a fun and tasty twist on dinner. You learned how to prepare fresh ingredients, cook a hearty filling, and assemble a dish that's sure to please. Remember, you can mix and match proteins and spices to fit your taste. Storing and reheating tips will help you enjoy leftovers without losing flavor. Dive into this dish for a healthy meal that’s easy to make and customize. Enjoy experimenting and sharing your tasty creations!](https://joymealplan.com/wp-content/uploads/2025/07/a6f85fbf-686b-42b4-a399-5784f990ec67-768x768.webp)


. To get the best texture, use day-old rice. Fresh rice has too much moisture. When you use day-old rice, it dries out and forms separate grains. This helps create that perfect fried rice texture. You can also spread fresh rice on a tray and chill it for an hour to dry before cooking. Prepare your ingredients ahead of time. Chop the chicken and vegetables before you start cooking. This makes cooking faster and easier. You can also use frozen mixed vegetables to save time. They cook quickly and add color to your dish. Don’t overcrowd the pan. If you add too much rice or chicken at once, it will steam instead of fry. This makes your fried rice soggy. Also, avoid cooking on too low of heat. High heat helps to sear the ingredients and gives that nice flavor. Lastly, don’t forget to taste your dish before serving! Adjust the salt and soy sauce as needed to enhance the flavors. {{image_4}} You can easily make fried rice without meat. Just swap the chicken with tofu or tempeh. Use the same amount, diced small. For a vegan twist, replace the eggs with silken tofu. This creates a soft texture that works well. You can also add more veggies, like bell peppers or zucchini. They add great flavor and color. If you want to change things up, try shrimp or beef. Cook them in the same way as the chicken. You can also use leftover cooked meats. Just chop them small and add them at the end. Don’t forget to add your favorite veggies. Broccoli, snap peas, or mushrooms will bring new tastes. If you like heat, add chili paste or sriracha to your dish. Just a spoonful will spice things up. You can also mix in fresh chilies when you sauté the garlic. If you want a milder heat, try crushed red pepper flakes. They add flavor without being too hot. Enjoy experimenting with these spicy options! To store leftover chicken fried rice, let it cool first. Place it in an airtight container. Make sure the lid fits tightly to keep air out. This helps it stay fresh. Store it in the fridge for up to three days. You can also place a piece of plastic wrap over the rice before sealing the container. This extra layer helps keep moisture in. If you want to keep it longer, freezing is a great option. Divide the chicken fried rice into smaller portions. Use freezer-safe bags or containers for this. Remove as much air as you can to prevent freezer burn. Label the bags with the date. Chicken fried rice can last in the freezer for up to three months. When you are ready to eat, just thaw it in the fridge overnight. To reheat chicken fried rice, use a skillet for the best taste. Heat a little oil in the pan over medium heat. Add the rice and stir it often. This helps it heat evenly. It should take about 5-7 minutes. You can also use a microwave if you are in a hurry. Place the rice in a microwave-safe bowl. Add a splash of water to keep it moist. Cover with a lid or wrap. Heat for 2-3 minutes, stopping to stir halfway. Enjoy your meal, and don't forget to check out the Full Recipe for more delicious tips! Yes, you can make fried rice without eggs. Just skip the eggs in the recipe. Use more veggies or tofu instead. This keeps the dish tasty and filling without the eggs. Jasmine rice is the best choice for fried rice. It's soft yet slightly sticky. Day-old rice works best because it’s drier. Fresh rice may get mushy when cooked. You can store chicken fried rice in the fridge for up to three days. Make sure to keep it in an airtight container. This helps keep it fresh and safe to eat. Yes, you can use cooked or leftover chicken. This saves time and adds flavor. Just chop it into bite-sized pieces before mixing it into your fried rice. You can add soy sauce, oyster sauce, or teriyaki sauce. Each sauce adds a unique taste. Try adding a splash of sesame oil for a nutty flavor. Adjust the amount to your liking for the best results. For the full recipe, check out the details above. In this post, we've explored the key ingredients and steps for Easy Chicken Fried Rice. I shared tips to enhance texture, save time, and avoid common mistakes. We discussed fun variations and how to store your dish effectively. Remember, this dish is simple and can easily fit your tastes. Customize it the way you like. With these tips, you can create a tasty meal while enjoying your cooking journey. Now, get started and make your own fried rice masterpiece!](https://joymealplan.com/wp-content/uploads/2025/06/b80d90ba-a0f5-4453-8c89-c3fa48509676-768x768.webp)

