Viral Feta Egg Toast Simple and Delicious Recipe

If you’re searching for a simple yet delicious breakfast, look no further! The Viral Feta Egg Toast is a must-try. This trendy dish combines creamy feta, perfectly cooked eggs, and toasty bread into a delightful meal. With just a few basic ingredients and straightforward steps, you’ll impress your taste buds in no time. Dive into this easy recipe and learn how to create this popular brunch sensation right at home!
Ingredients
Main Ingredients
– Feta cheese, crumbled
– Large eggs
– Olive oil
Additional Ingredients
– Red pepper flakes
– Fresh herbs (dill or parsley)
– Bread options (sourdough or multigrain)
Optional Ingredients
– Salt and black pepper
– Cherry tomatoes for garnish
To make your Viral Feta Egg Toast, you need some key items. Feta cheese is the star of this dish. Use crumbled feta for easy mixing. Large eggs add protein and flavor. Olive oil gives a nice richness and helps with cooking.
For the extra kick, red pepper flakes bring spice. Fresh herbs like dill or parsley add freshness. Choose your bread wisely. Sourdough or multigrain works best for crunch and taste.
If you want, season with salt and black pepper. Cherry tomatoes make a lovely garnish. They add color and a fresh taste.
Step-by-Step Instructions
Preheating the Oven
Set your oven to 400°F (200°C). This high heat will toast the bread well. Preheating is key for even cooking.
Mixing the Feta Topping
In a small bowl, combine the crumbled feta, one tablespoon of olive oil, red pepper flakes, and herbs. Use a fork to mix until creamy. You want it smooth but still a bit chunky. This texture adds flavor and richness.
Preparing the Bread
Take your favorite bread, like sourdough or multigrain. Spread the feta mixture evenly over each slice. Make sure to cover every part. This step helps the flavors soak into the bread.
Baking the Toast
Place the baking sheet with the bread in the oven. Bake for about 10-12 minutes. Look for golden brown edges and a slightly melted topping. This means your toast is ready.
Cooking the Eggs
While the toast bakes, heat the remaining tablespoon of olive oil in a non-stick skillet. Crack the eggs into the skillet. Cook them until the whites are firm but the yolks stay runny, about 4-5 minutes. Covering the skillet can speed up cooking.
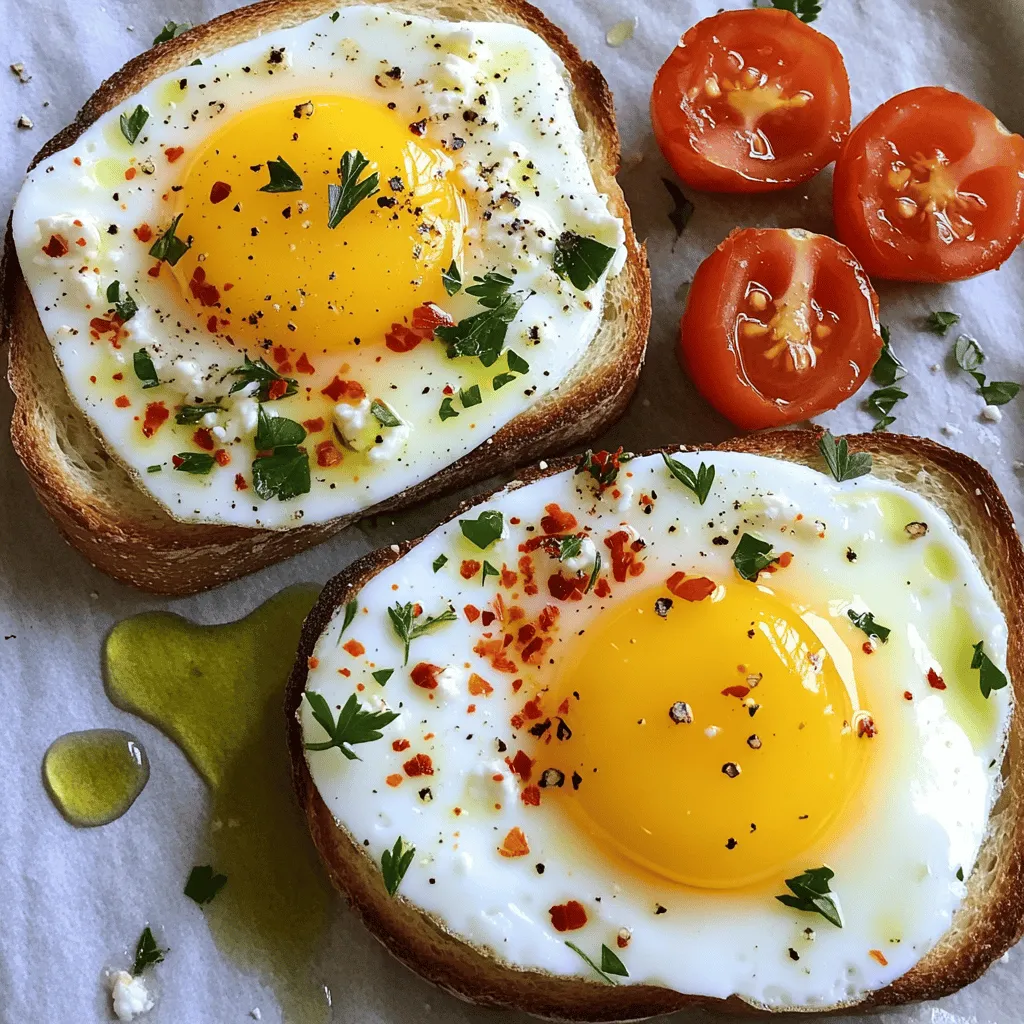
Assembling and Serving
Once your toast is done, take it out of the oven carefully. Place a cooked egg on each slice. Season with salt and black pepper to taste. For a fresh touch, add halved cherry tomatoes on top. Serve hot for the best flavor.Enjoy this tasty dish!
Tips & Tricks
Ensuring Perfect Texture
To get creamy feta, don’t over-mix. Start with crumbled feta in a bowl. Add olive oil and mix gently with a fork. Aim for a smooth texture, but keep some lumps. This gives your topping character and flavor.
Egg Cooking Techniques
For perfectly runny yolks, use medium heat. Heat your skillet and add olive oil. Crack the eggs in gently. Cover the skillet to help the whites cook. Check them after 4-5 minutes. The yolks should remain soft and glossy.
Presentation Suggestions
Make your toast look lovely with garnishes. Use fresh herbs like dill or parsley. A sprinkle on top adds color and flavor. You can also add halved cherry tomatoes for a pop of red. Serve on a colorful plate for extra appeal.

Variations
Different Cheese Options
You can change the cheese for more fun. Goat cheese adds a tangy flavor. Ricotta gives a creamy texture. Both options work well on the toast. Try them to mix things up!
Adding Vegetables
Adding veggies makes this dish even better. Spinach is a great choice. It cooks fast and adds color. You can also use avocado for a creamy bite. Just slice it and place it on top of the egg. These greens boost flavor and nutrition.
Flavor Enhancements
Don’t be afraid to experiment! You can try different spices like garlic powder or cumin. A drizzle of hot sauce can add a kick. Mix in fresh herbs like basil or chives for extra zest. These simple tweaks keep the dish exciting and fresh.
Storage Info
Storing Leftovers
To keep your Viral Feta Egg Toast fresh, store leftovers in an airtight container. Place the toast in the fridge if you don’t eat it right away. Avoid stacking the toast, as this can make the bread soggy. If you have extra feta topping, keep it in a separate container. It will stay fresh longer this way.
Reheating Guidelines
When you’re ready to enjoy your leftovers, reheat them in the oven. Preheat the oven to 350°F (175°C). Place the toast on a baking sheet and warm it for about 5-7 minutes. This method helps maintain the crispiness of the bread. You can also use a toaster oven if you prefer. Avoid the microwave, as it can make the bread chewy.
Shelf Life
Stored correctly, your Feta Egg Toast will last about 2-3 days in the fridge. The feta topping can stay fresh for up to a week. However, the taste is best when enjoyed fresh. If you want to prepare in advance, consider making the feta mixture and storing it separately. This way, you can assemble your toast quickly later.
FAQs
Can I make this recipe vegan?
Yes, you can easily make this recipe vegan. Instead of feta cheese, use a plant-based feta or almond cheese. For eggs, try tofu or chickpea flour scrambled with turmeric. Use olive oil as usual. This way, you keep the creamy texture and tasty flavors.
What can I use instead of feta?
If you don’t have feta, try goat cheese or ricotta. Cream cheese is another option, though it will change the texture. Each cheese will give a different twist to your toast, so feel free to experiment.
How do I prevent the bread from getting soggy?
To keep the bread crisp, use thick slices. Toast the bread first before adding the feta mix. Bake it until the edges are golden. Avoid overloading the topping. This way, the bread stays nice and crunchy.
Can I make this recipe in advance?
You can prep some parts ahead. Mix the feta and store it in the fridge. You can also slice the bread and keep it fresh. Just cook the eggs right before serving for the best taste. This will help you enjoy your toast without a lot of fuss.
This blog post shared a simple and tasty way to make feta toast with eggs. We covered the main and optional ingredients, step-by-step instructions, and helpful tips for perfect results. Plus, we explored tasty variations and storage tips.
Enjoy making this dish that can please everyone. Experiment with flavors and enjoy your time in the kitchen!


![- 8 lasagna noodles - 2 cups cooked chicken, shredded - 1 cup ricotta cheese - 2 cups mozzarella cheese, shredded (divided) - 1 cup grated Parmesan cheese - 2 cups Alfredo sauce (store-bought or homemade) - 1 teaspoon garlic powder - 1 teaspoon Italian seasoning - Salt and pepper to taste - Fresh parsley, chopped (for garnish) Gathering these ingredients is the first step. Start with lasagna noodles. They are the base for your roll-ups. Make sure to have cooked chicken ready. Shredded chicken works best. You can use leftover chicken or cook some fresh. Ricotta cheese adds creaminess. Mozzarella cheese gives a nice stretch when melted. Parmesan cheese adds a sharp flavor. Alfredo sauce is key for richness. You can buy it or make your own. Garlic powder and Italian seasoning bring extra taste. Don't forget salt and pepper to enhance all the flavors. Fresh parsley adds a pop of color. It also freshens the dish. With all your ingredients lined up, you’re set to create a delicious meal. For the full recipe, check the details above. - Preheat oven to 375°F (190°C). - Grease a 9x13 inch baking dish with cooking spray or butter. This helps prevent sticking. - Boil a large pot of water. Add salt for flavor. - Cook lasagna noodles until al dente, usually about 8-10 minutes. - Drain the noodles carefully in a colander. Lay them flat on a clean kitchen towel. This helps them dry slightly and prevents sticking. - In a mixing bowl, combine: - 2 cups cooked chicken, shredded - 1 cup ricotta cheese - 1 cup mozzarella cheese, shredded - 1 teaspoon garlic powder - 1 teaspoon Italian seasoning - Salt and pepper to taste - Stir the mixture well until everything is blended. Aim for a smooth filling with no lumps. - Spread a thin layer of Alfredo sauce on the bottom of the greased dish. - For each lasagna noodle, take 2-3 tablespoons of the filling. Spread it evenly along the noodle's length. - Roll the noodle up tightly from one end to the other, keeping the filling inside. Place the roll seam-side down in the dish. Repeat with all noodles. - Pour the remaining Alfredo sauce evenly over the roll-ups. - Sprinkle the remaining mozzarella and Parmesan cheese on top. - Cover the dish tightly with foil and bake for 25 minutes. - After 25 minutes, remove the foil and bake for another 15 minutes. This helps the cheese bubble and turn golden. - Let the dish cool for a few minutes before slicing. Garnish with fresh parsley before serving. For the complete recipe, check the full recipe section! If you want to switch things up, you can replace ricotta cheese with cottage cheese or cream cheese. Both options still give a creamy taste. For mozzarella, try using provolone or gouda. Both melt well and add great flavor. When it comes to Alfredo sauce, you can use store-bought for speed. If you prefer homemade, blend butter, cream, and parmesan for a rich taste. Homemade sauce can be thicker and creamier, which enhances your roll ups. To get the perfect noodle texture, boil them until just al dente. This keeps them sturdy enough to roll without tearing. After cooking, place the noodles on a clean kitchen towel to absorb excess water. For cheese melting and browning, use full-fat cheese. It melts beautifully and creates a golden crust. Keep the dish covered with foil for the first part of baking. Remove the foil later to allow the cheese to brown nicely. Pair your roll ups with a fresh salad or garlic bread. A light Caesar salad adds a crisp contrast to the creamy dish. Garlic bread complements the flavors and adds a warm touch. For garnishing, sprinkle fresh parsley on top just before serving. You can also drizzle extra Alfredo sauce over the roll ups for a tasty finish. This adds color and makes your dish look fancy. For the full recipe, check out [Full Recipe]. {{image_4}} You can boost your roll-ups by adding veggies. Spinach and mushrooms work well here. Just sauté them first to soften. Mix these veggies into your filling for extra flavor and nutrition. This makes the dish colorful and adds a nice crunch. While Alfredo is rich and creamy, you can switch it up. Try using marinara sauce for a tangy twist. Pesto can also bring a fresh, herby taste. Each sauce gives your roll-ups a new life. Feel free to experiment and find your favorite! For those with dietary needs, there are options. Use gluten-free lasagna noodles to keep it safe. For a dairy-free choice, look for dairy-free cheese. Many brands offer great flavors that melt well. These swaps let everyone enjoy this delicious meal! For the complete recipe, check out the Full Recipe section. After enjoying your Chicken Alfredo Lasagna Roll Ups, let them cool down. Place them in an airtight container. Make sure to cover them well. This keeps them fresh and tasty in the fridge. You can store leftovers for up to three days. When you are ready to eat again, reheat them in the oven. Set it to 350°F (175°C). Cover the dish with foil to avoid drying out. Heat for about 20 minutes. If you prefer the microwave, heat in short bursts. Check every minute until hot. To freeze your roll ups, follow these steps: 1. Cool Completely: Let them cool in the fridge first. 2. Wrap Well: Use plastic wrap to cover each roll up tightly. 3. Use a Freezer Bag: Place wrapped roll ups in a freezer bag. Remove as much air as you can. 4. Label and Date: Write the date on the bag for easy tracking. You can freeze these roll ups for up to three months. When you want to eat, move them to the fridge overnight to thaw. After thawing, reheat as mentioned above. In the fridge, your Chicken Alfredo Lasagna Roll Ups last three days. If you freeze them, they stay good for three months. Always check for any signs of spoilage before enjoying them again. Storing them properly helps keep their flavors intact and delicious. For the full recipe, check out the details provided earlier. Yes, you can make Chicken Alfredo Lasagna Roll Ups ahead of time. Prepare them up to the baking step. Cover the dish and store it in the fridge for up to 24 hours. When ready to bake, add a few extra minutes to the cooking time. This makes meal prep easy. To make this recipe vegetarian, swap the chicken for sautéed vegetables. Good choices include mushrooms, spinach, or zucchini. Use the same filling method with ricotta and mozzarella. This keeps the creamy texture and flavor you love. Serve Chicken Alfredo Lasagna Roll Ups with a fresh salad. A Caesar or mixed greens salad pairs nicely. Garlic bread or crusty rolls also complement this dish. You can add a light soup for a complete meal. If your Alfredo sauce is runny, try adding more cheese. Grated Parmesan or mozzarella works well. You can also simmer the sauce on low heat. This helps it thicken. Use cornstarch mixed with water as a last resort to thicken it. Absolutely! You can use cooked turkey or ham instead of chicken. Shredded beef or pork also works well. Just ensure the meat is tender and flavorful, as this adds depth to your roll-ups. You can create a delicious Chicken Alfredo Lasagna Roll Ups meal. This recipe included key ingredients, clear steps, and useful tips. It’s easy to customize, whether for dietary needs or personal taste. You can serve them with sides to make it a feast. Don’t forget about storing leftovers properly for quick meals. Enjoy making these tasty roll ups. You’ll impress your guests and family with their creamy flavor and cheesy goodness. These roll ups make cooking fun and simple.](https://joymealplan.com/wp-content/uploads/2025/06/3bb75aa4-aa5d-45cb-bb96-cf9b565c5d71-768x768.webp)


